If you’re anything like me, you’ve probably found yourself in a situation where you have an extra partition taking up space on your hard drive and you want to get rid of it. Whether you’re cleaning up your system or making space for a new project, deleting a partition is a pretty straightforward task – but, as with anything in Windows, it can get a little tricky. That’s why I want to share my experience and show you how to delete a partition in Windows 10 or 11, using a tool that I found super easy to use: Dr.Partition.
Let’s dive right into it!
My Experience with Dr.Partition
I’ve used Dr.Partition for a while now, and let me tell you—it’s a game-changer for managing partitions on both Windows 10 and 11. I was able to delete a partition safely without any hiccups, and it made the whole process so much simpler than using Windows’ built-in Disk Management. Dr.Partition gives you an intuitive interface and even handles some behind-the-scenes magic to make sure nothing gets messed up.
Steps to Delete a Partition in Windows 11 or Windows 10
Step 1: Download and Install Dr.Partition
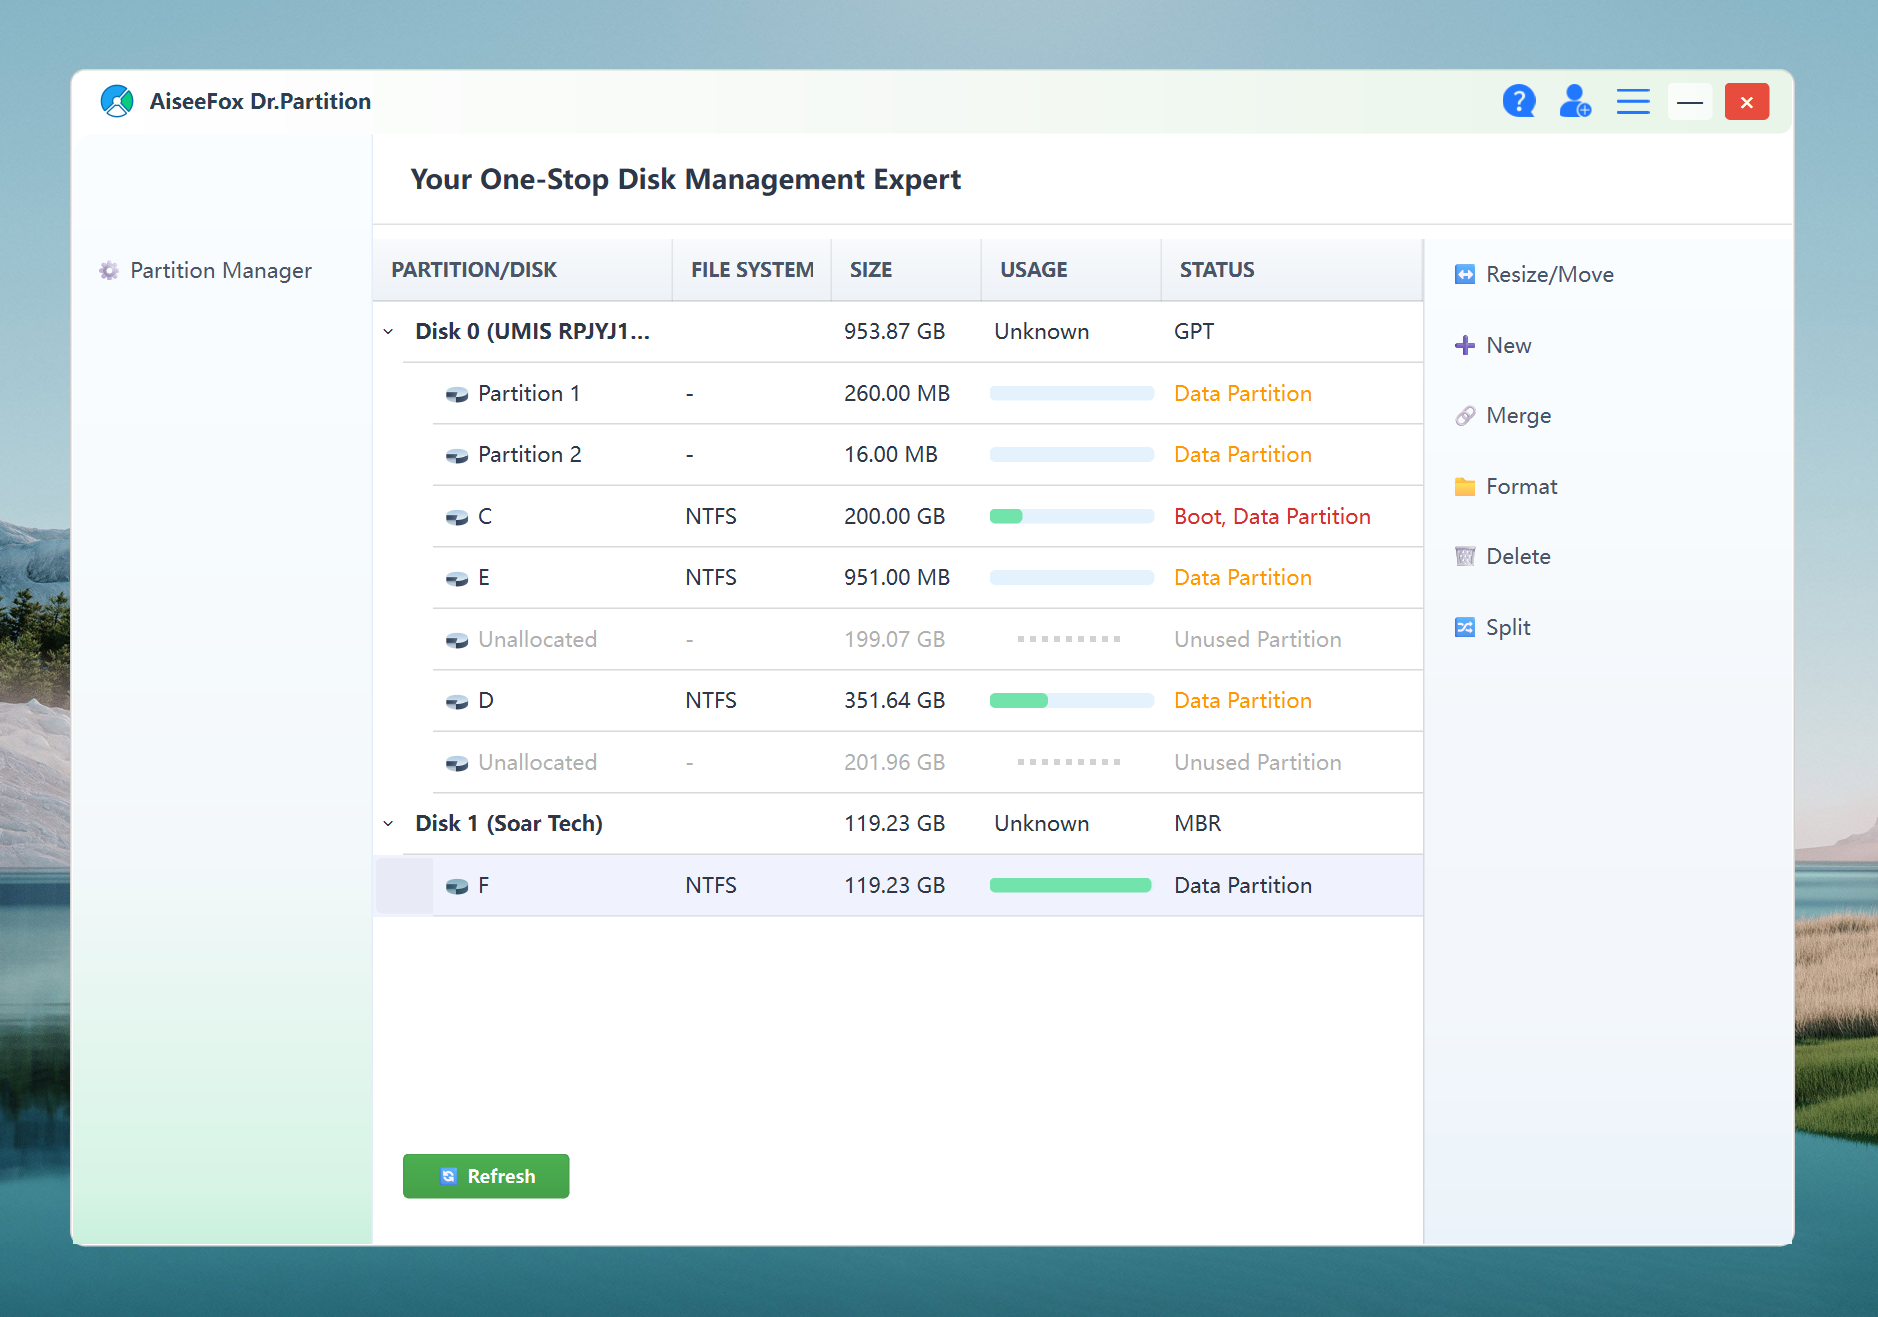
First things first, head over to the Dr.Partition website and download the software. It’s lightweight and doesn’t take much to install. Once installed, open the program and you should see a list of all the drives and partitions on your system.

Step 2: Select the Partition to Delete
In Dr.Partition’s interface, all your partitions are neatly listed. Find the partition you want to delete. Be super careful here because once you delete the partition, all data on it will be gone—unless you’ve backed it up. I always double-check to ensure I’m selecting the right one!
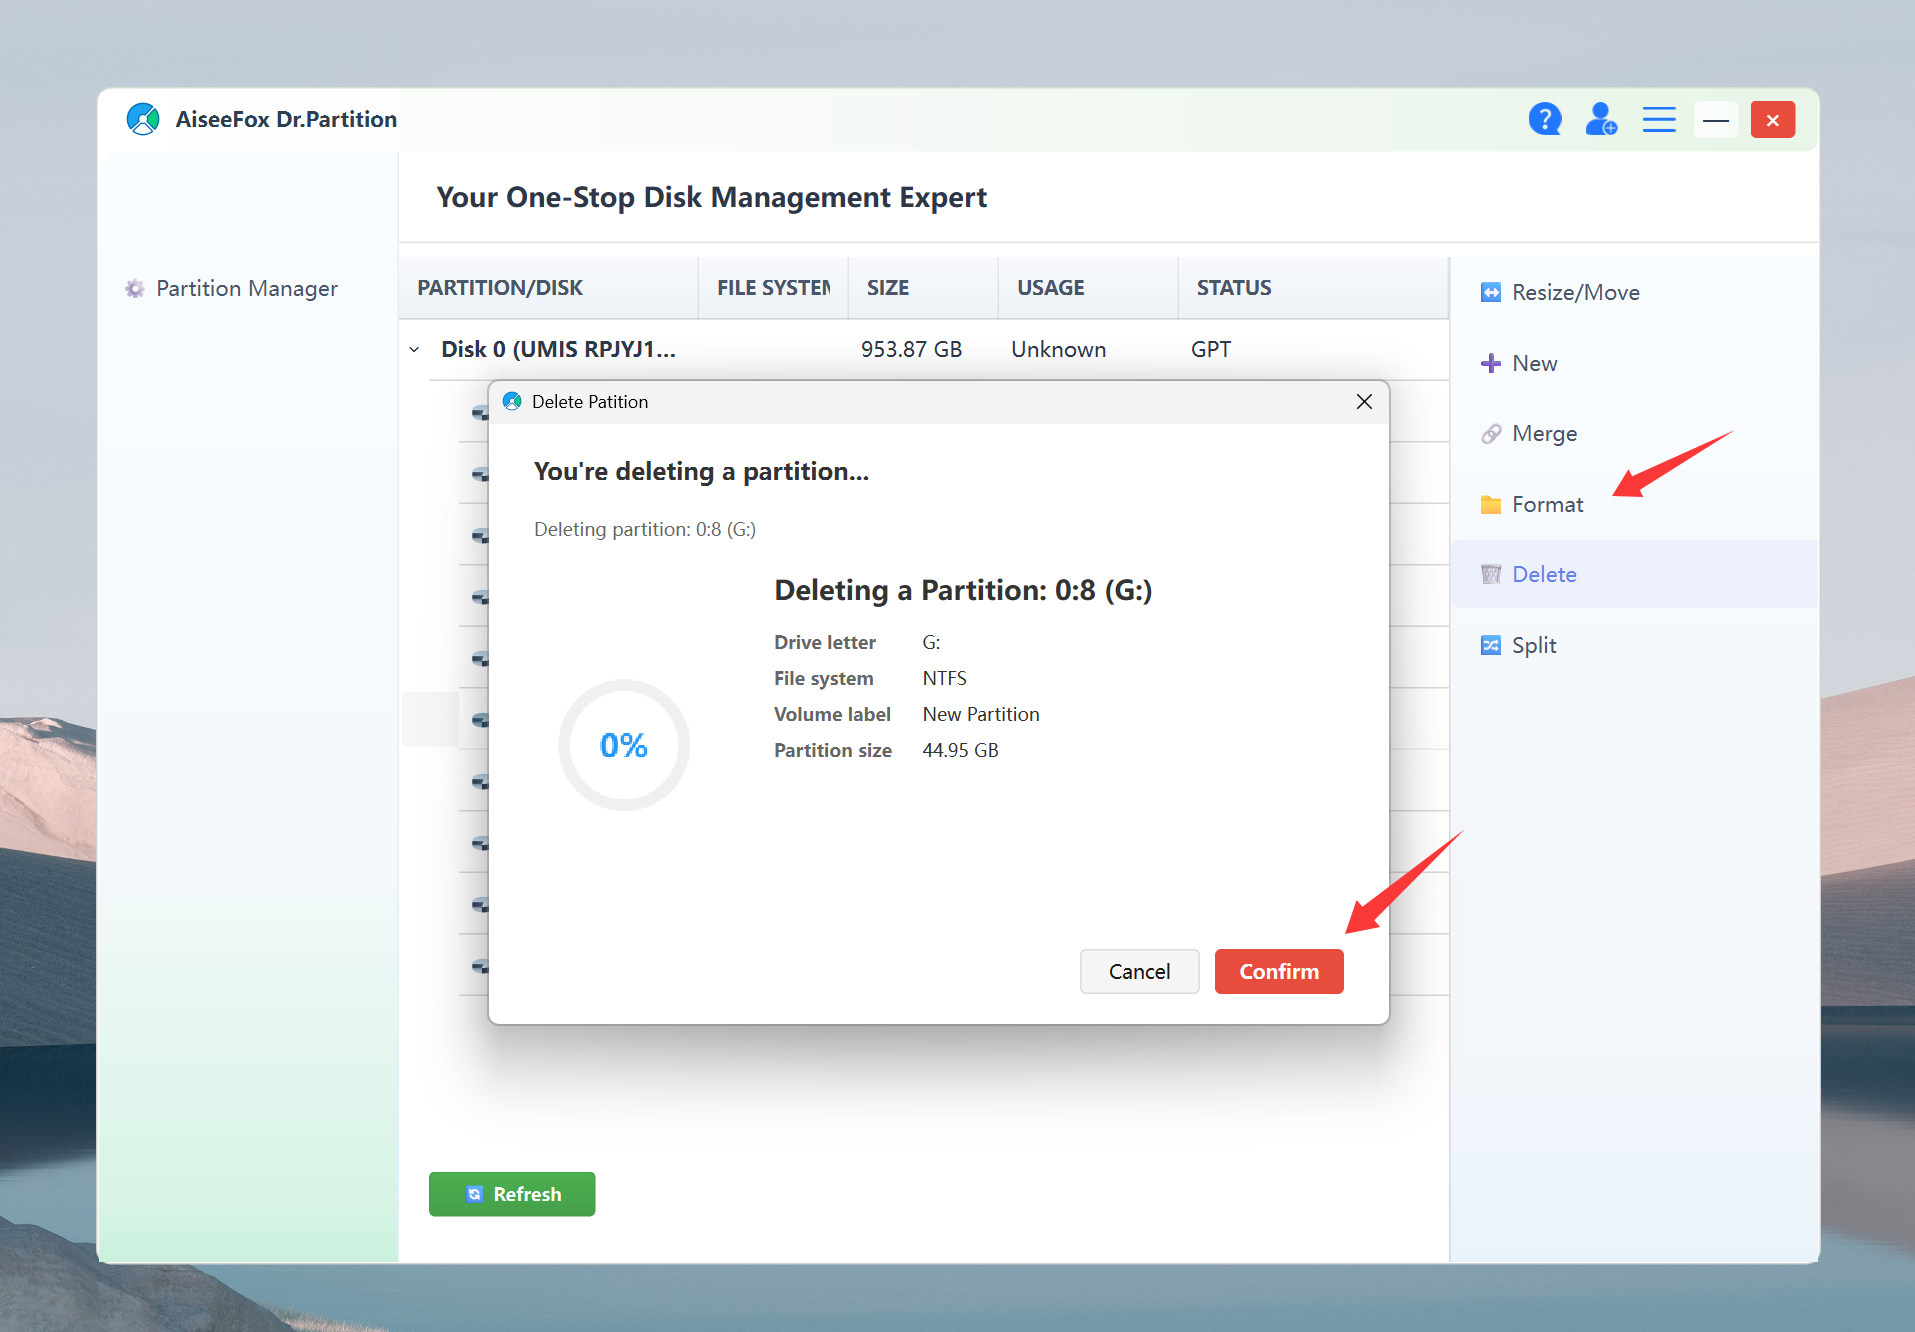
Step 3: Delete the Partition
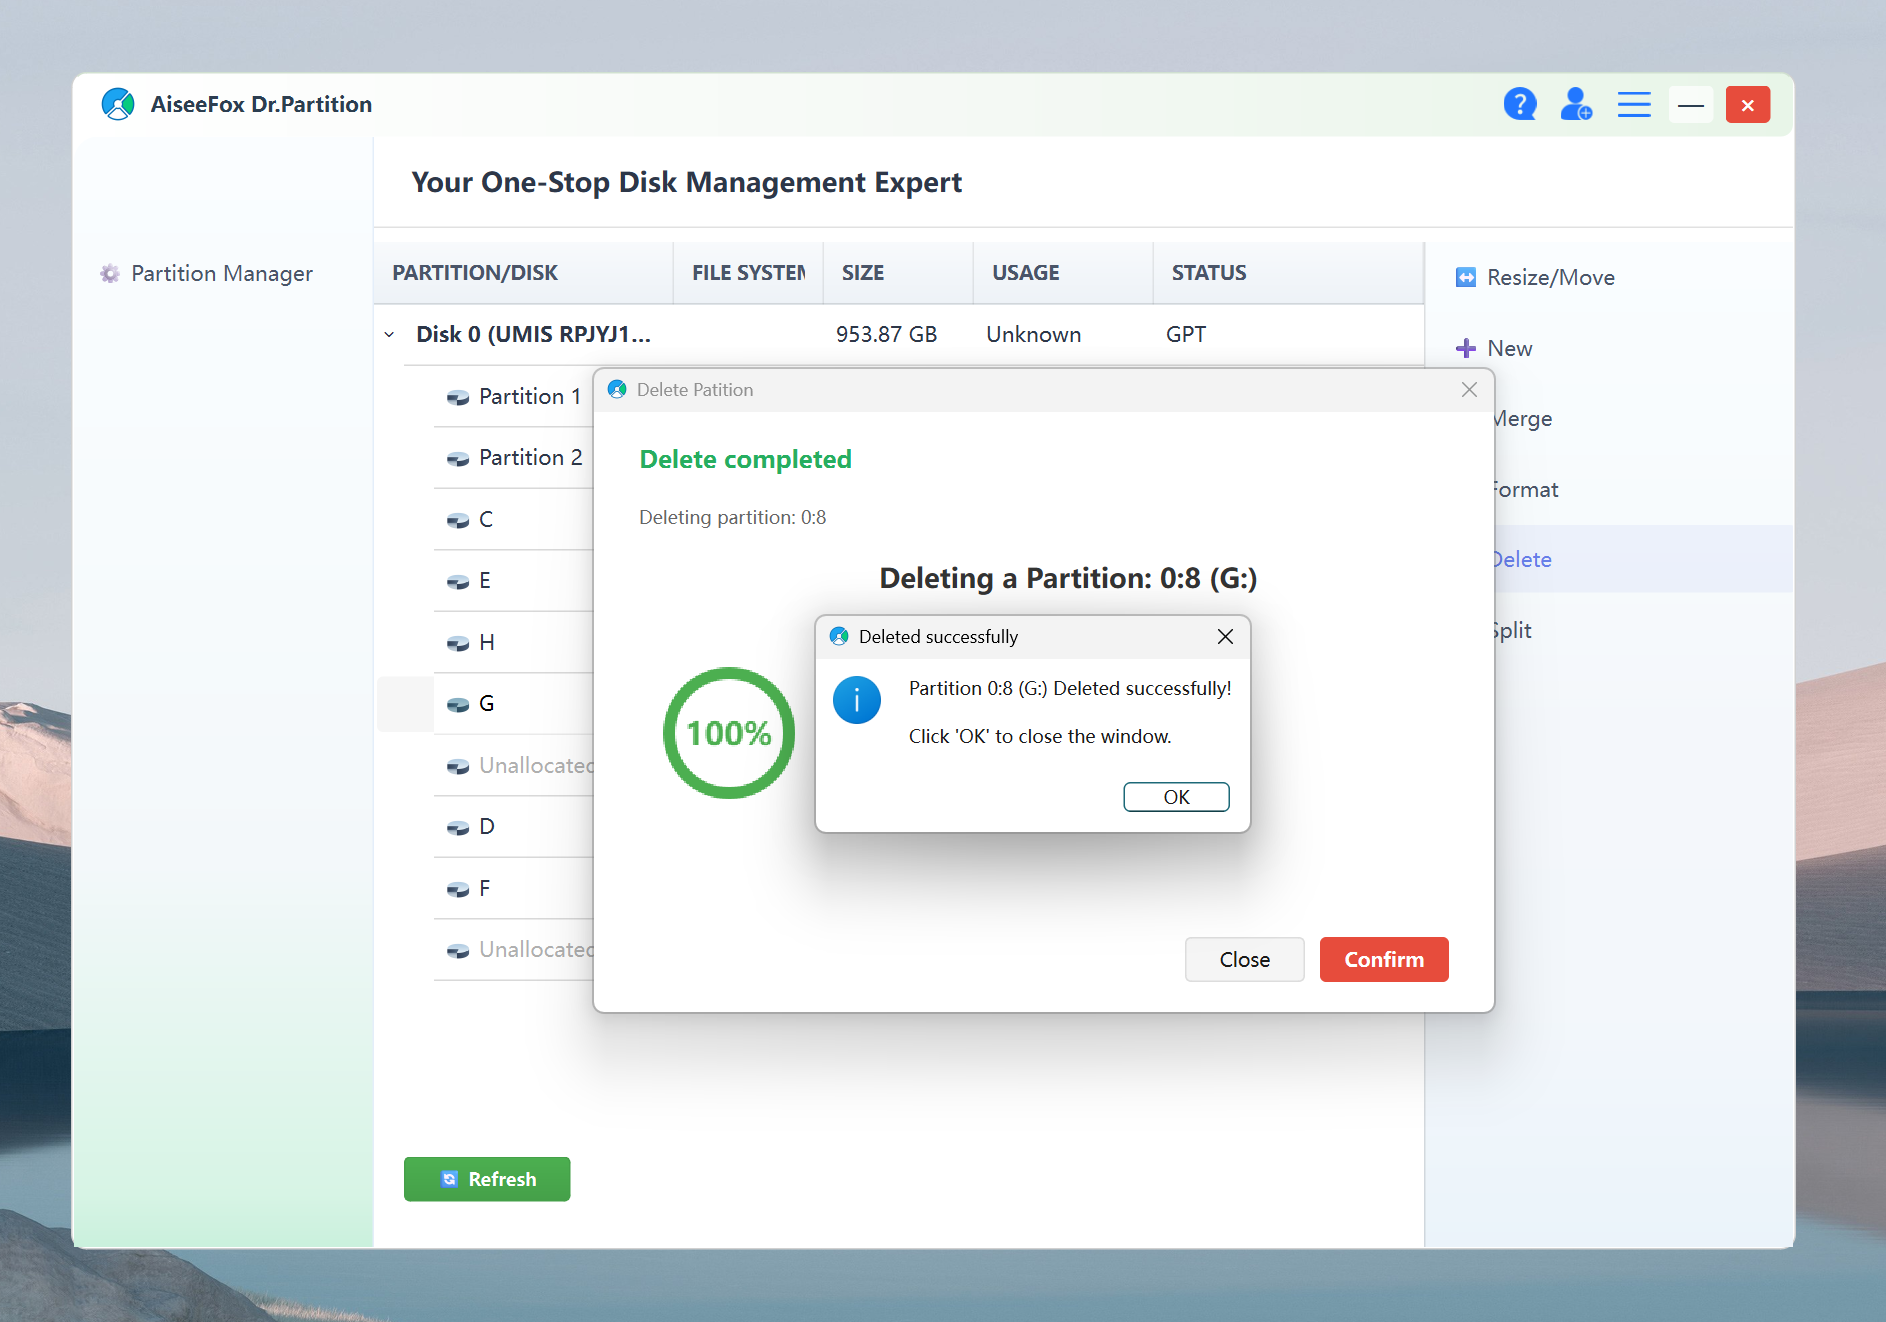
Once you’ve selected the partition, you’ll notice a “Delete Partition” option (or something similar) in the toolbar. Click it. Dr.Partition will ask you to confirm, just in case you’re sure. After confirming, the partition is deleted, and the space will show as “unallocated.”
Now, Dr.Partition starts to delete the partition you selected.
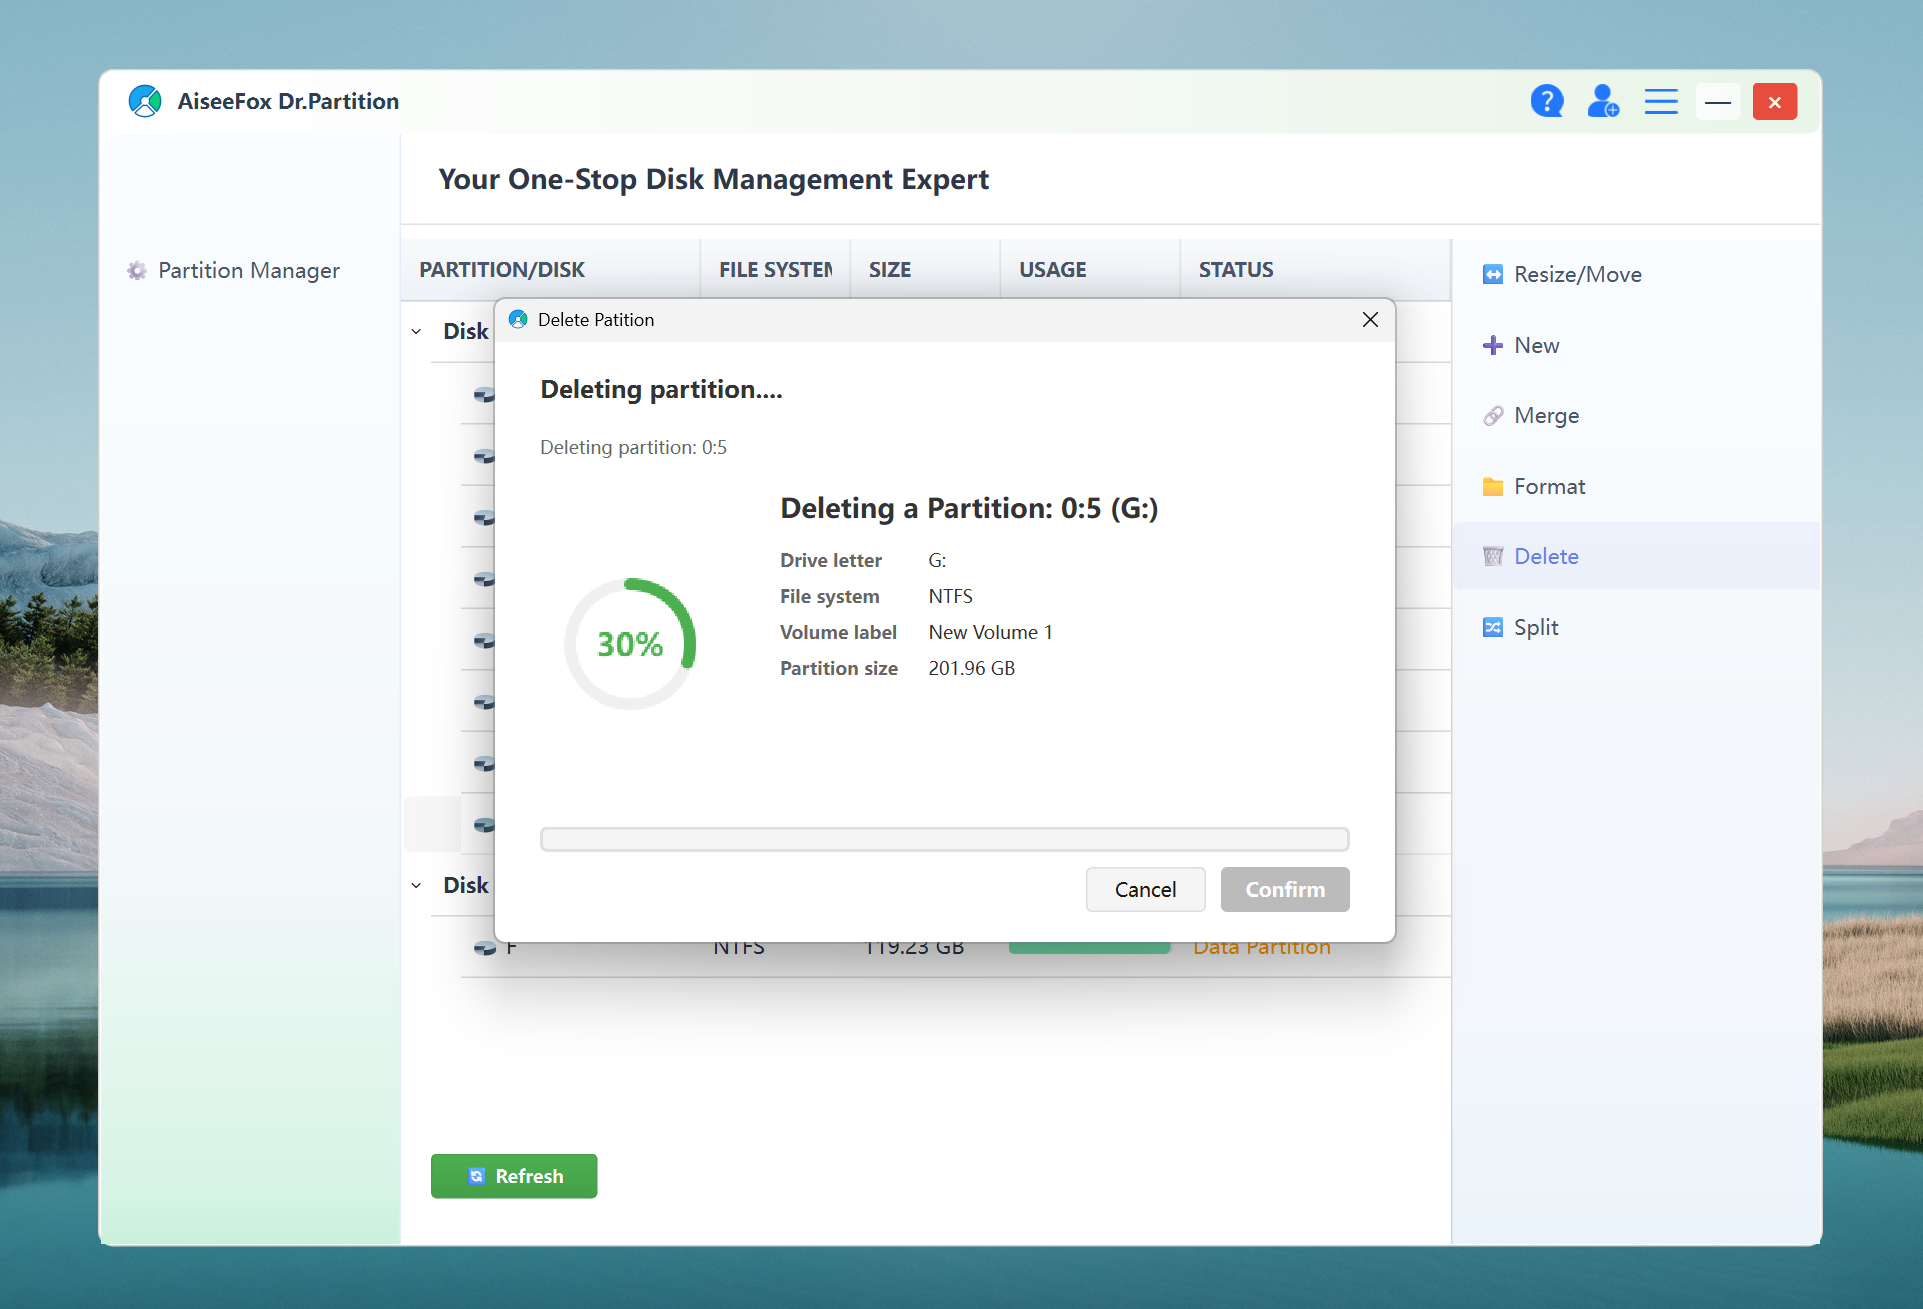
Deleting partitions is very fast and can be successfully deleted in just a few seconds!
Step 4: Reclaim the Space
Now that the partition is gone, you can either leave the space unallocated or extend an adjacent partition into it. If you want to merge it with an existing partition, you can easily do this using Dr.Partition’s “Resize” or “Merge” features. In my case, I used it to merge with a neighboring partition to free up a ton of space.
Why I Recommend Dr.Partition
I’ve been through my fair share of partition managers, but Dr.Partition stands out for a few reasons:
-
Simplicity: You don’t need to be a tech expert to figure it out. The interface is intuitive and guides you through each step.
-
Safety: The tool helps prevent mistakes and even shows you a preview of what will happen before making any changes.
-
No Data Loss: It handles the process without putting your data at risk, which is the most important part, right?
Conclusion
In the end, deleting a partition doesn’t have to be complicated. Thanks to Dr.Partition, the whole process was smooth, quick, and worry-free. If you’re looking to reclaim space or clean up your system, I highly recommend giving it a shot. It saved me time and headaches, and it could do the same for you.
So, that’s my experience! Let me know how it goes if you decide to try Dr.Partition or if you’ve got any other partition tips to share. Happy partitioning!