Okay, let’s be real — editing photos one by one is painful. I used to open every image in Photoshop, fix lighting, clean up the background, upscale it a bit, and by the time I was done, my coffee had gone cold. Then I found VisioMint, an AI-powered image editor that actually saved me hours of my life.
I’ll walk you through how I batch edit my photos with it — nothing fancy, just how I really use it.
🧠 Why I started using VisioMint
I run a small online shop and take product photos every week. Most of them look fine, but some are too dark, or the background is a mess. I wanted a tool that could:
- Fix lighting and sharpness automatically
- Remove the background without leaving weird edges
- Handle multiple photos at once (because who’s got time to edit 50 images manually?)
I tried a few online editors, but most were slow or added watermarks unless you paid extra. VisioMint just… worked.
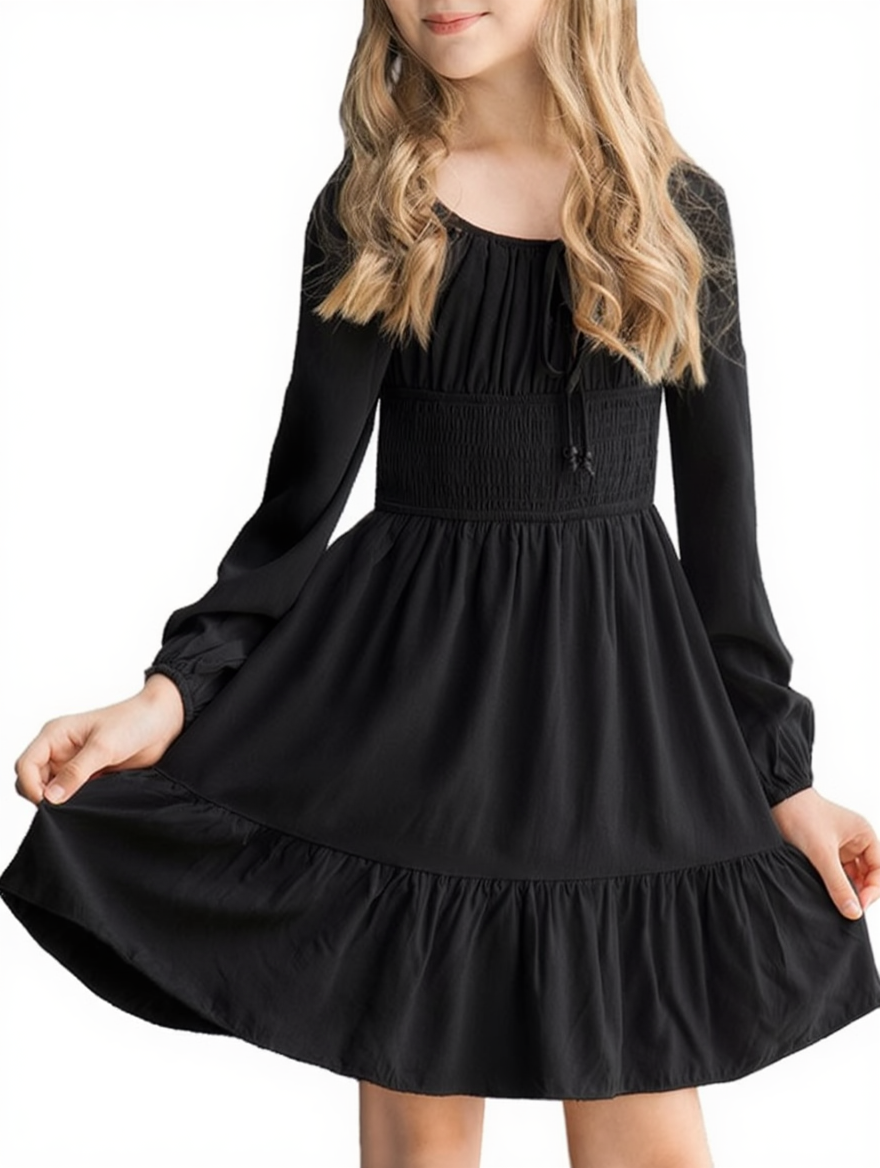
1. Changing Clothes for the Model
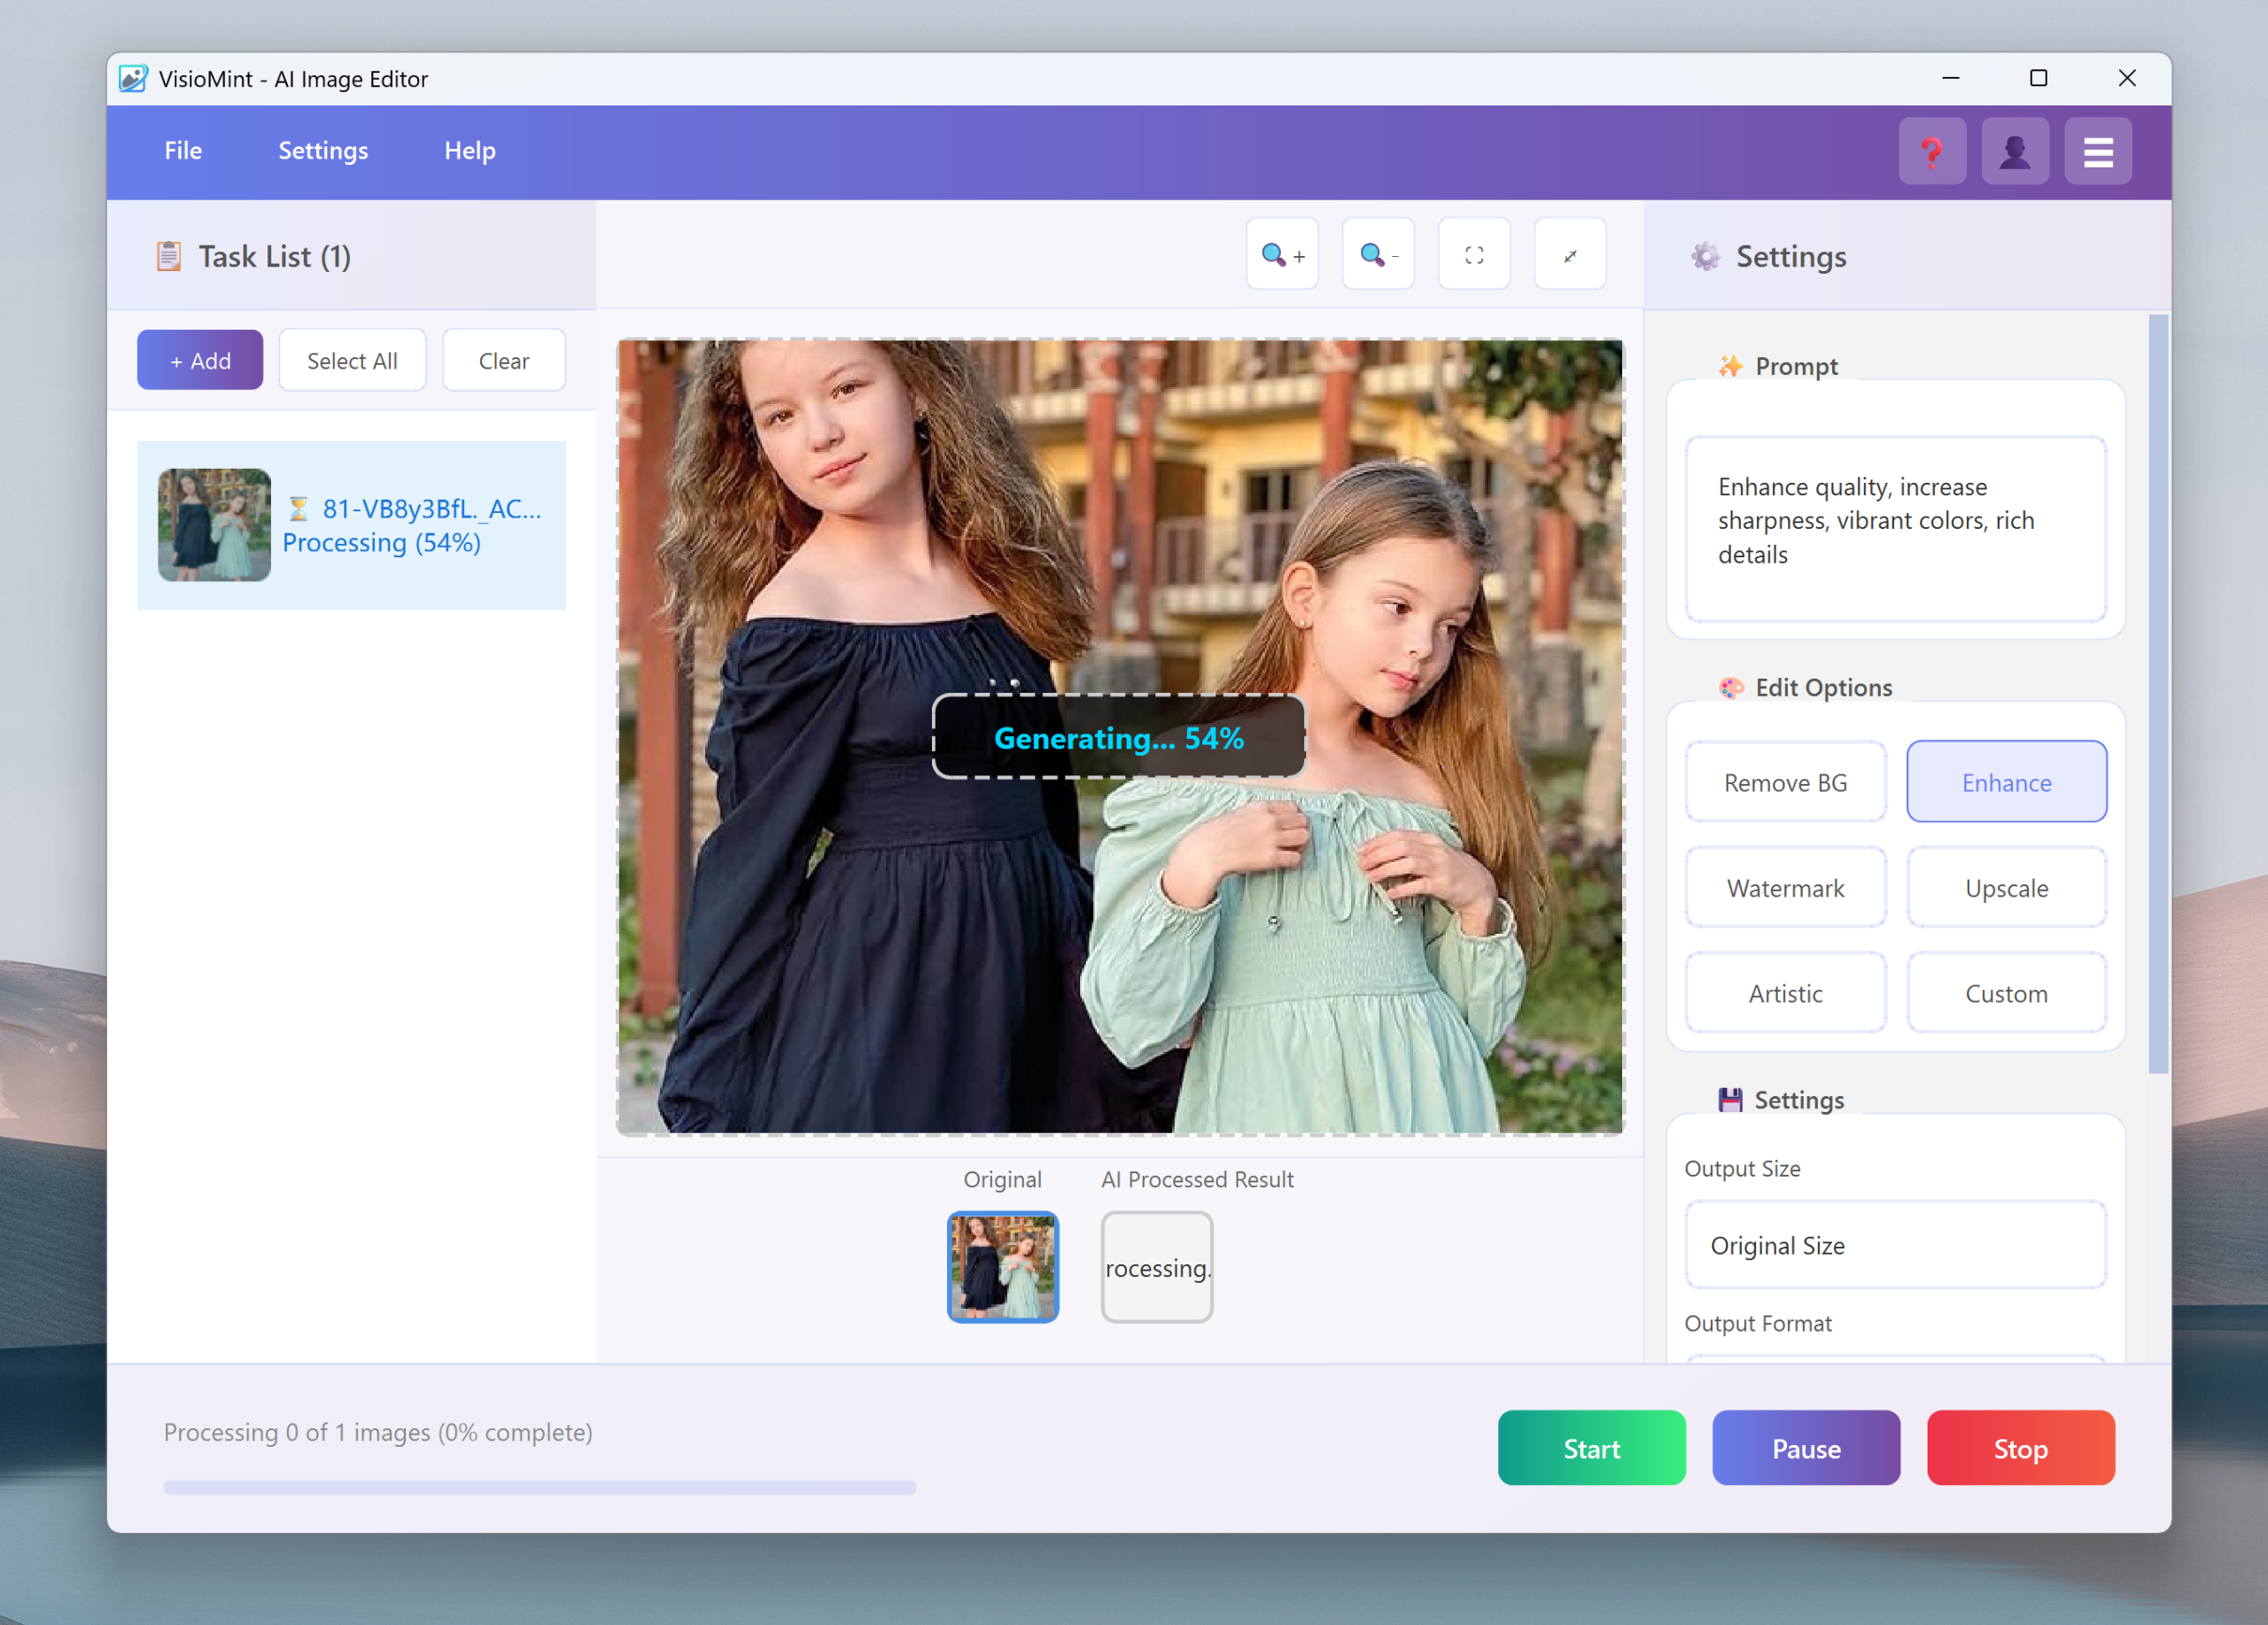
🖼 Step 1: Download, Install and Load all your photos
After downloading and installing the VisioMint on your computer, run it and click “+ Add” to add all the photos you need to the list. The software will automatically add them to the queue.

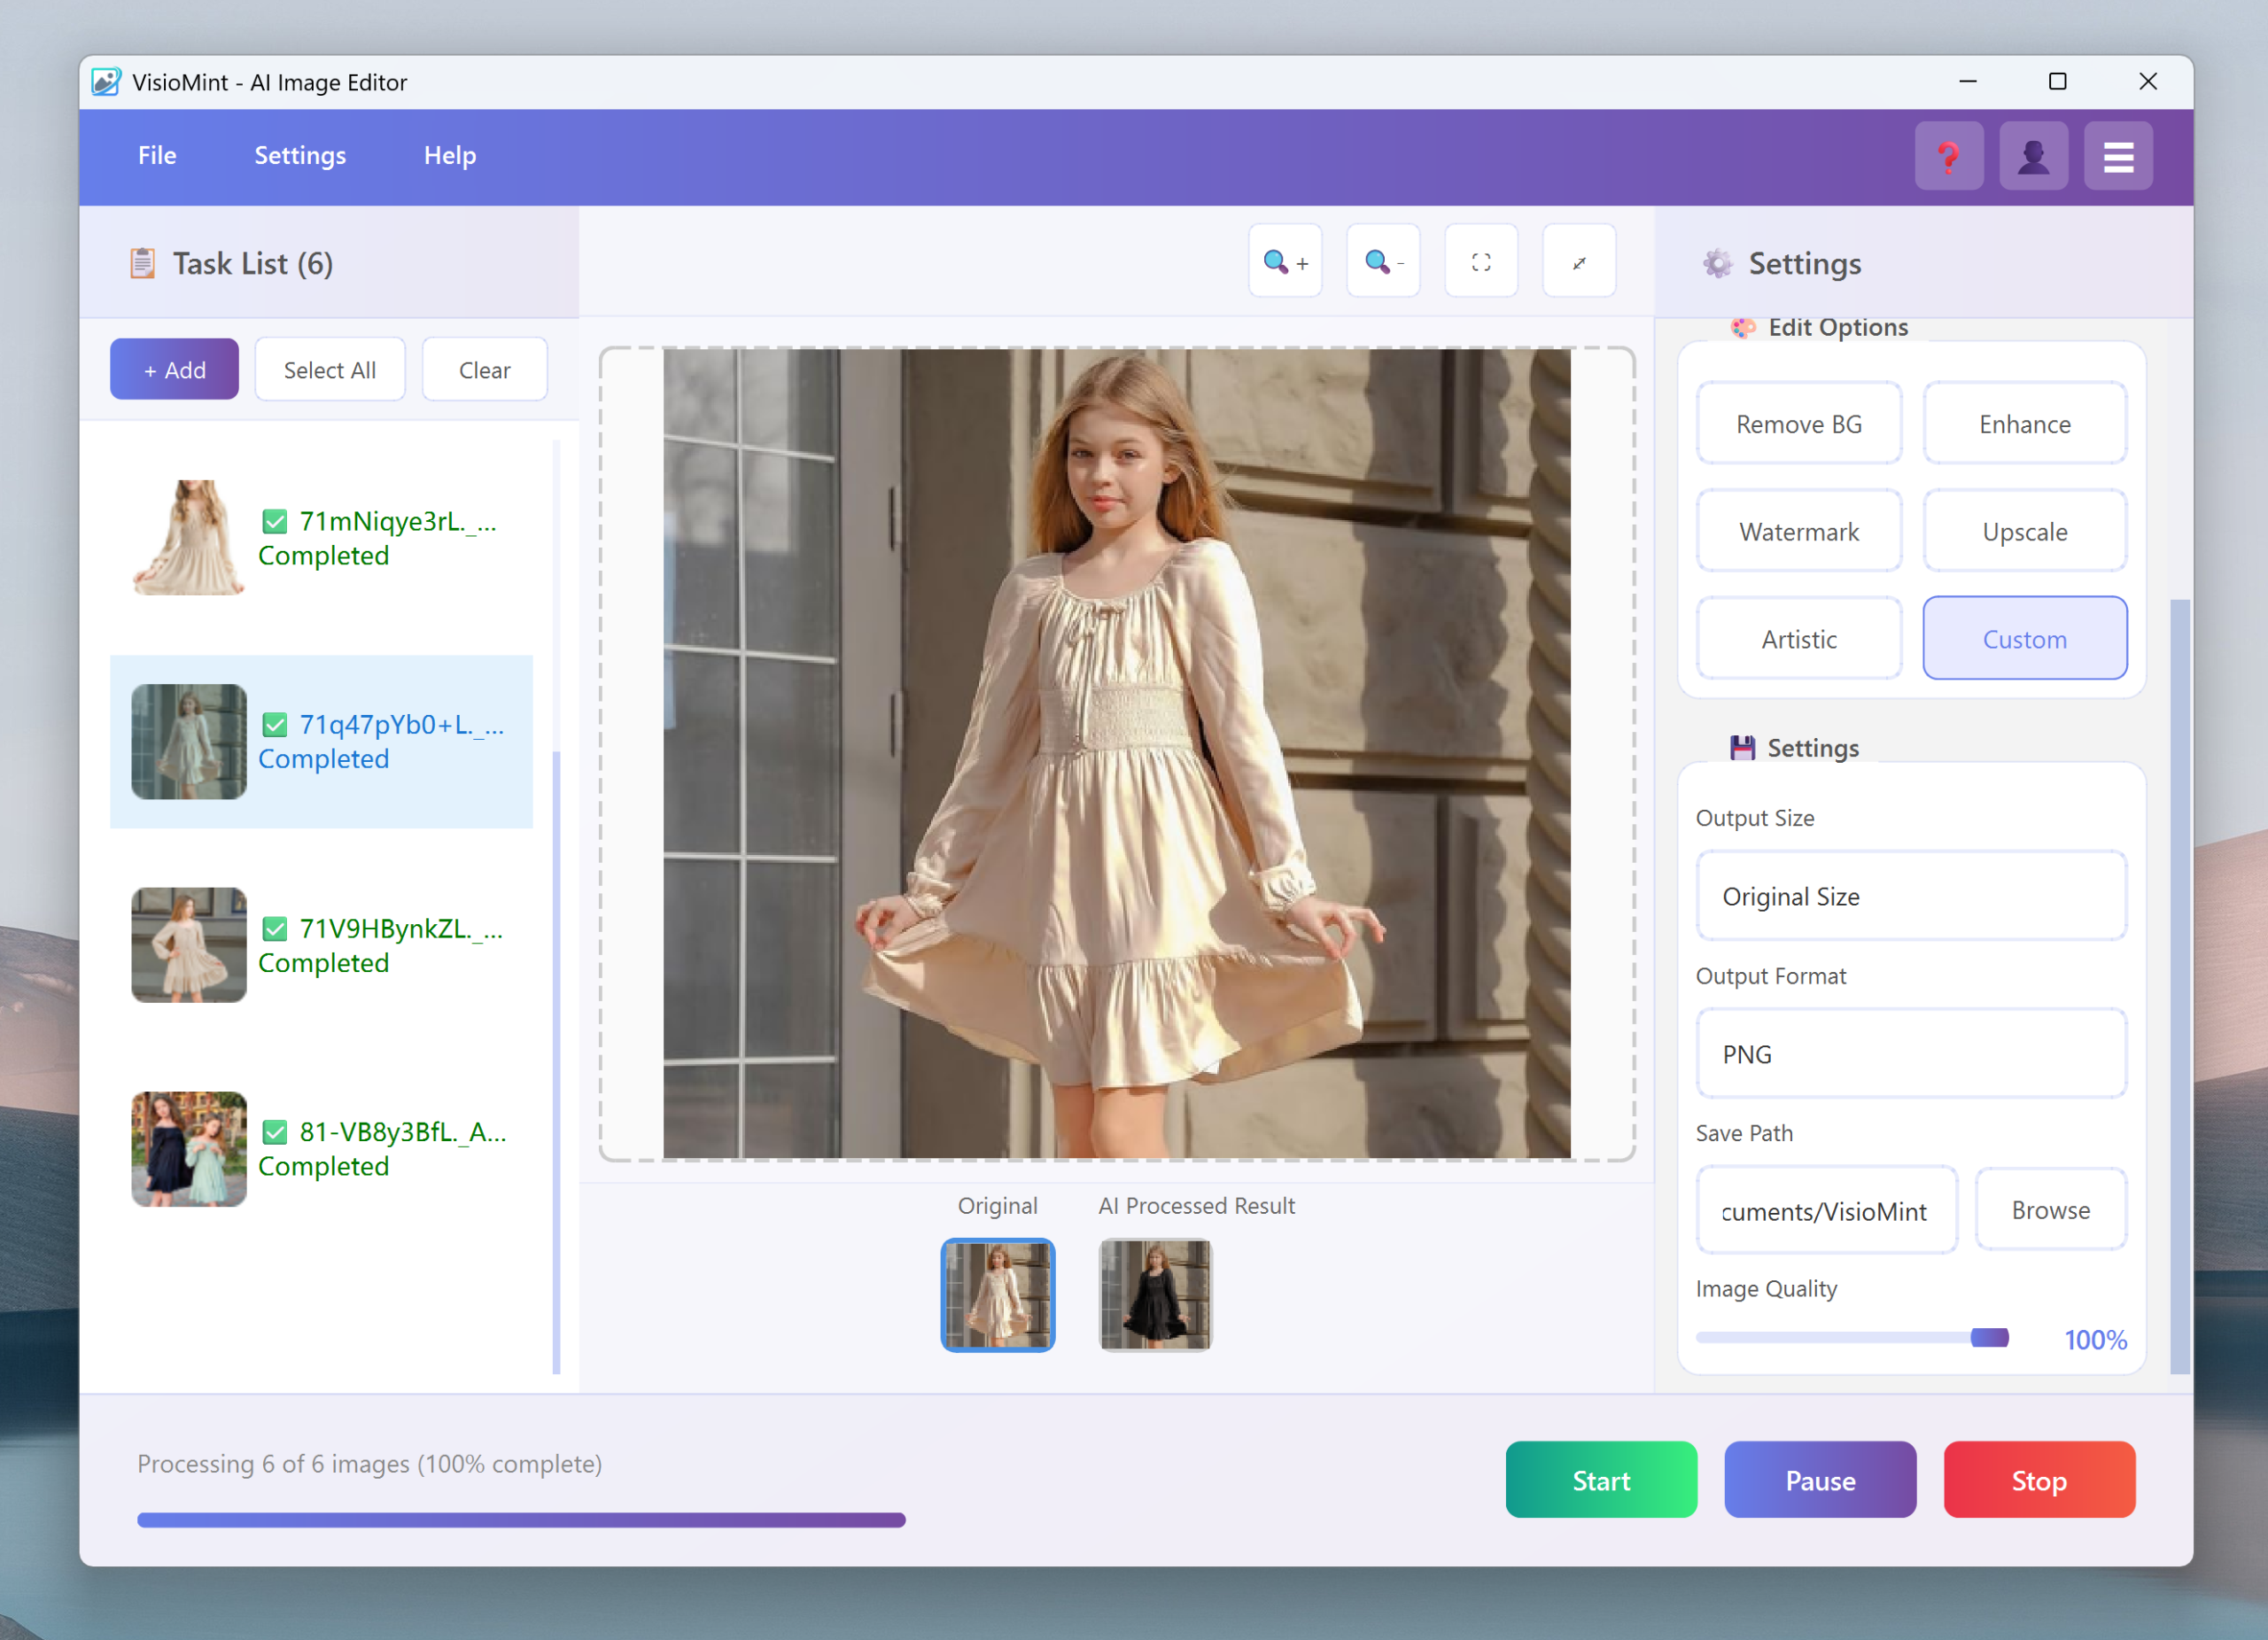
⚙️ Step 2: Pick what you want to do
This is where AI magic comes in. On the right side, you’ve got buttons like:
- Remove BG – removes the background cleanly
- Enhance – boosts clarity and sharpness
- Watermark – adds or removes watermarks
- Upscale – increases resolution without losing detail
- Custom – Enter any prompt to control the output.
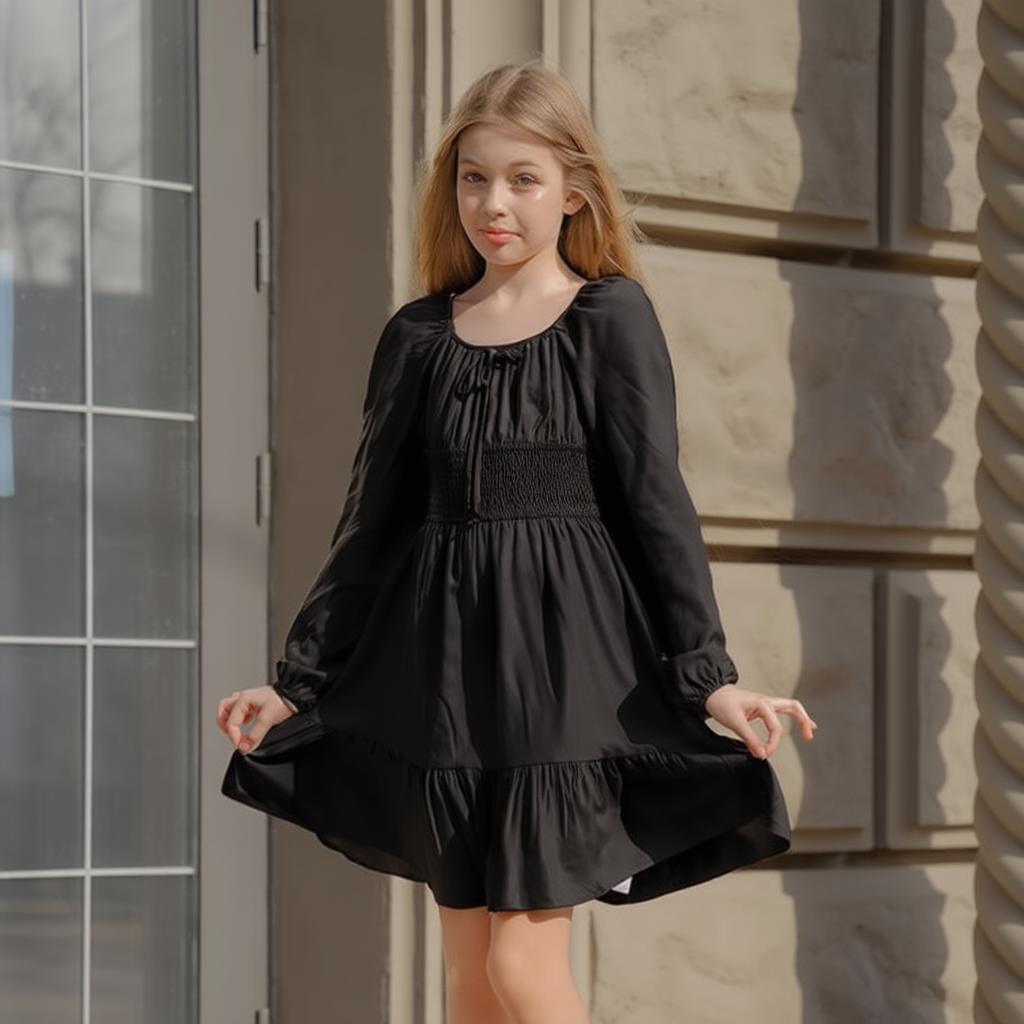
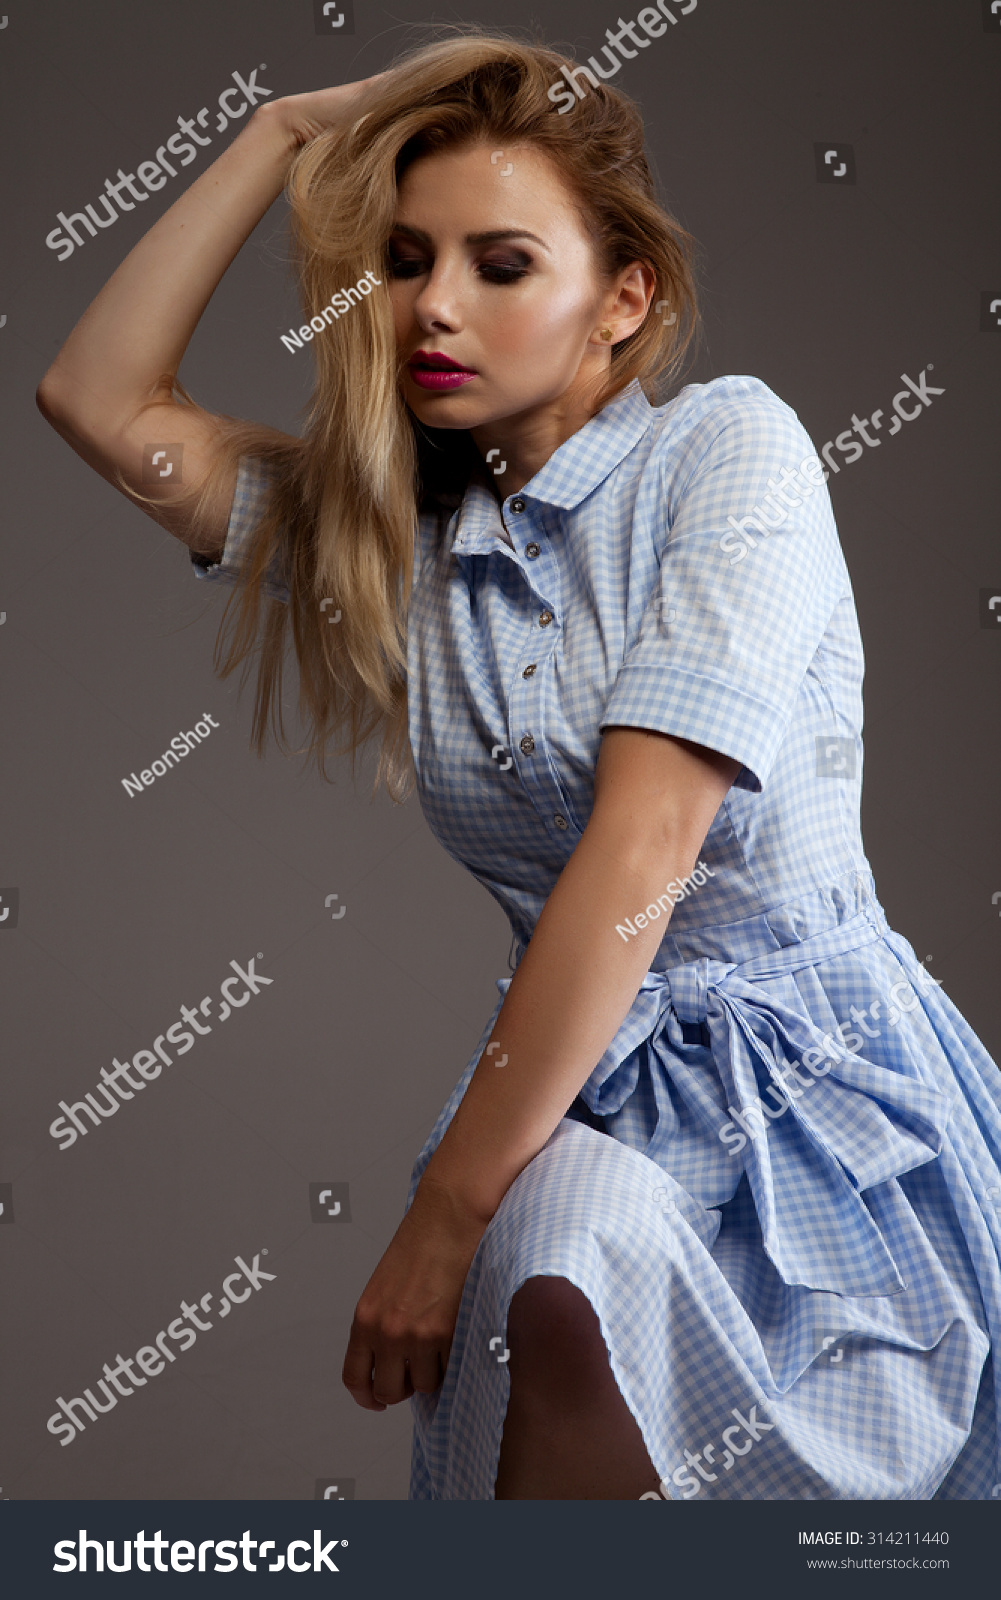
I changed the model’s clothes to black, and the AI-processed result was exactly the same as the original image. I’m very satisfied!
💾 Step 3: Choose your settings
Under the “Settings” section, I can:
- Set output size (I usually stick to “Original Size”)
- Pick output format (PNG for transparency, JPG for smaller size)
- Choose where to save the edited images
I keep the Image Quality slider at 100% because why not — I want the best version possible.
▶️ Step 4: Hit Start and chill
Once I hit Start, VisioMint runs all the AI tasks automatically.
The progress bar at the bottom shows how many images are done, and you can see the “before and after” previews instantly.
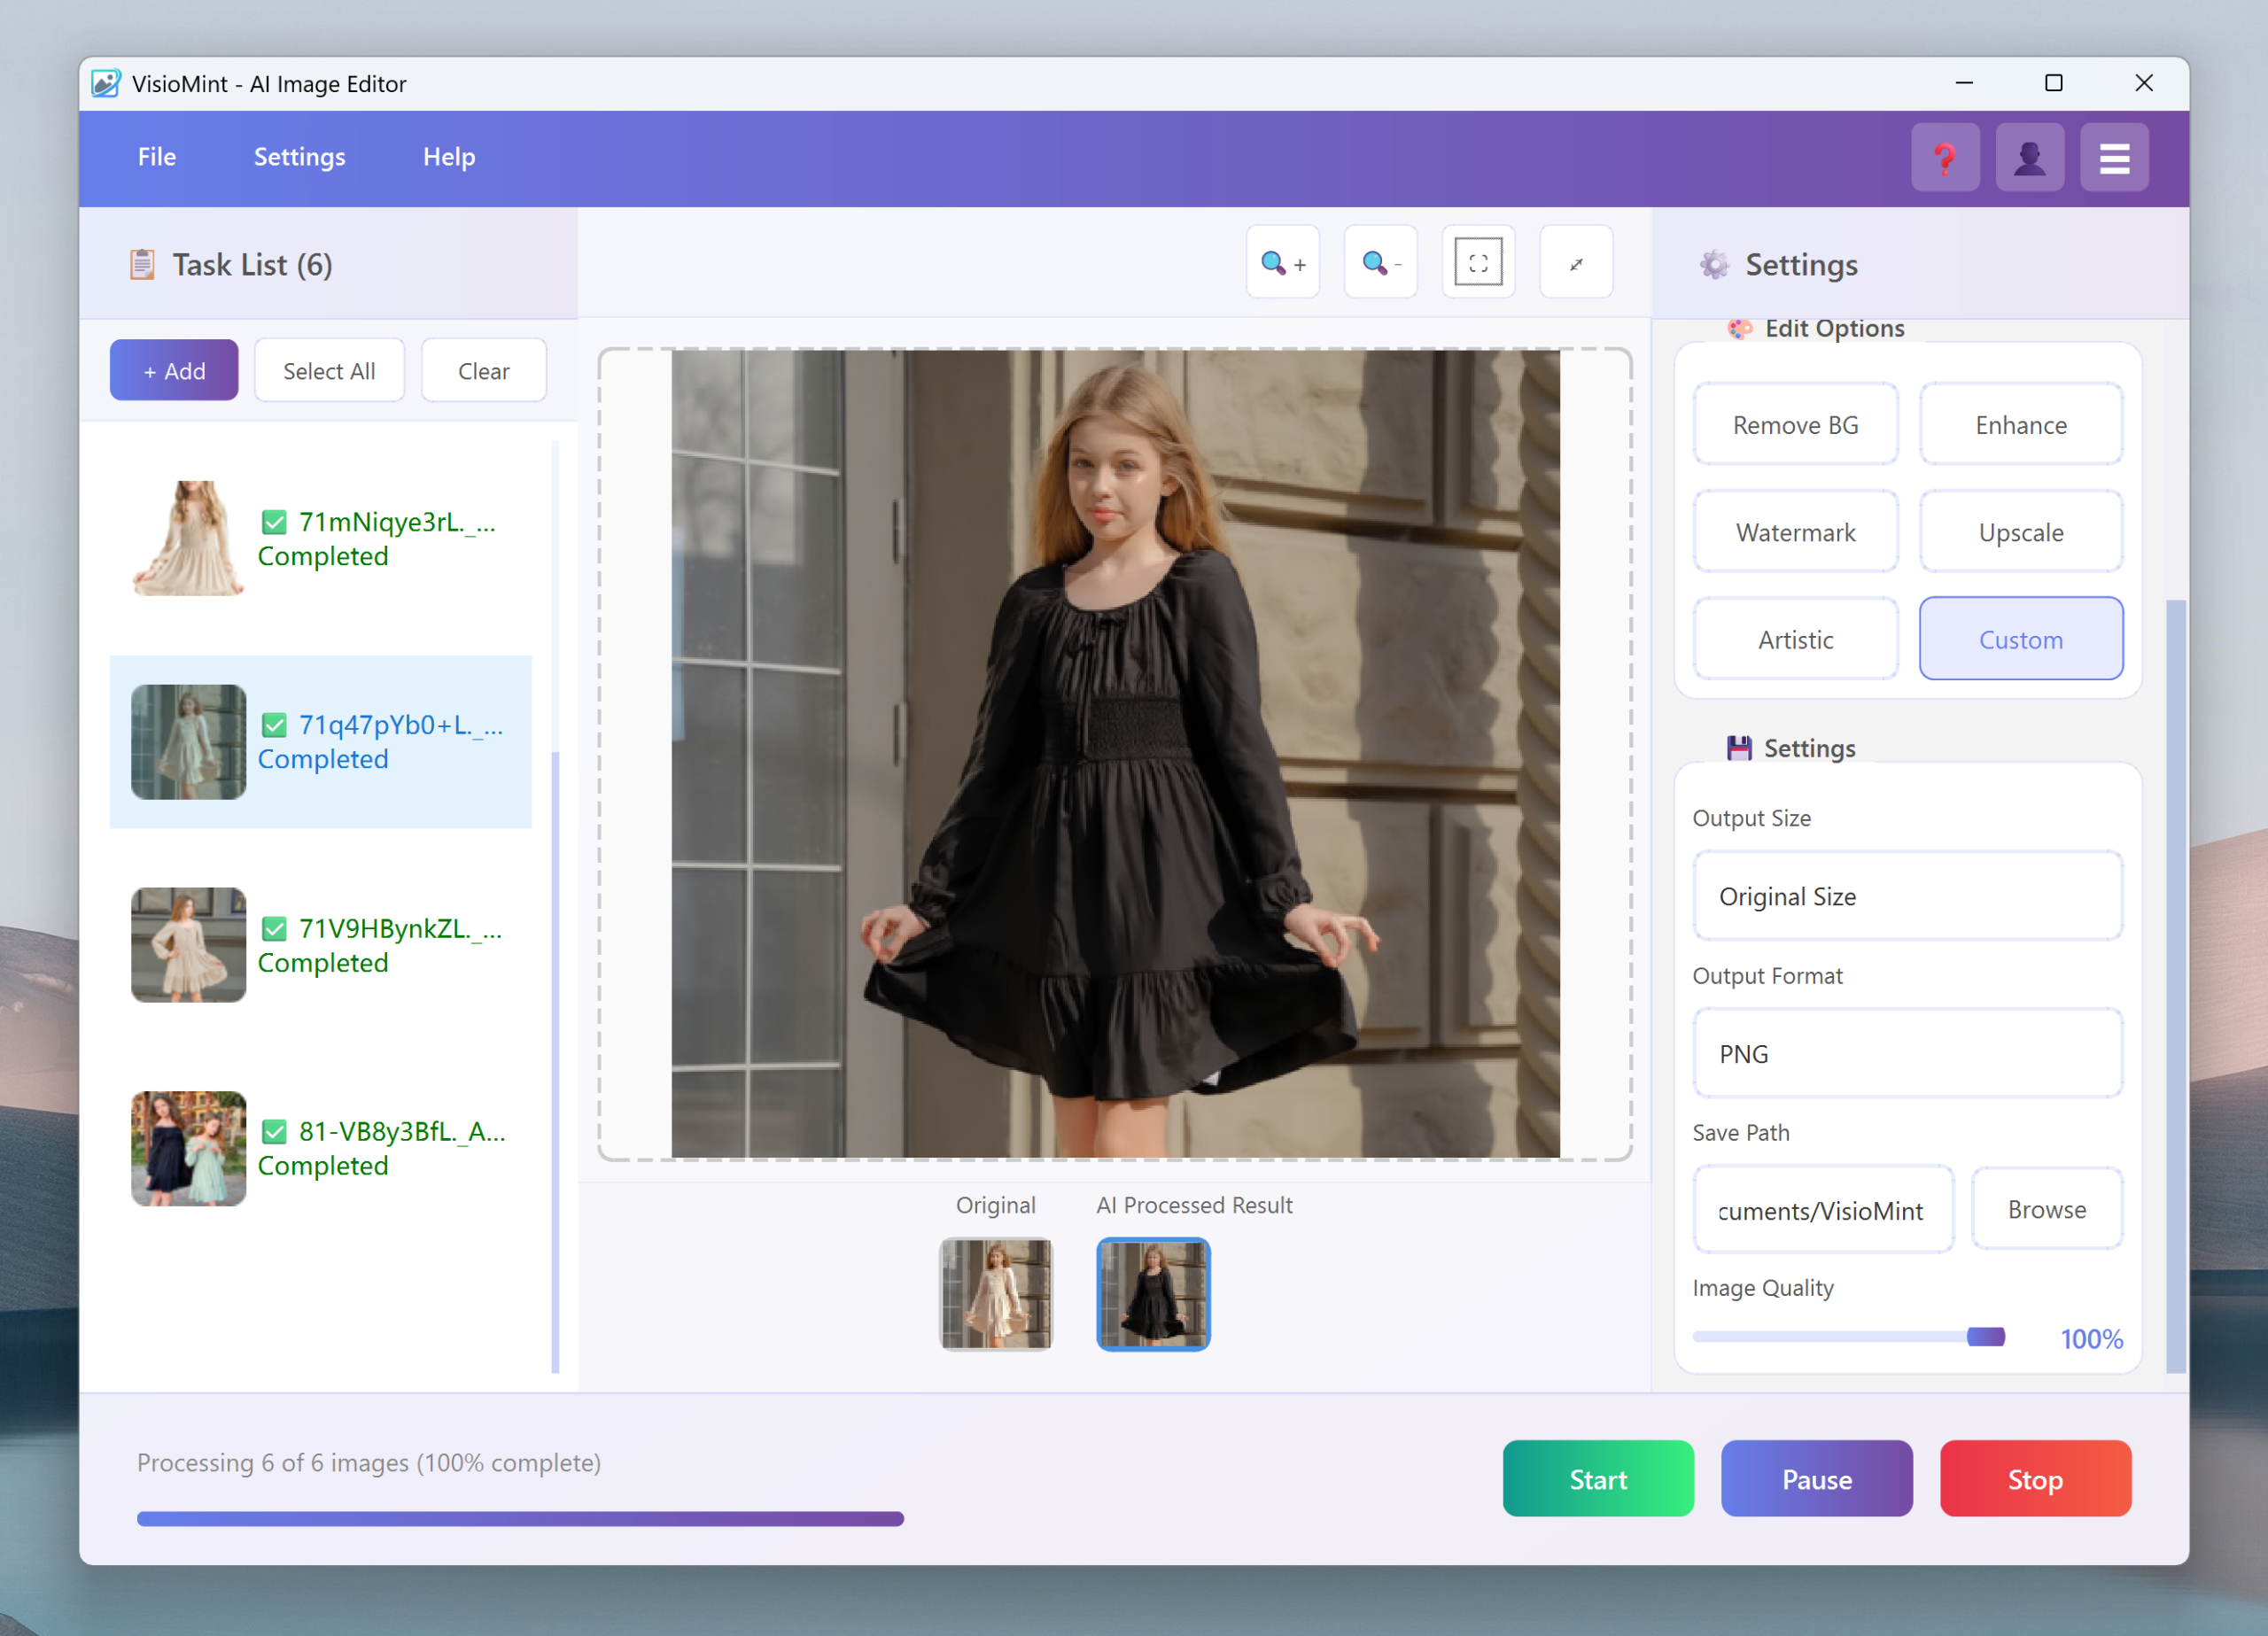
The before-and-after photos after the outfit change—doesn’t it look the same as the original?

Honestly, the first time I saw it finish 20 photos in under a minute, I just sat there thinking, “Where was this tool three years ago?”
2. Remove Watermark
So here’s the thing — sometimes I find a really good photo, but there’s that annoying little watermark sitting in the corner. It’s not like I’m trying to steal anyone’s work; usually, it’s just for my personal mockups or presentations.
VisioMint’s Remove Watermark tool is ridiculously easy to use. You just click the button, and the AI automatically finds and removes any text or logo-like marks on the image. No need to clone, blur, or paint over — it fills the background naturally, like it was never there. The first time I tried it, I was expecting it to smudge the area or make it obvious, but it actually blended everything perfectly — even on complex backgrounds like trees or textured walls.
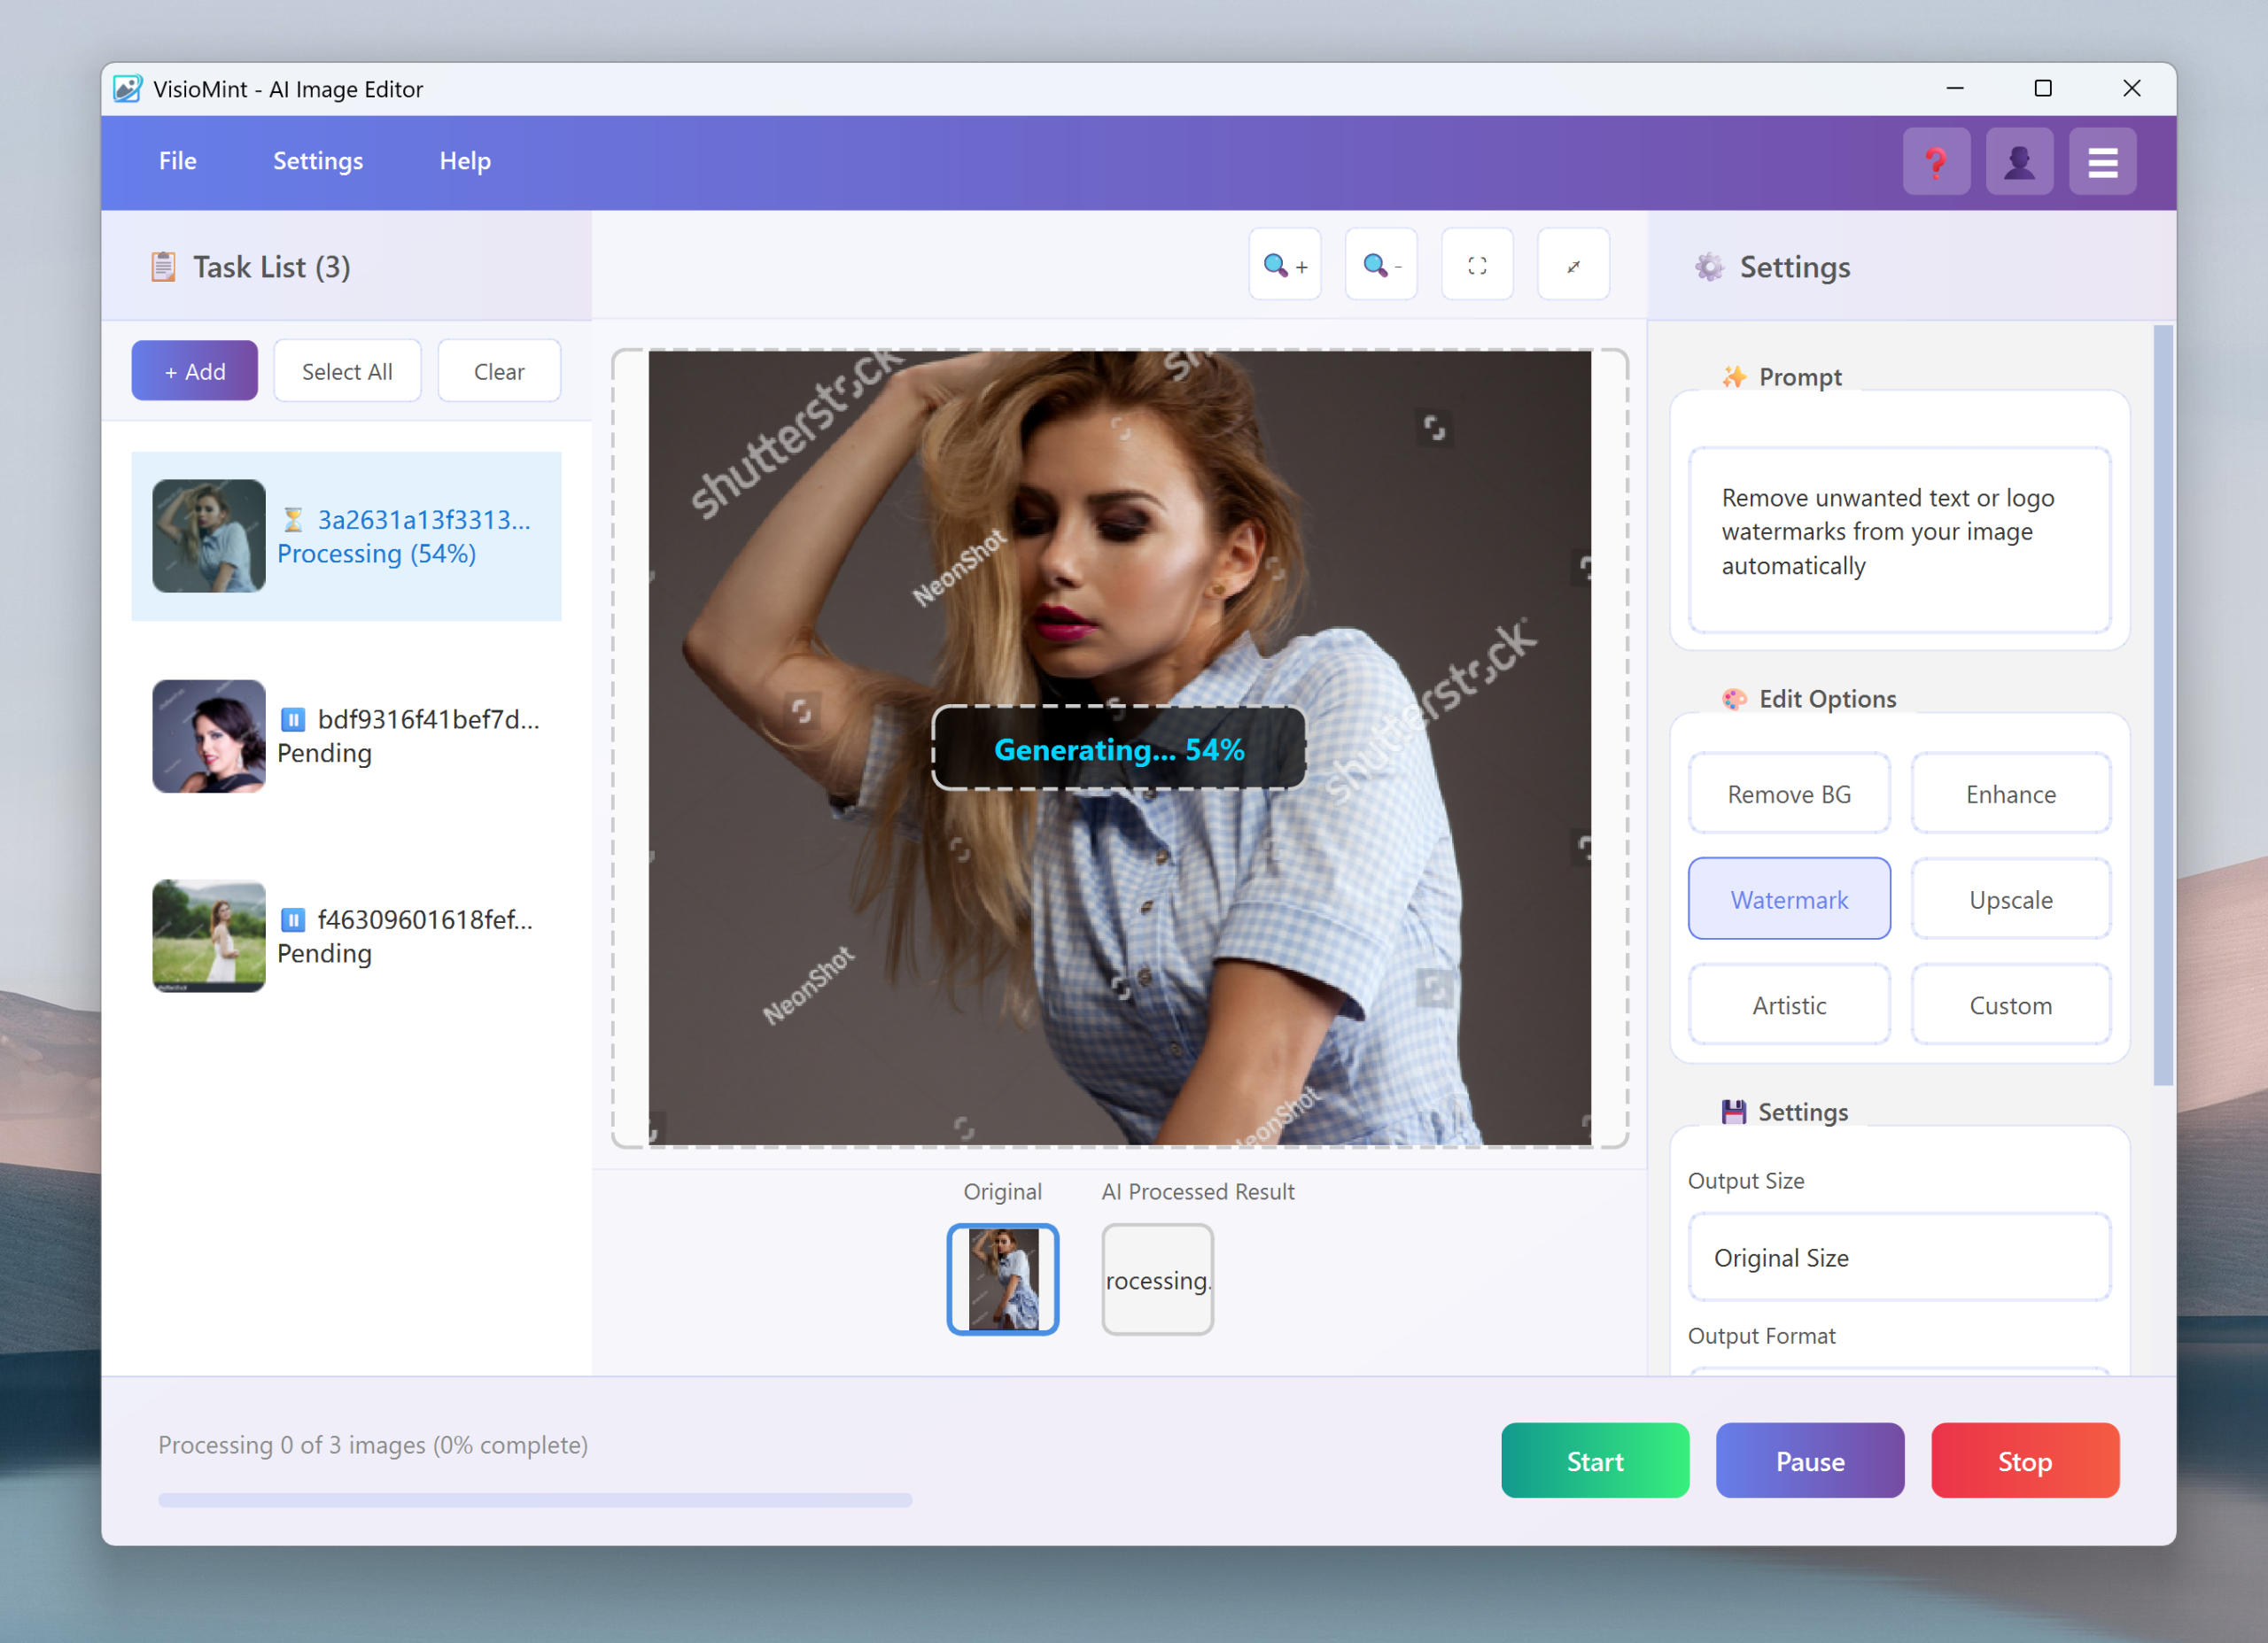
I’m very satisfied with the image quality after removing the watermark!

It’s honestly one of those “why didn’t I have this before” moments. If you’ve ever spent ten minutes cloning pixels in Photoshop just to hide a logo, you’ll appreciate how magical this feels.
3. Remove Background
Cutting out a subject by hand used to take forever — zooming in, tracing edges, fixing halos… nightmare.
With VisioMint’s Remove Background, it’s literally one click. The AI detects the subject and cleans everything around it in seconds, no weird outlines or missing details.
I’ve used it on product photos, portraits, even stuff with shadows — it just works. Now I can drop my images onto any background instantly.

Doesn’t the person look much cleaner after the background is removed?
4. Enhance quality, vibrant colors
This is the part that really makes the photos pop. After removing the background, I usually hit Enhance — and it’s like the AI suddenly gives my images a caffeine boost. Colors look richer, edges sharper, and everything feels more alive without looking over-edited.
VisioMint’s enhancement tool balances lighting and contrast automatically, so even dull or flat photos get that clean, professional glow. I don’t have to tweak saturation or brightness manually — the AI just gets it right. It’s perfect when you want your photos to stand out without spending hours fine-tuning every detail.
The adjusted effect is noticeably better; the colors are more suitable and natural!


Download it here and give it try!
💡 Final thoughts
VisioMint isn’t trying to be another Photoshop — it’s more like your personal AI photo assistant.
It’s perfect if you:
-
Need clean, consistent images for eCommerce, blogs, or social media
-
Hate doing repetitive editing work
-
Want pro-looking results without spending an entire afternoon on it
After switching to VisioMint, I don’t dread batch editing anymore. I literally start it, grab a snack, and by the time I’m back — everything looks perfect.
If you’re still manually editing one photo at a time, give VisioMint a shot.
Trust me — once you go AI, you don’t go back. 😎