Partitioning a hard drive is an essential step for better file organization, system performance, and even dual-boot setups. Whether you’re preparing a new disk or organizing an existing one, creating partitions can help separate your operating system from personal files, backups, or specific applications. With Dr.Partition, a powerful disk manager similar to EaseUs Partition Master, partitioning a hard drive becomes a safe and straightforward process even for beginners. This guide will walk you through what disk partitioning is and how to safely perform it on your Windows PC using Dr.Partition.
What Does Dr.Partition Do
A disk partition is a logical section of a physical hard drive. Each partition functions like a separate drive, allowing you to install different operating systems, store backups, isolate workspaces, or manage data more efficiently. For example, you can dedicate one partition to Windows, another to personal documents, and a third for media or backups. This separation minimizes data loss risk during system crashes and simplifies disk management. Partitioning also makes it easier to format or reinstall the OS without affecting other stored files.
How to Partition a Hard Drive in Windows 11/10
It is super easy to partition a hard drive with Dr.Partition software. Please follow the steps in below to get it done.
Step 1: Download and Launch Dr.Partition
Download and install Dr.Partition on your Windows PC. Launch the program and wait for it to detect all connected disks and partitions.

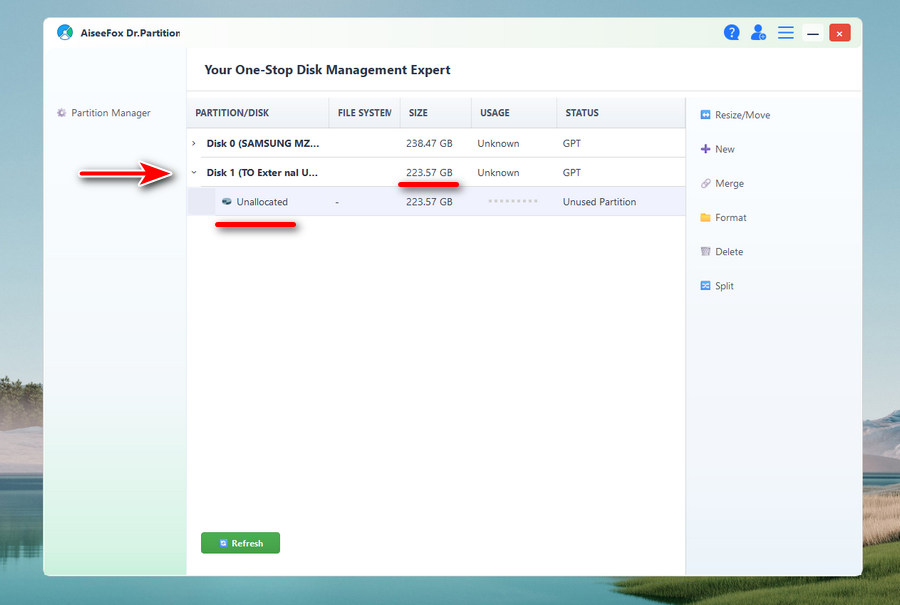
Step 2: Select the Target Disk
Choose the drive you want to partition. In my example, it is a brand new SSD drive with 223 GB Storage. It is marked as Disk 1 in Dr.Partition software.
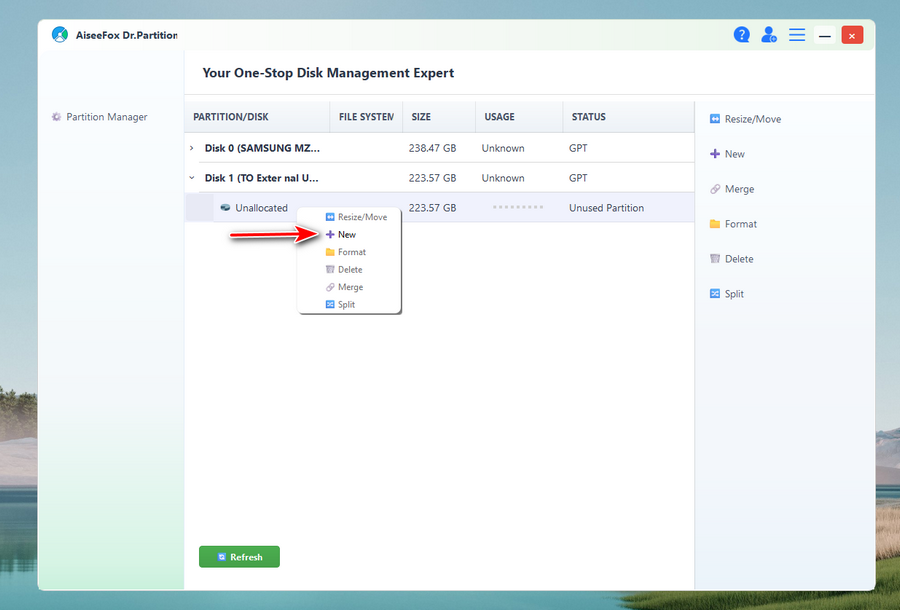
Step 3: Create a New Partition
Right-click on the unallocated space and select “New” menu.
From the pop-up window, please input a number (MB) for new partition. The number should be equal or less then the physical size of the hard drive. Also choose a file system for the new partition. NTFS is used by default.
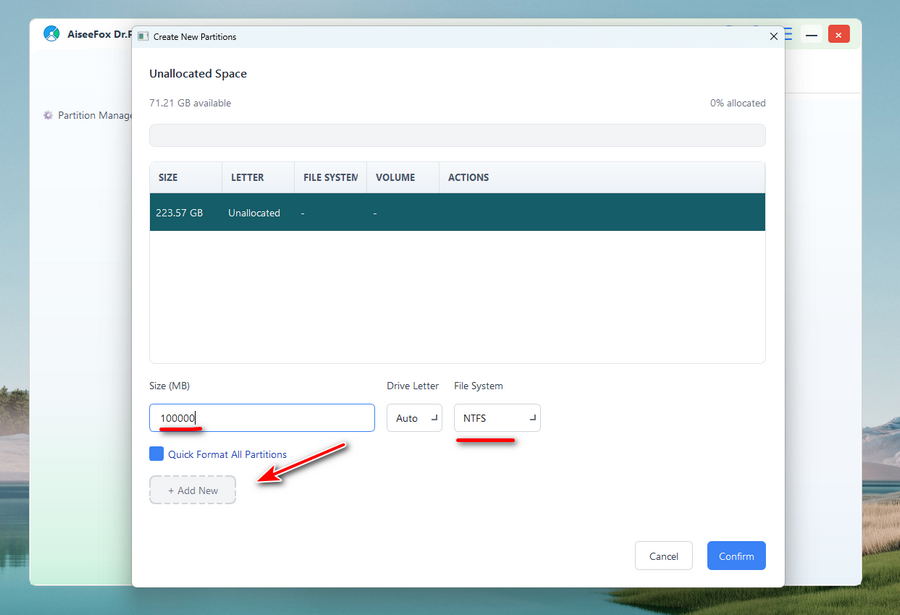
Now, click the “Add New” button to confirm the operation. You will see the basic of new partition in seconds.
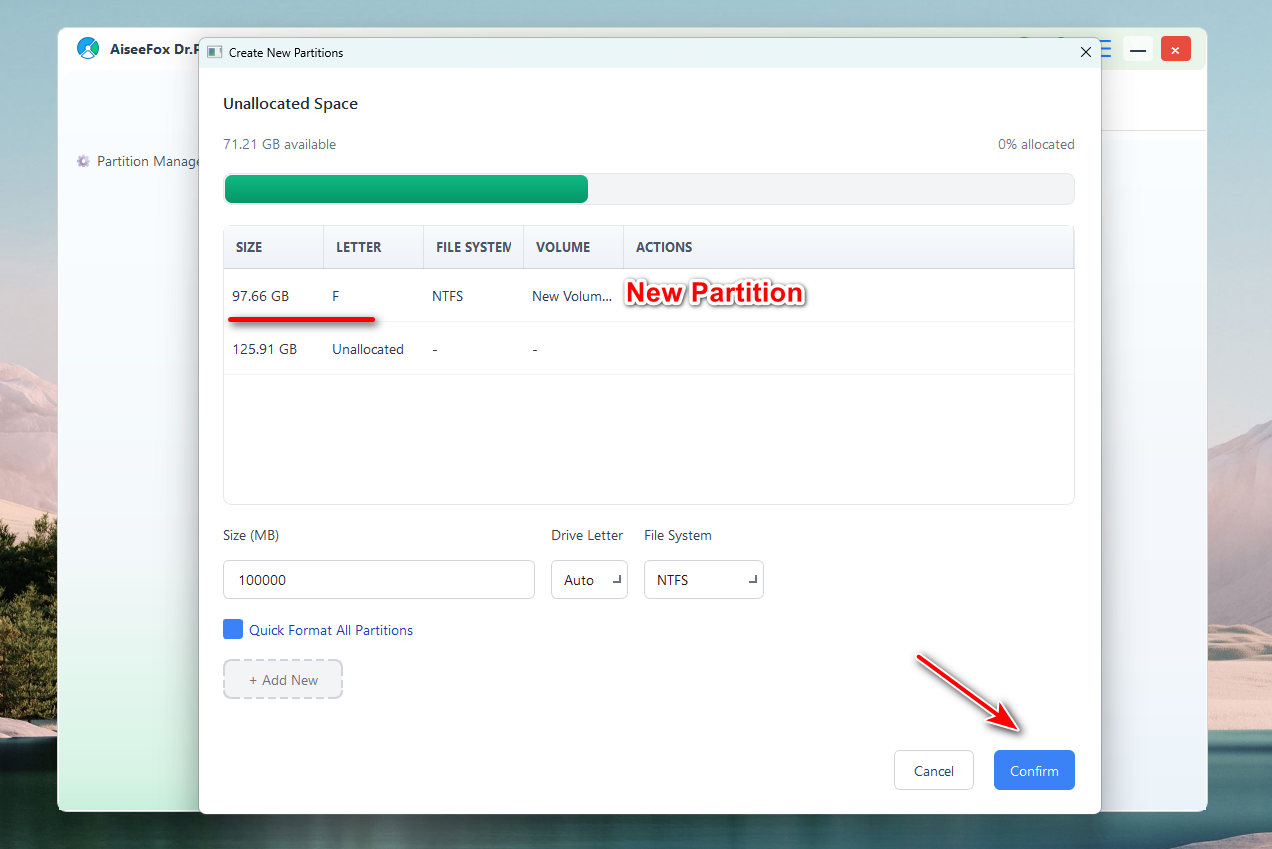
Step 4: Start Partitioning the Hard Drive
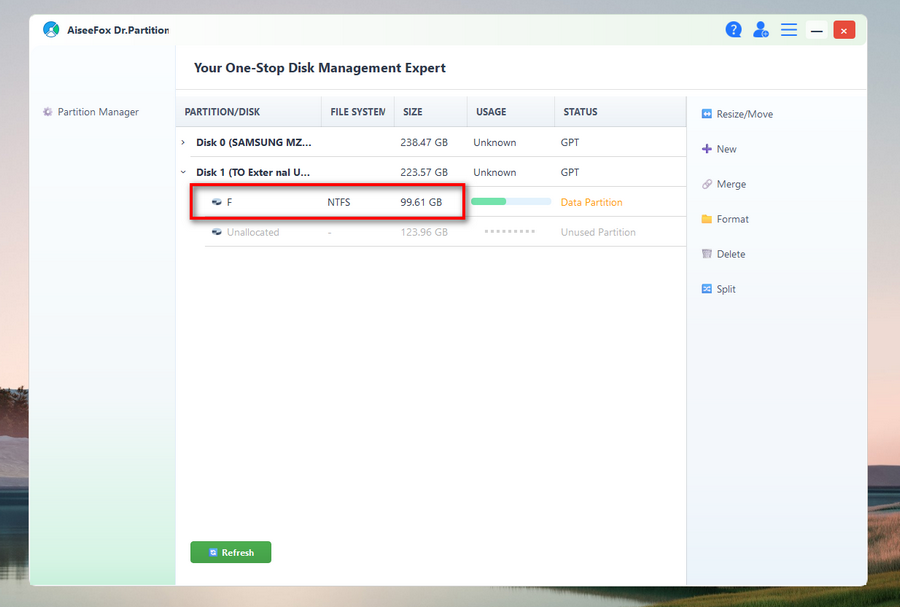
Click the “Confirm” button at the bottom to commit the changes. This will be done very shortly. Once done, open the File Explorer to ensure your new partition appears and is ready to use.
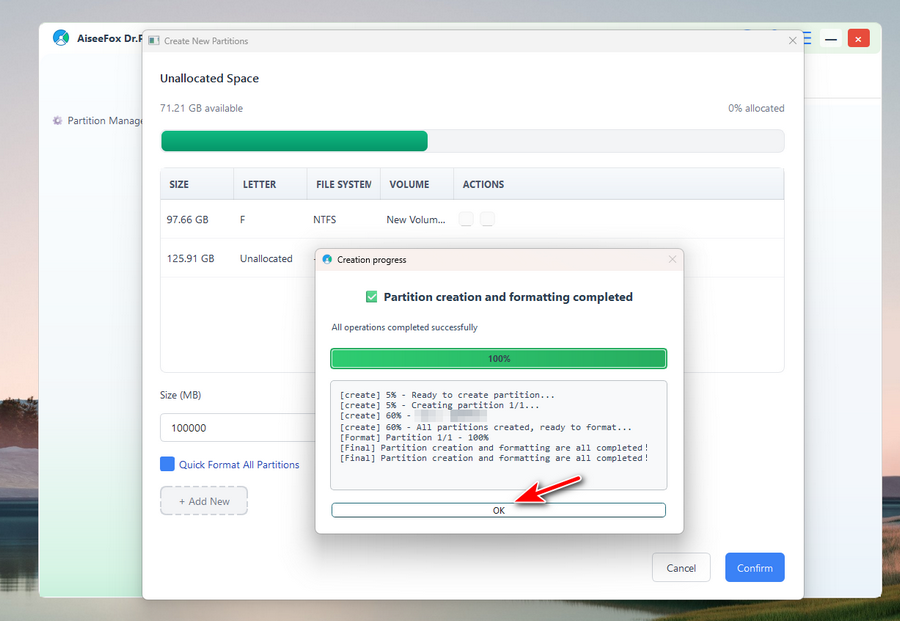
Click “OK” to complete the task and the partition list will be refreshed automatically. As you can see, the F partition is the newly created from the connected hard drive.
Summary
Partitioning a hard drive in Windows is a practical way to manage your storage and safeguard your data. With a user-friendly tool like Dr.Partition, the process is secure, efficient, and accessible even for non-technical users. Whether you’re setting up a new system or optimizing an old one, proper partitioning gives you more control over how your data is stored and maintained.