Are you looking for a reliable and efficient way to format your USB drive, SD card, or external hard drive to FAT32 on Windows? However, Windows’ built-in formatting tools have limitations—especially when dealing with drives larger than 32GB.
That’s where Dr.Partition comes in! This powerful yet user-friendly disk management tool makes formatting to FAT32 quick and hassle-free, even for large storage devices. In this guide, we’ll explore why Dr.Partition stands out as one of the best FAT32 formatter tools for Windows and how you can use it to optimize your storage devices effortlessly.
The Usual Workarounds (and why they suck)
You can find a million old forum posts suggesting command-line tools, weird scripts, or even reformatting on a Linux VM. I did try a couple:
- Diskpart: Won’t do it.
- Format via cmd: Nope, limit is hard-coded.
- Random third-party tools: Tried a few “free” ones. One had ads everywhere, another failed half-way through.
It honestly felt like way more trouble than it should be, and I started worrying about losing data or bricking my drive.
The Best FAT32 Formatter Software – Dr.Partition
I’d been using Dr.Partition for basic resizing and merging before, so I wondered if it could help with this. In this post, I will take formatting NTFS to FAT32 for example.
(Warning: Formatting or converting will wipe your data! Always back up anything important first.)
1. Download and Install Dr.Partition
Head to the AiseeFox Dr.Partition website and grab the installer. It’s quick, clean, and no bundled junk.

2. Plug in Your Drive
Pop your external drive or big USB stick into your PC. Dr.Partition will show all your disks and partitions in a super clear visual layout.
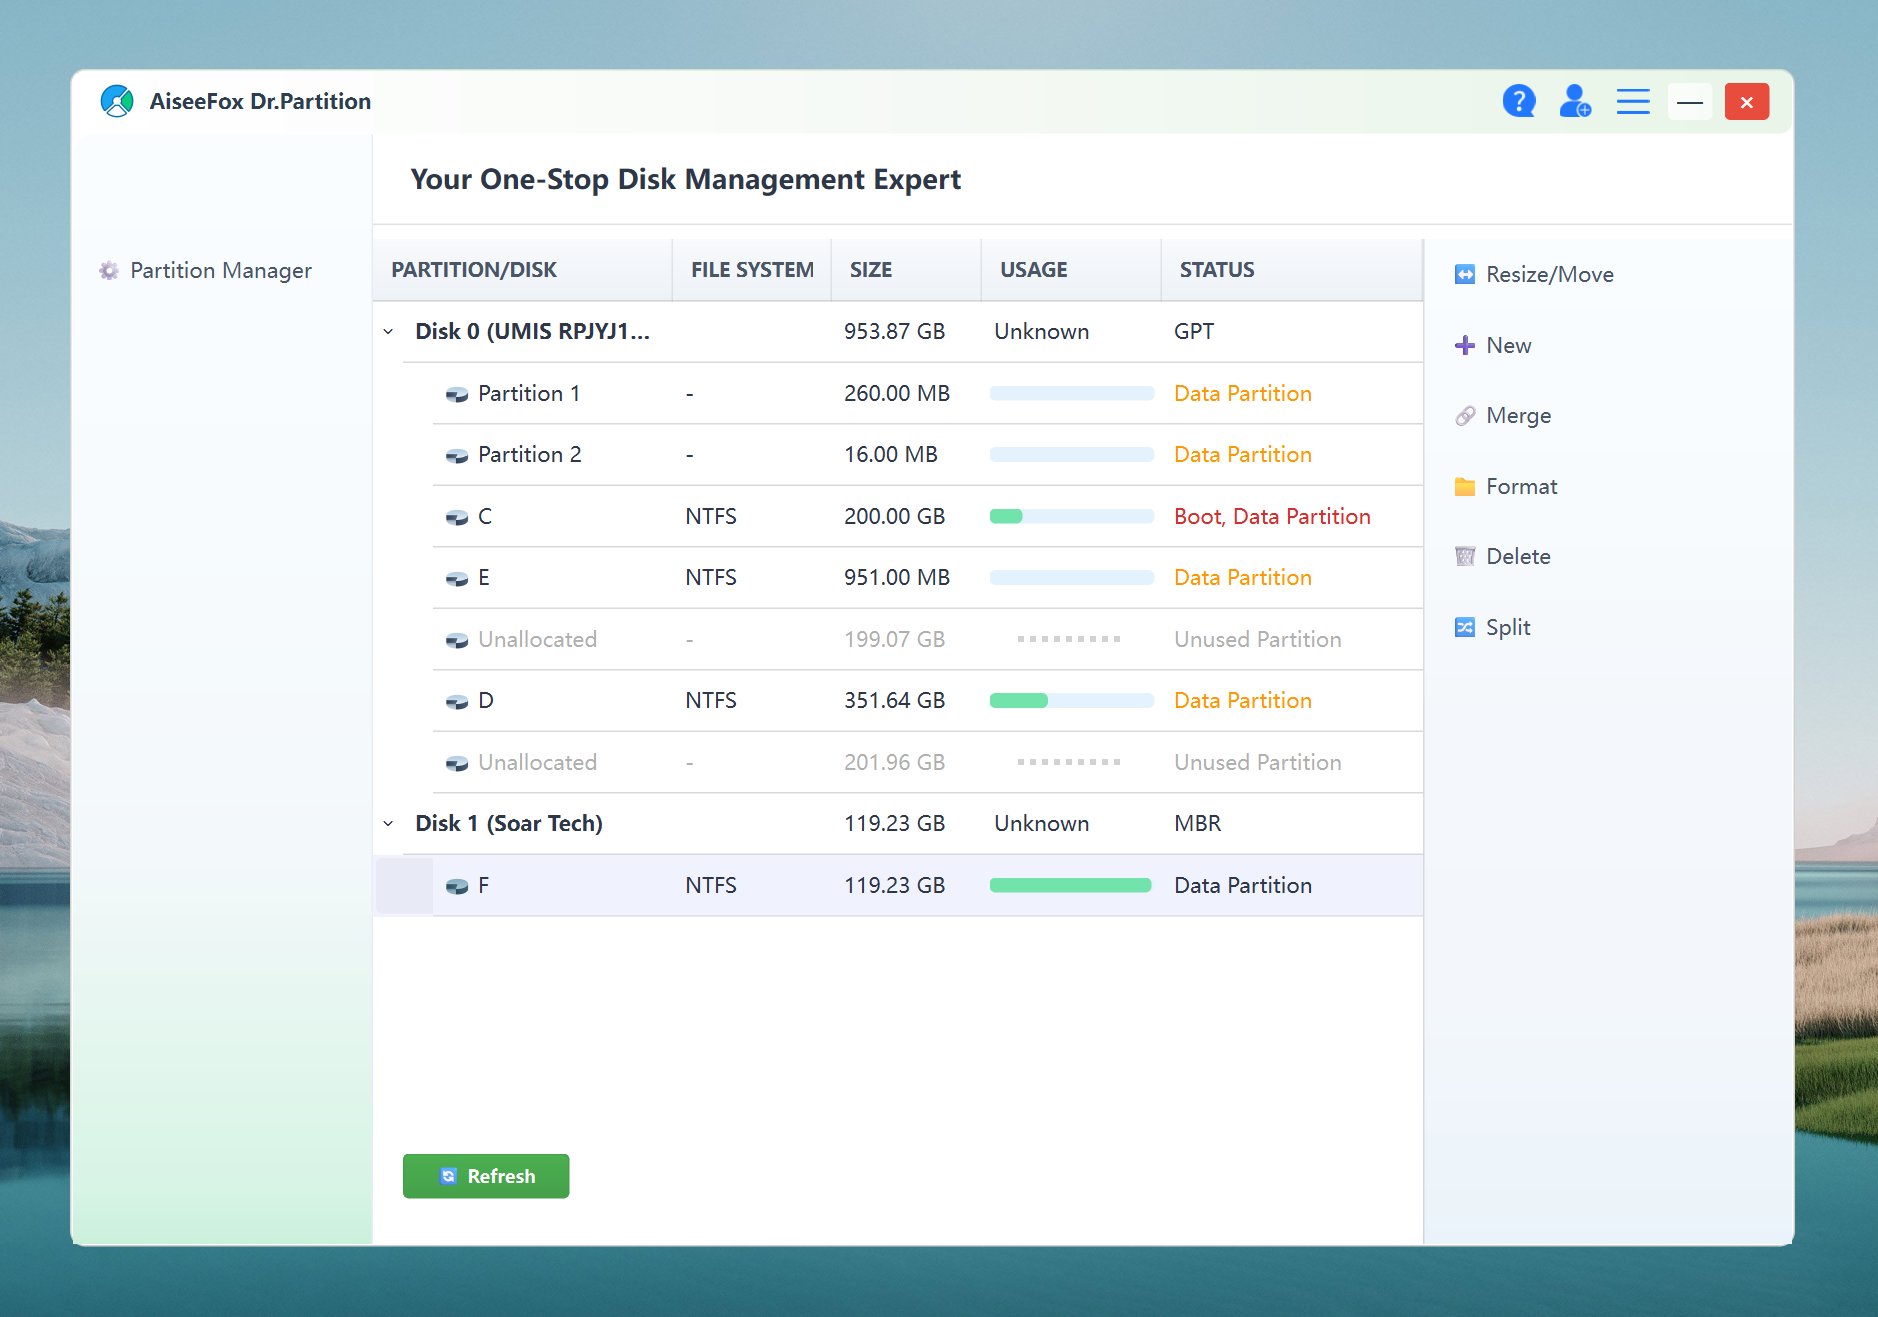
3. Select the Partition You Want to Convert
You’ll see a graphical map of your drives. Find your NTFS (or other) partition on the large drive you want to change.
4. Choose “Format”
- If you just want to format (you don’t care about data loss), right-click the partition and select Format.
- Pick FAT32 as the file system. You can give your drive a label (like “MUSIC” or “MOVIES”) if you want.
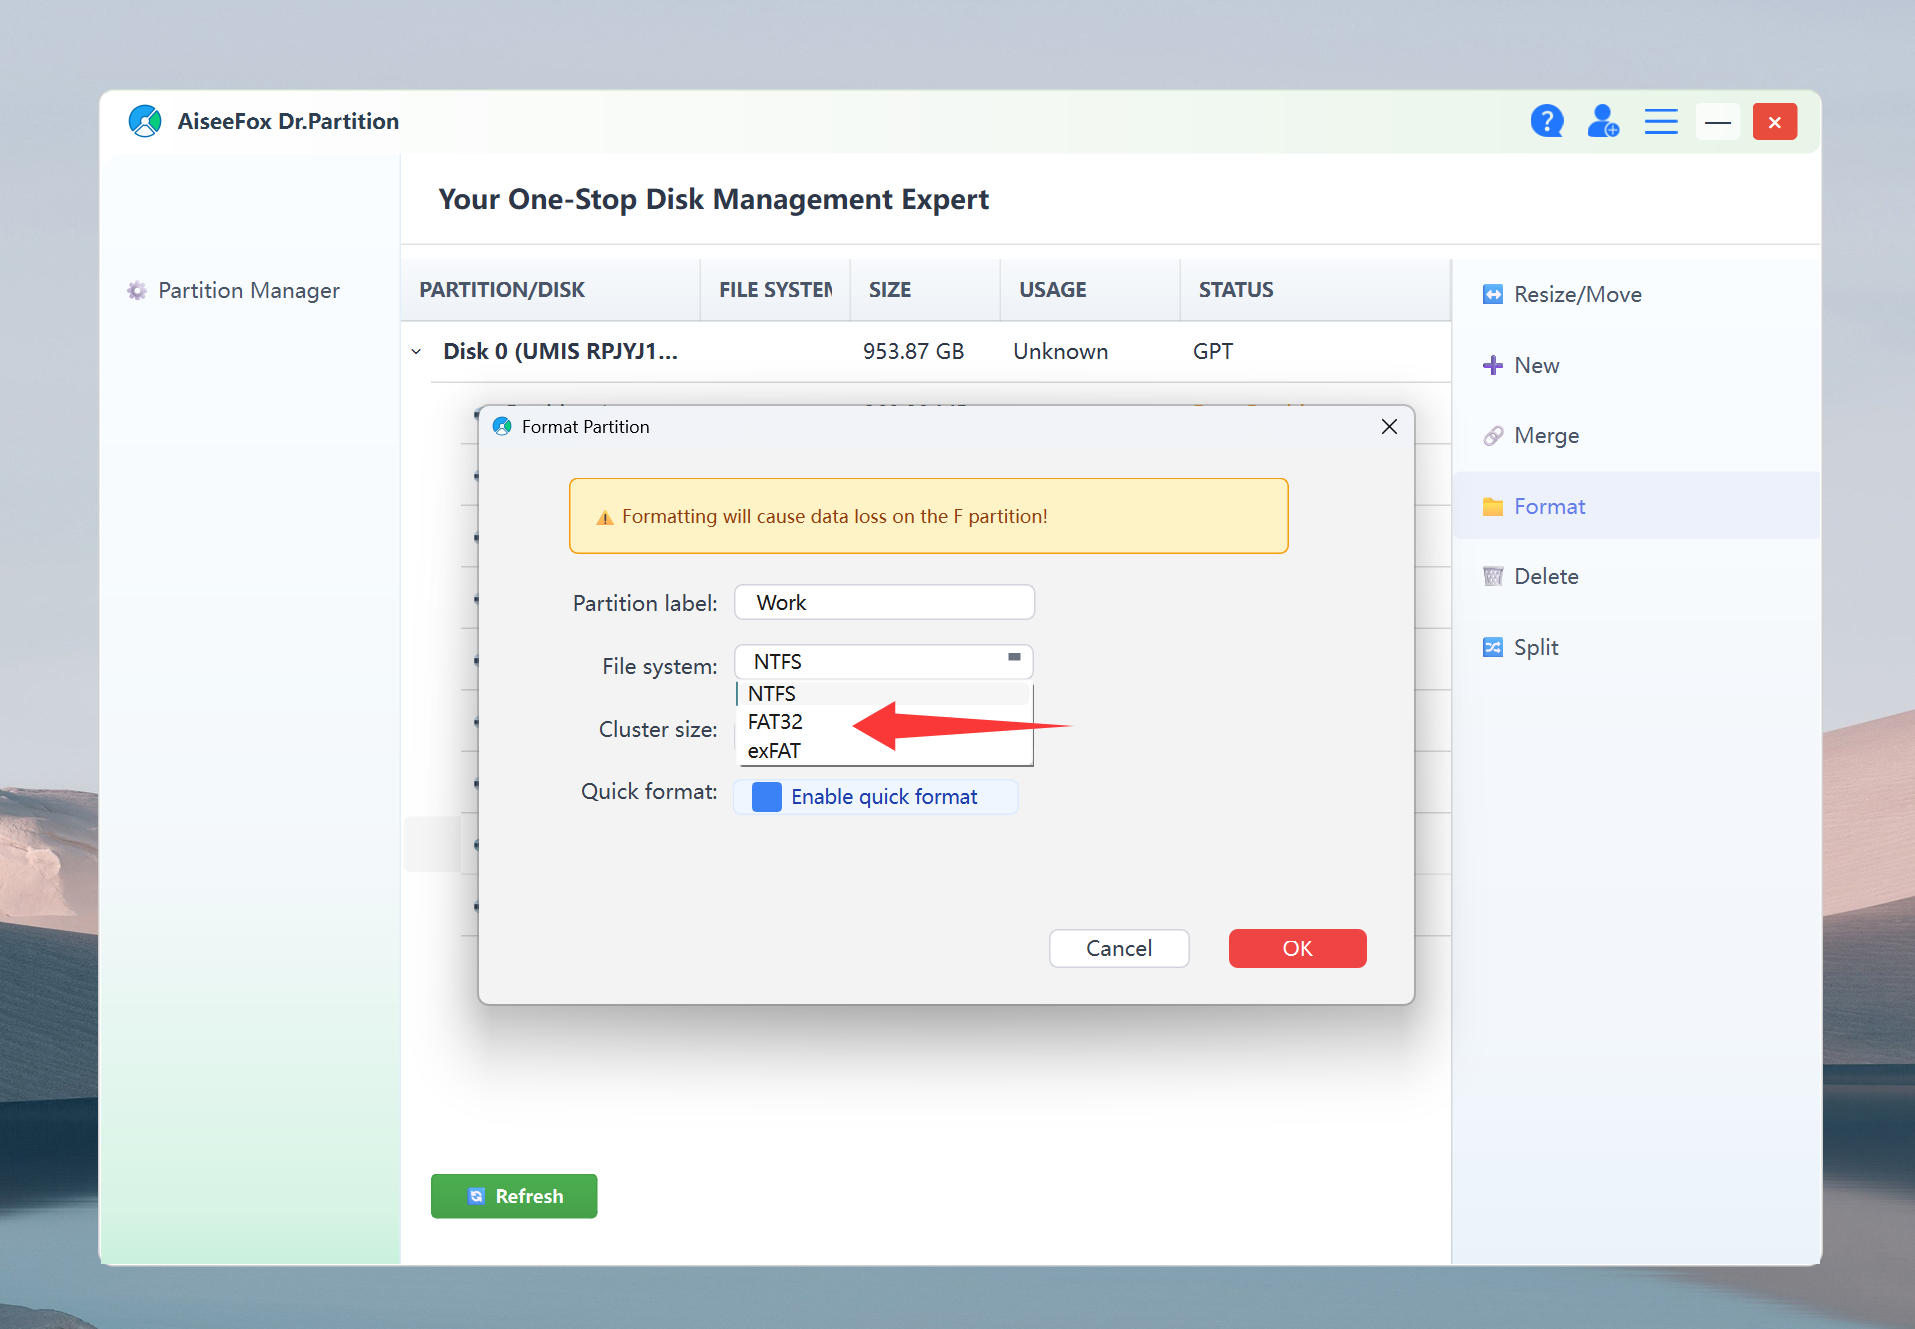
- Click OK button. Dr.Partition will show a warning about wiping data if it’s not a true convert. Double-check you’ve backed up what you need, then confirm. The formatting process will be very quick, and it will be successful in about 30 seconds! Do not interrupt the operation during the formatting process and do not remove the USB drive.
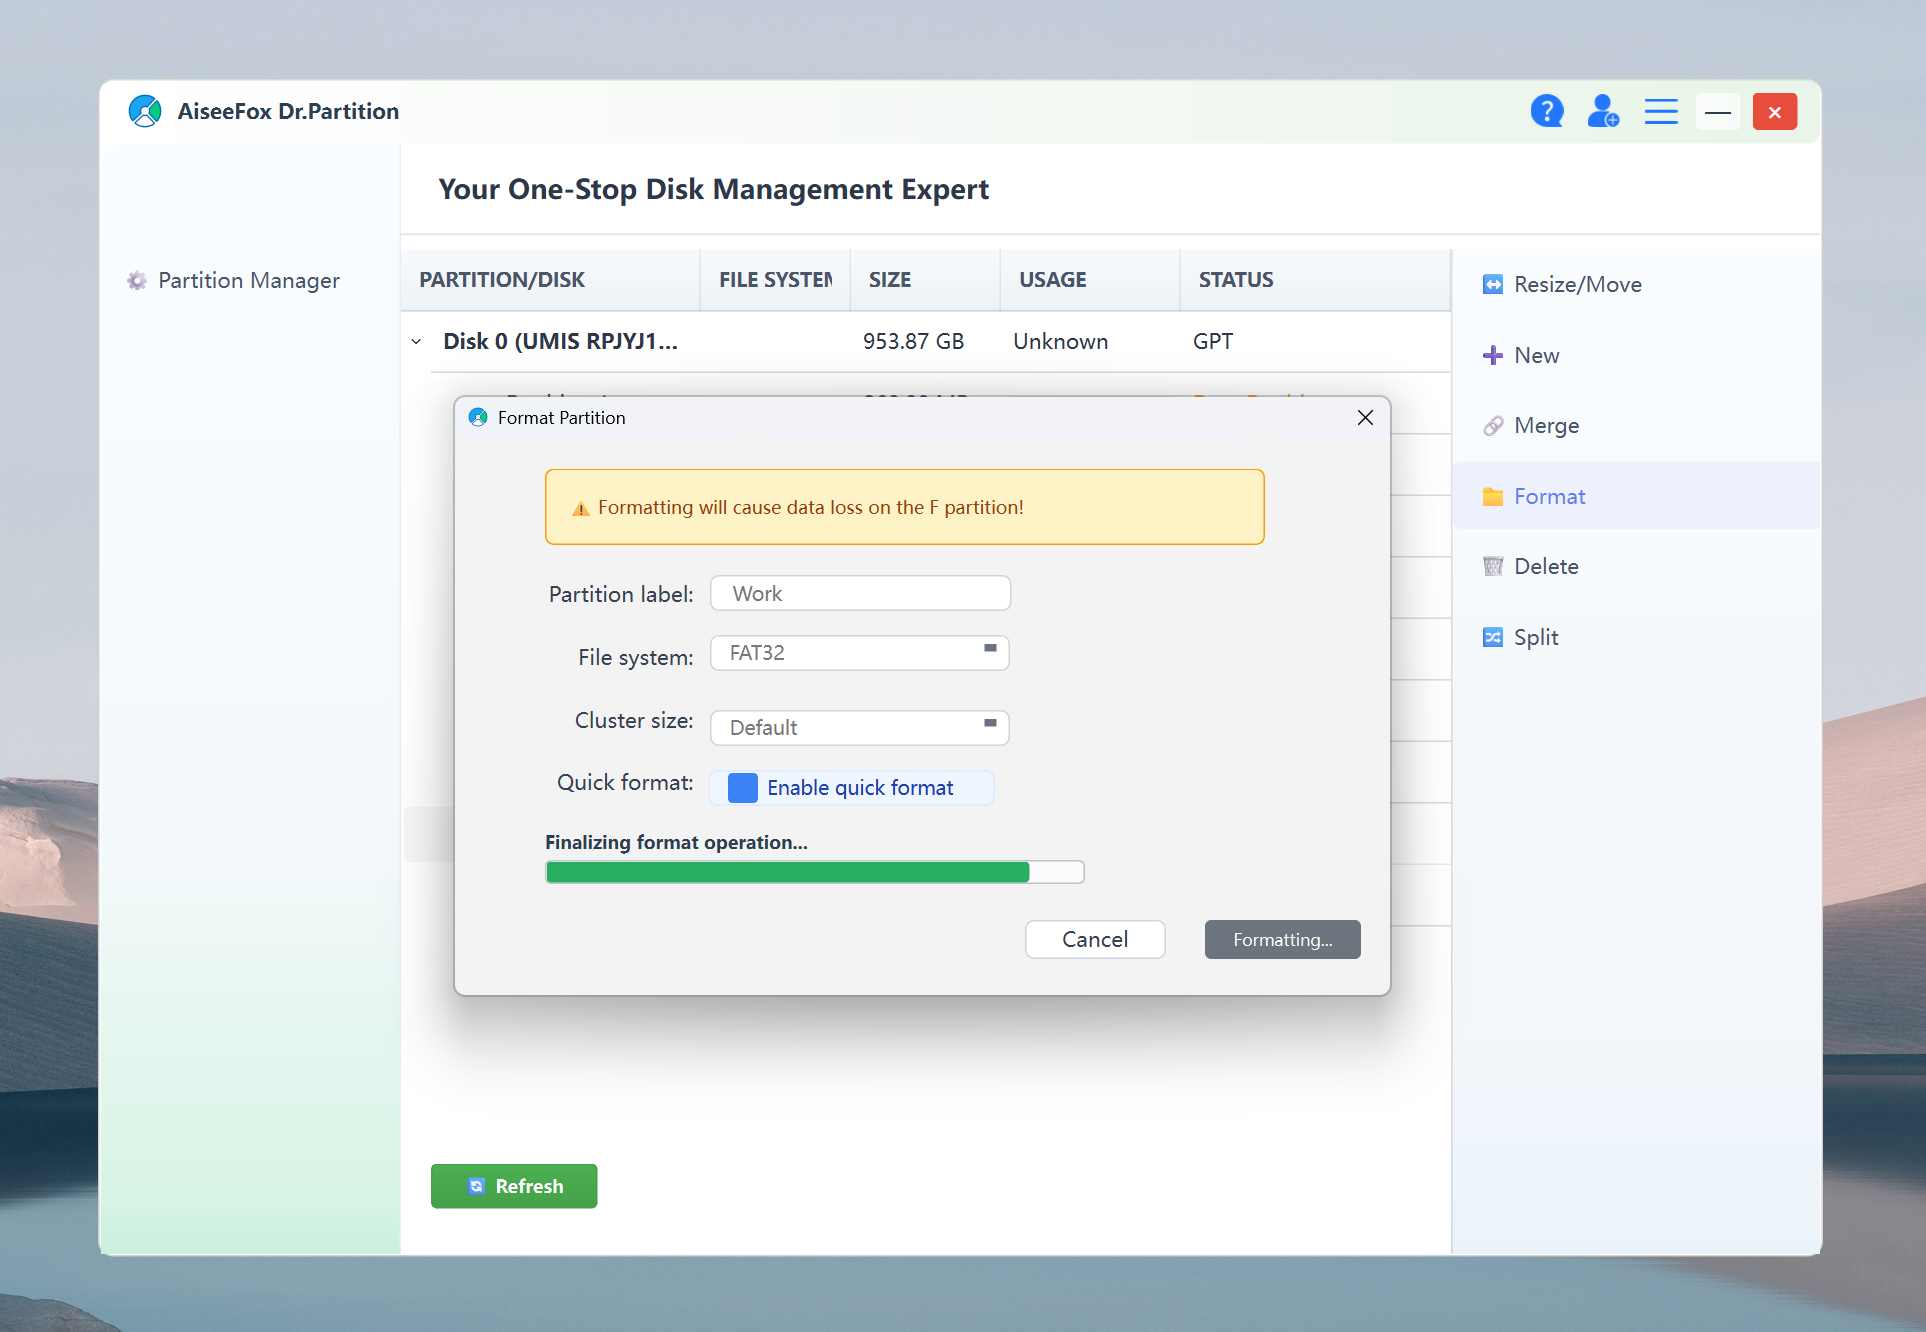
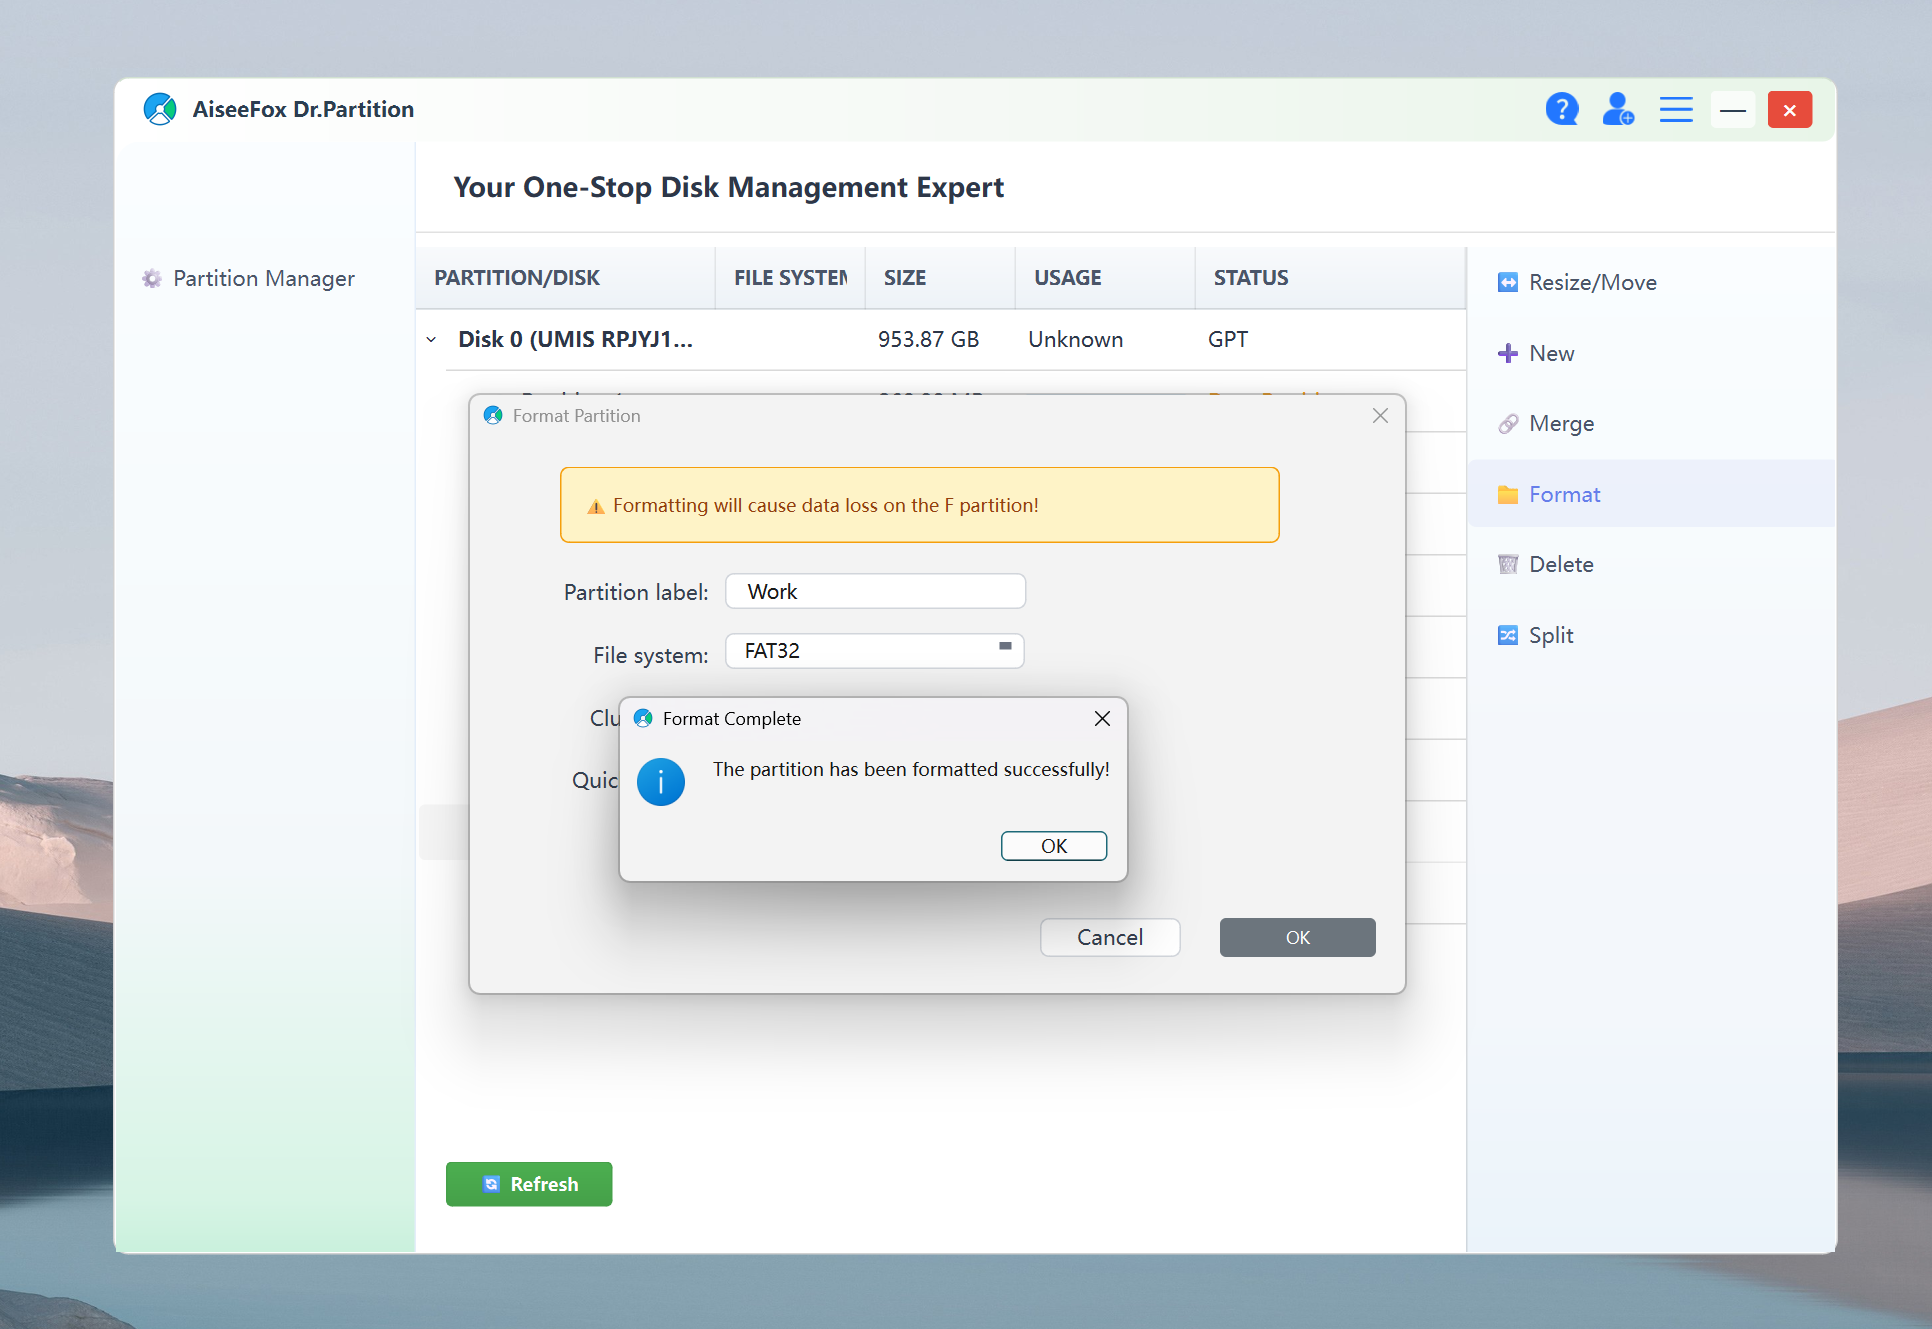
Wait a Minute… Done!
The progress bar will keep you in the loop. Once finished, your drive is FAT32 — no 32GB limits, no error codes.
I think it’s worth a try! You can download it here!
Why I Recommend Dr.Partition for This
- Handles big drives: FAT32 for 64GB, 128GB, even multi-terabyte disks — no problem.
- Modern, clean interface: Just click, choose your format, done. No tech headaches.
- Clear safety checks: Always warns you before any risky step.
- All-in-one partition tool:
Beyond FAT32 conversion, Dr.Partition does it all — resize or move partitions, merge or split them, create new partitions, format to NTFS/exFAT/FAT32, and more. It’s basically your one-stop shop for any drive management job.
If you’re looking for a reliable, efficient, and user-friendly FAT32 formatter for Windows, Dr.Partition is an excellent choice. Give it a try and enjoy hassle-free disk management for all your storage needs!