Let’s face it — most of us have more than one drive or partition these days. SSD upgrades, big externals, Windows 11, even gaming rigs with multiple disks… it’s super common to need to resize, merge, or move partitions around. The built-in Disk Management tool in Windows is… fine, but it can’t do everything (like merging or resizing without wiping data), and it’s pretty clunky.
Why Dr.Partition?
I’ve tried tons of partition tools over the years, and most are either too old-school, too limited, or packed with annoying ads. Dr.Partition is the only one I’ve actually stuck with: it’s got a clean, modern interface, isn’t bloated, and just plain works for everyday partition tasks.
What I like:
- Clean interface: All drives and partitions, visual and simple.
- No ads or junk: Real trial, no popups, no bundled nonsense.
- Handles all basics: Resize, merge, split, format — all in a couple clicks, always with clear warnings.
- Great for big drives: Works fine with huge disks and any filesystem, even FAT32 for giant USBs.
- Fast & reliable: Quick actions, no surprises, keeps you informed.
How I Use It: Quick Tutorial
Here’s what my usual workflow looks like:
1. Download and Install:
Just grab the official installer from AiseeFox, install it (needs admin rights, as any real partition tool does), and launch. Easy.

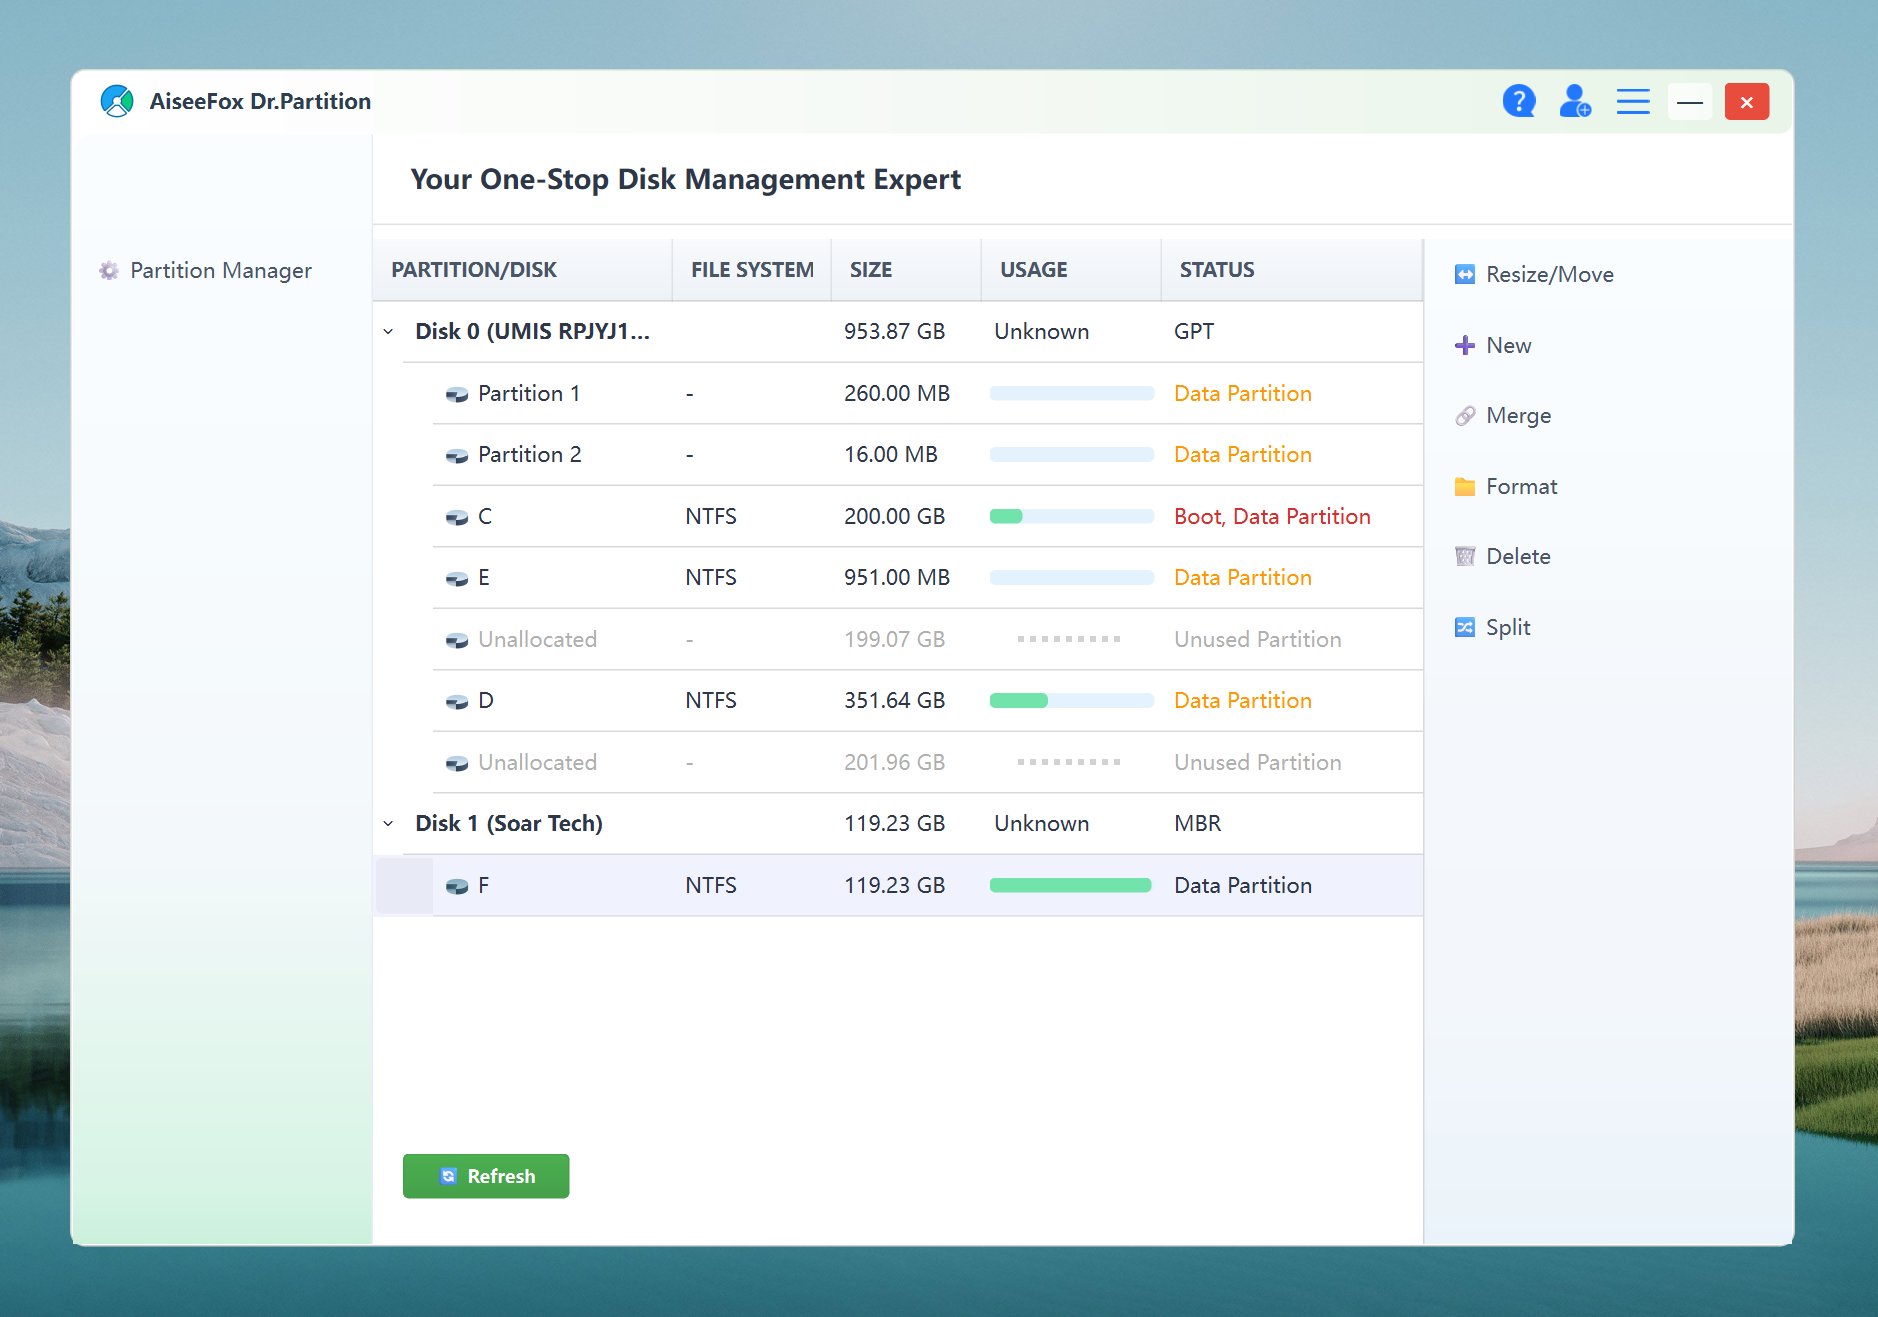
2. See Everything at a Glance:
The dashboard loads up all your disks and partitions, color-coded, with space usage bars. Super handy for a bird’s-eye view.
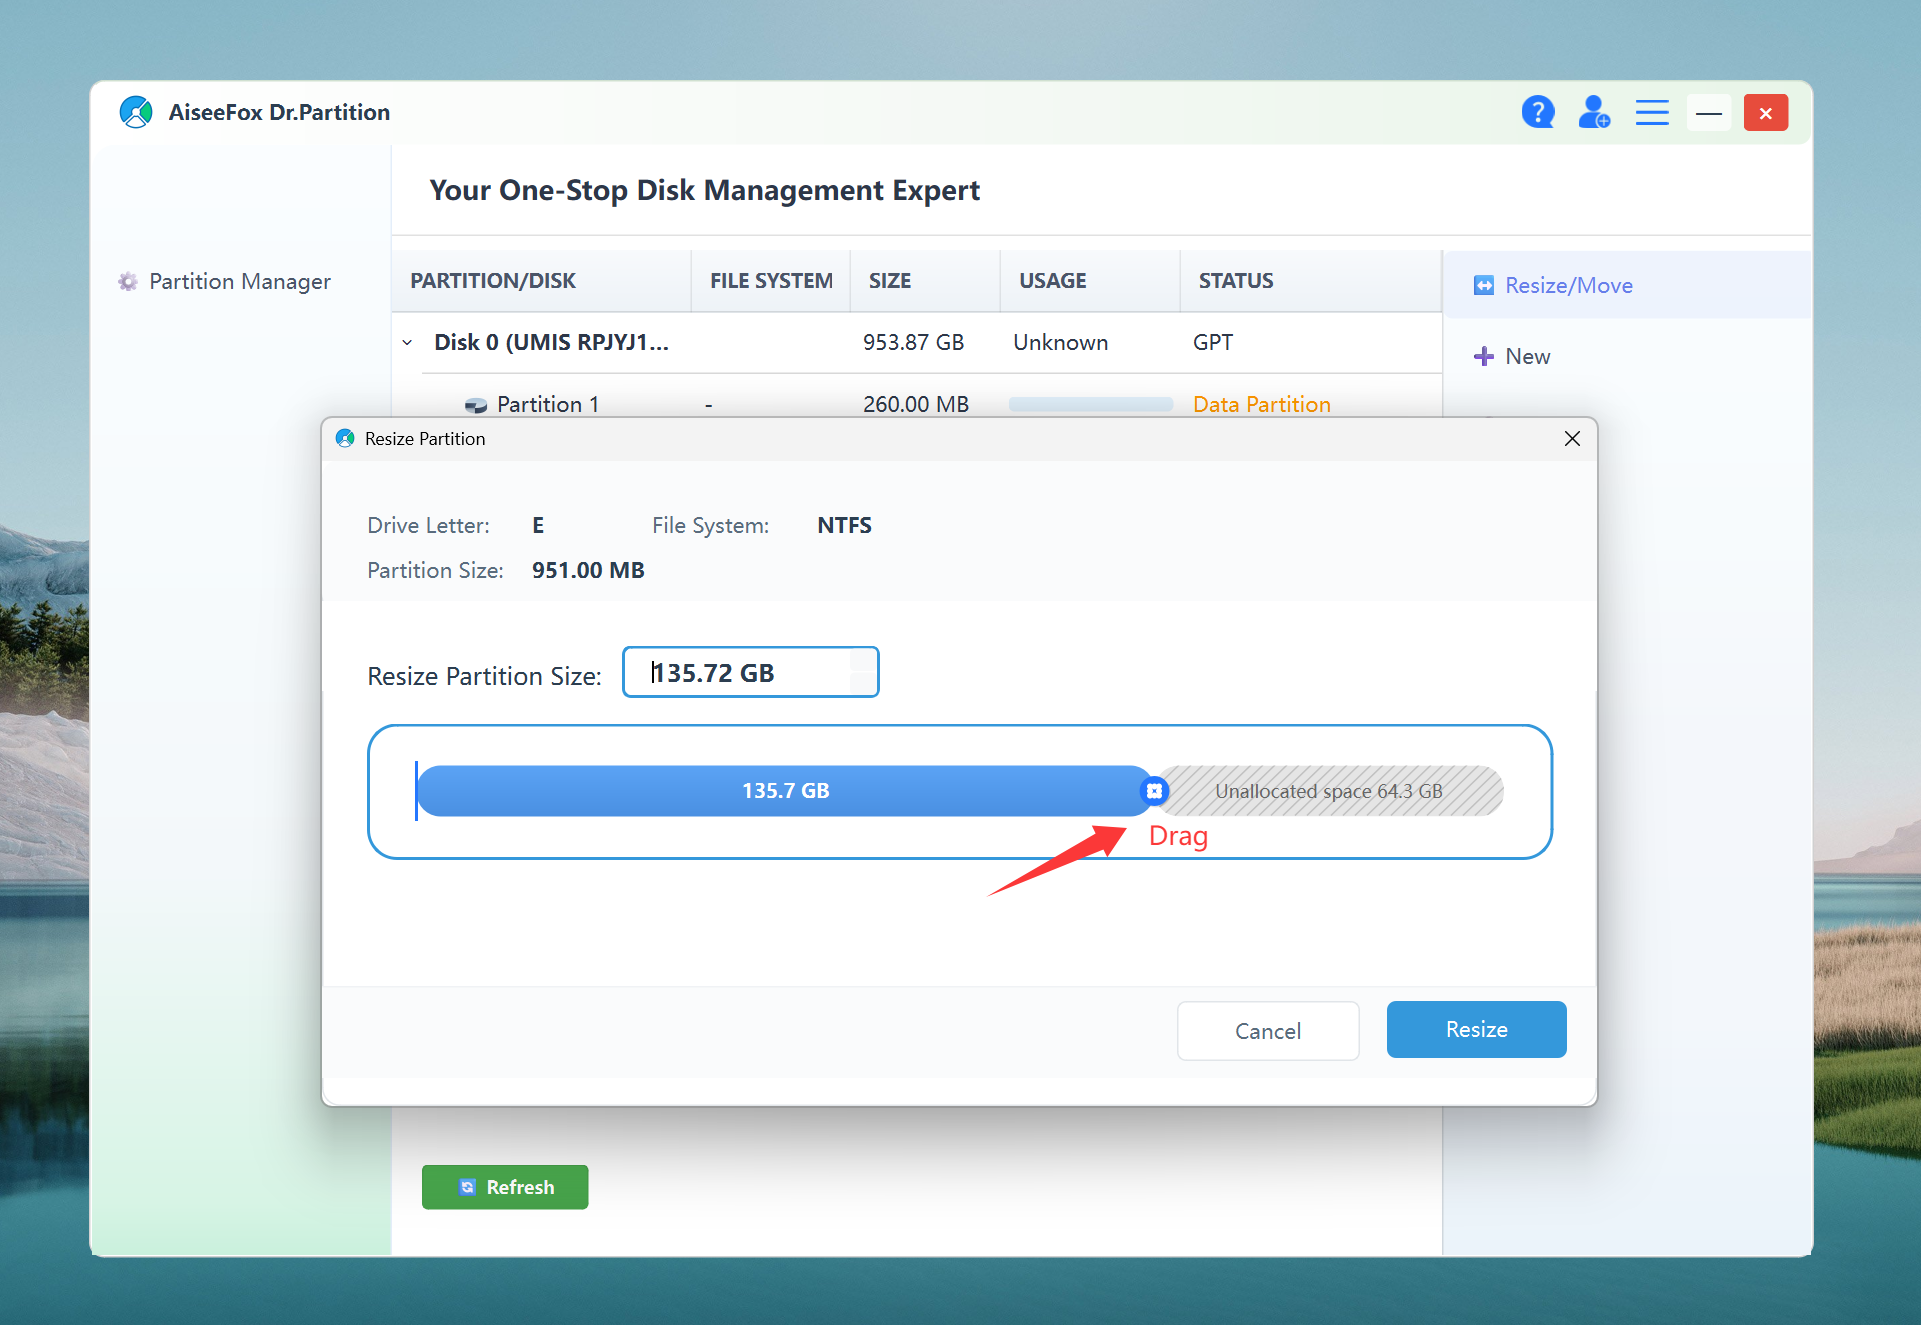
3. Resize a Partition:
Click on the partition, choose “Resize,” drag the slider, or enter the size you want. The preview updates live. Hit apply, and it handles the rest — with status and an option to cancel if you freak out.
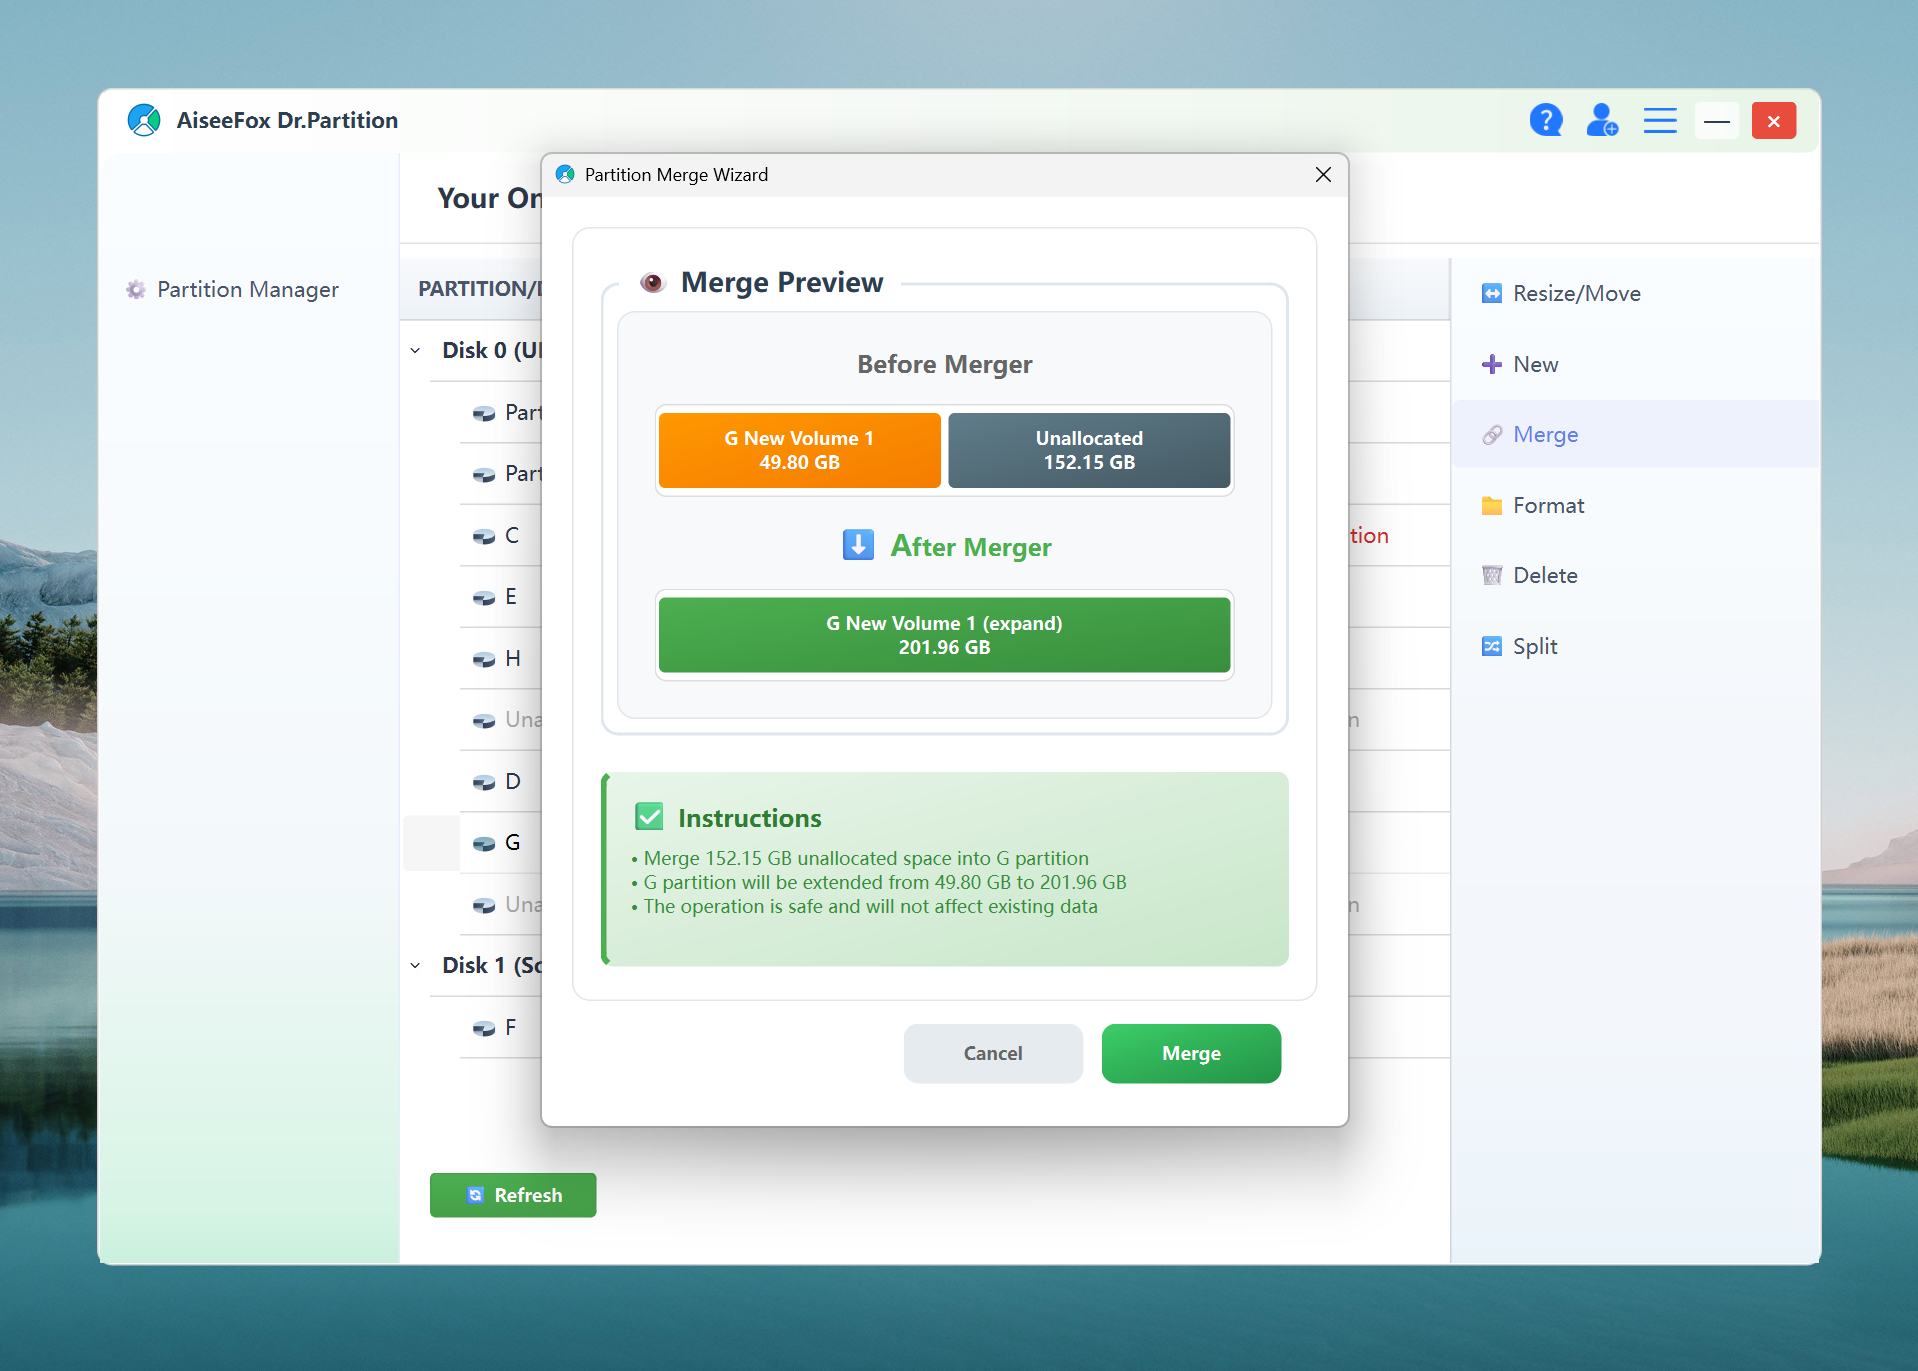
4. Merge Partitions:
Have two adjacent partitions you want to combine? Select the first, hit “Merge,” pick the target, confirm the warning (yes, it will erase one partition’s data), and off you go. Super useful for cleaning up USB sticks after too many experiments.
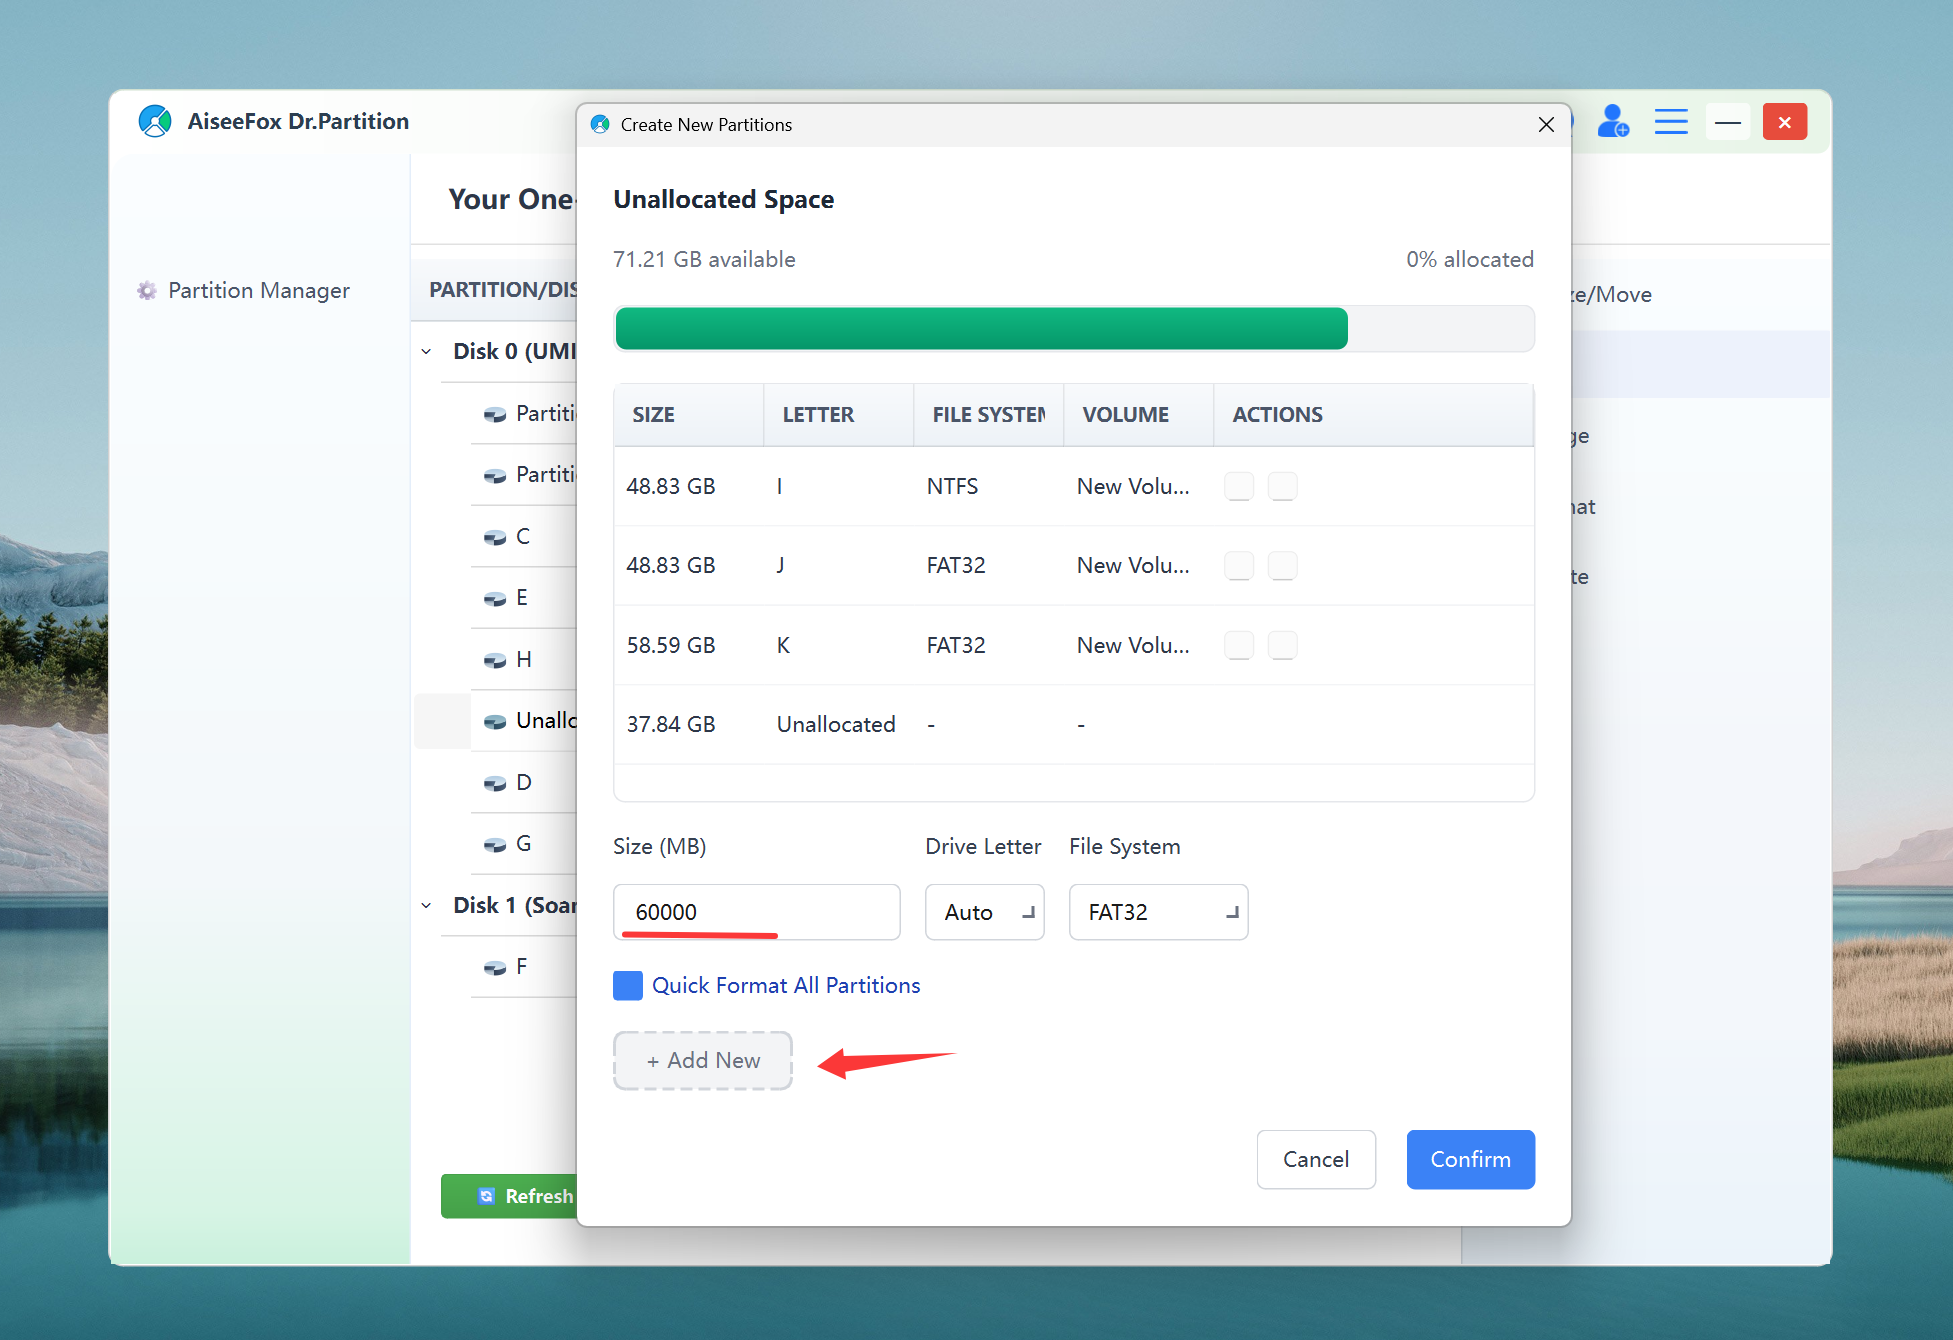
5. Create New Partitions
Adding a new partition is basically foolproof. Select unallocated space, set your size and file system, and you’re done. The tool automatically avoids mistakes and shows you exactly what’s happening.
You can download Dr.Partition here and give it a try!
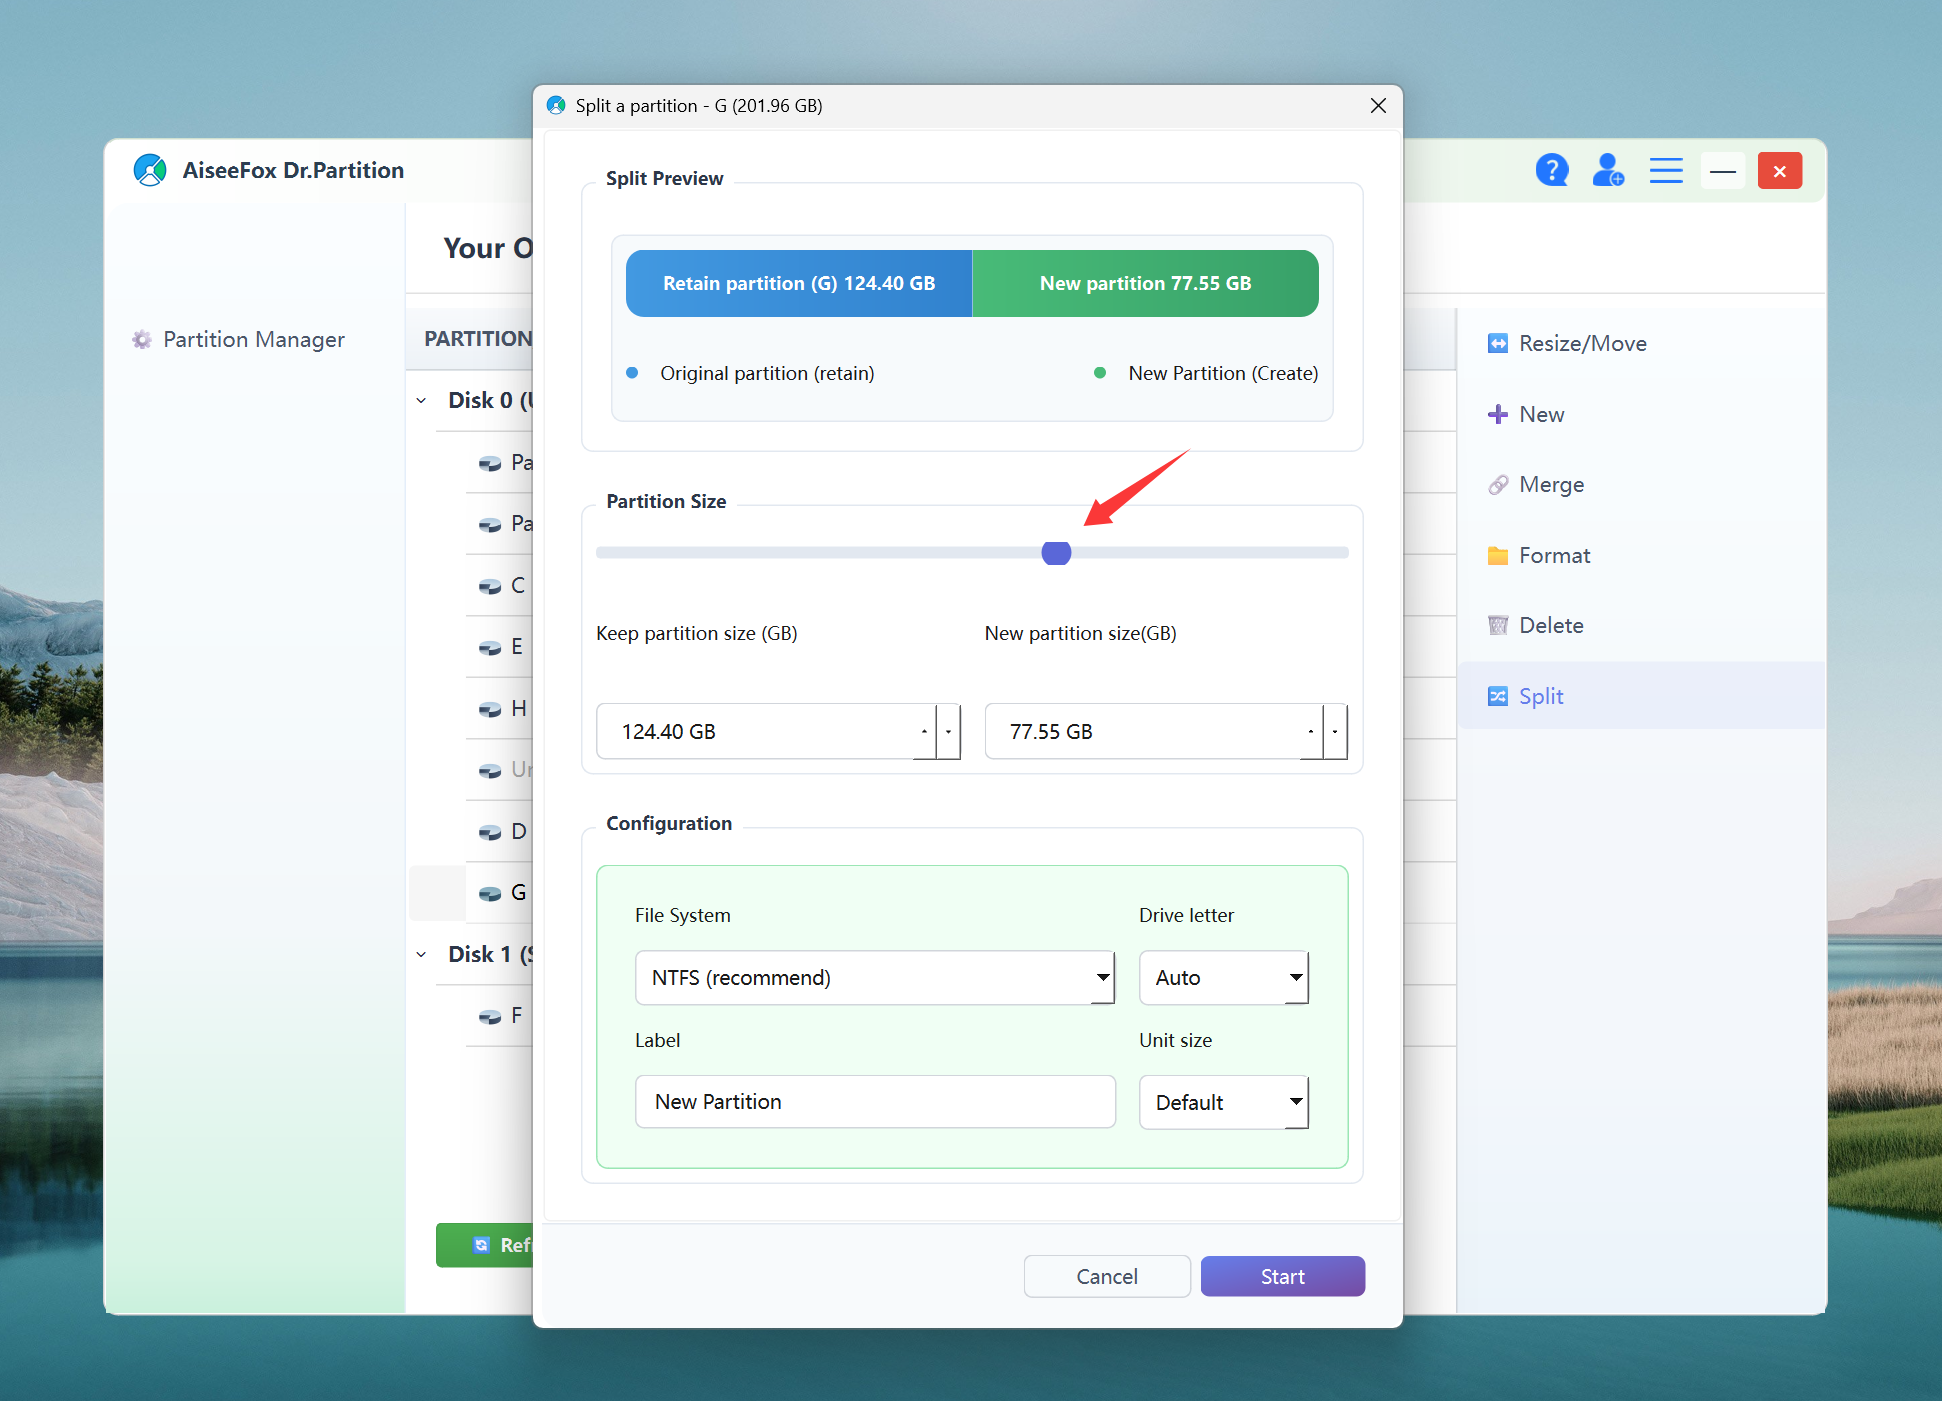
6. Split Partitions
Need to carve up a big partition into two? Dr.Partition makes this super simple — just move a slider, check the preview, and hit split. I’ve used it to reorganize my drives without having to back up or worry about data loss.
Format Partitions
Pick your format (NTFS, exFAT, FAT32), add a label, click go — done. It’s fast and always asks before erasing anything.
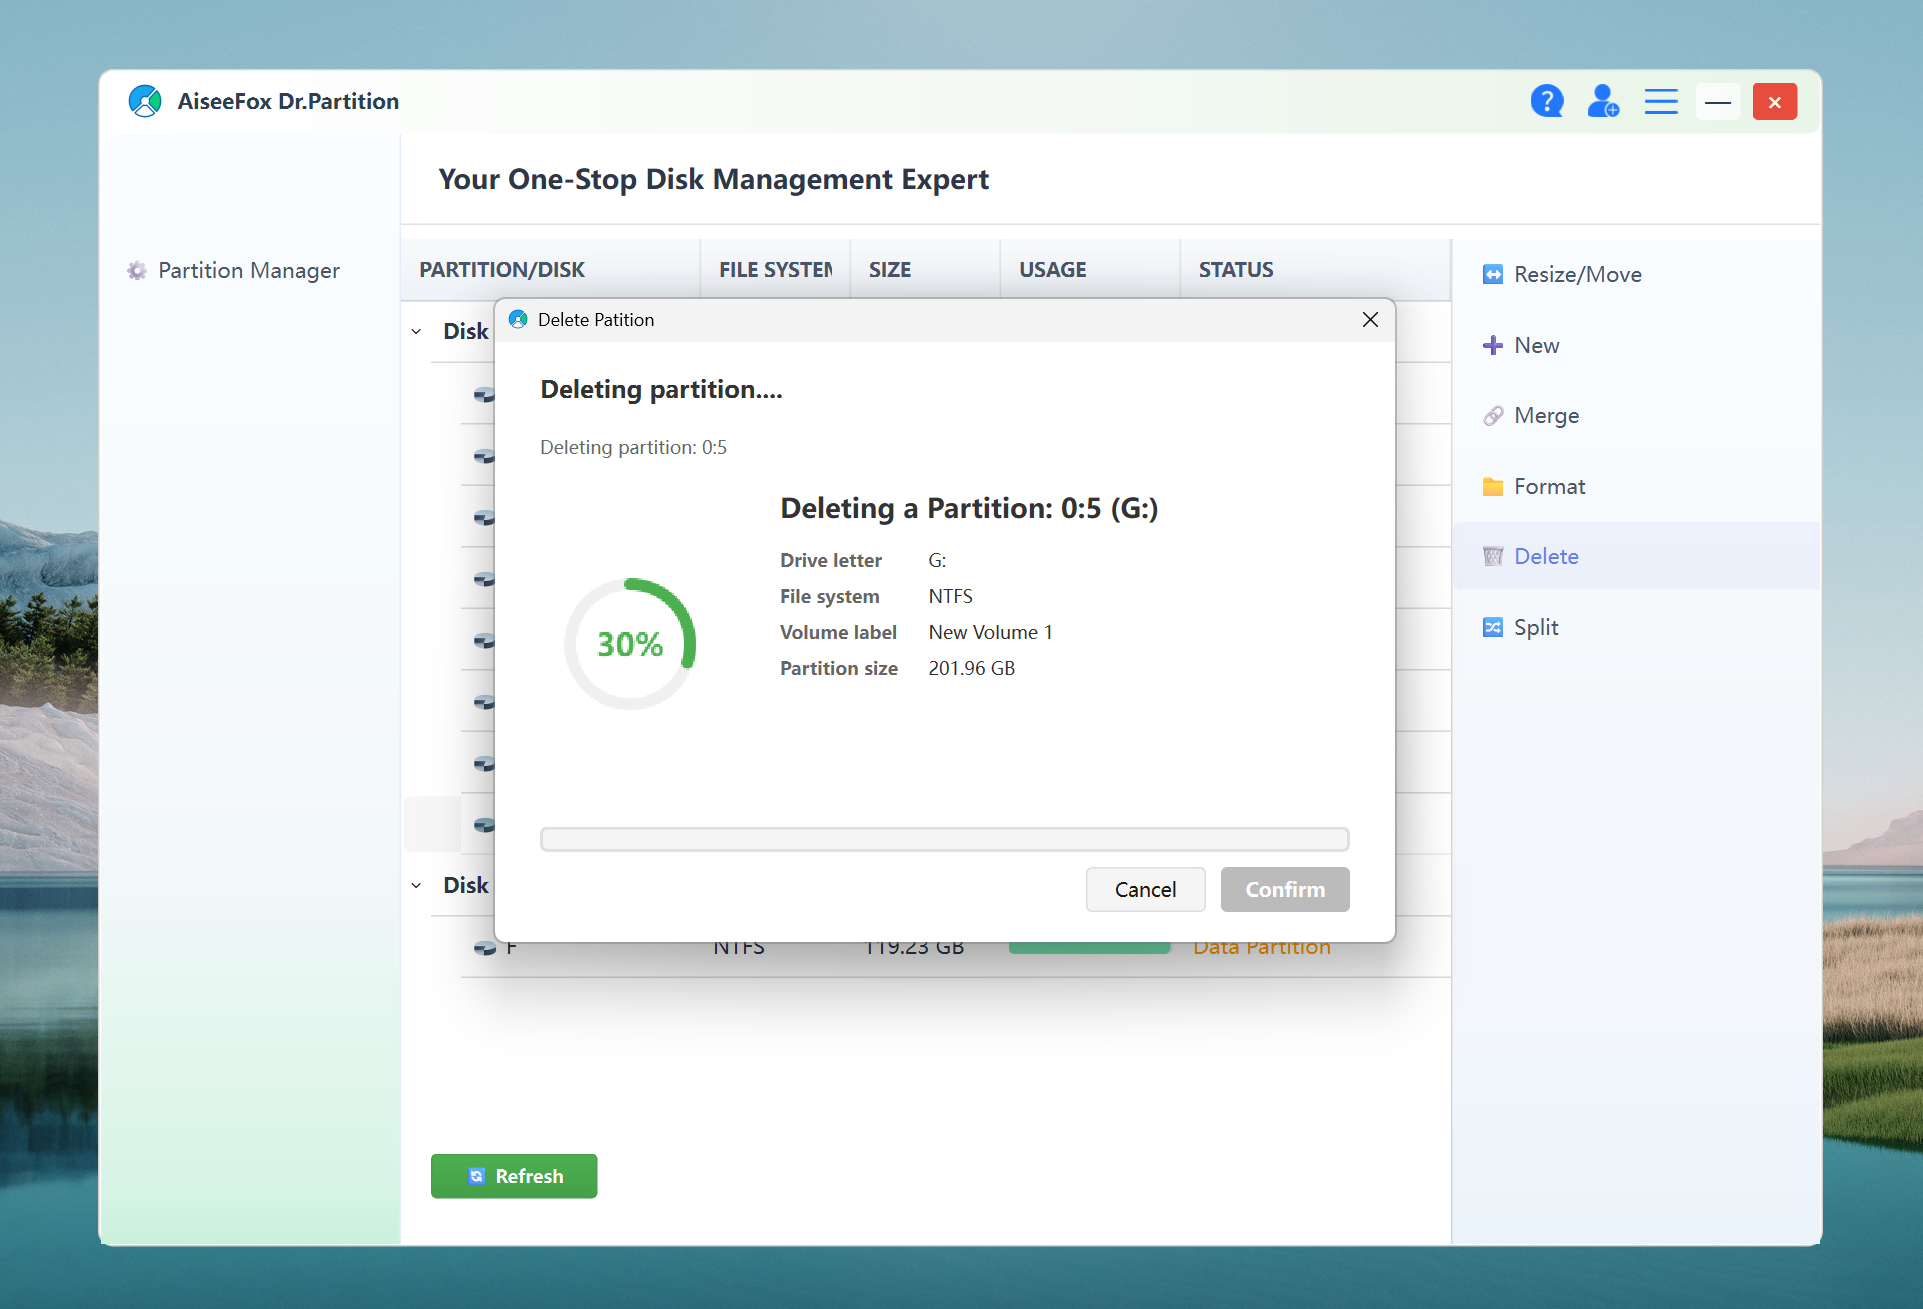
Delete Partitions
One click deletes, but Dr.Partition warns you first and shows exactly what will change. Simple, safe, no surprises.
Apply and Done:
Dr.Partition always shows a summary of pending changes, so you can check everything before hitting “Apply.” No accidental “oops” moments.
The Bottom Line
If you’re still relying on Windows Disk Management or random free tools from the internet, give Dr.Partition a shot. It’s genuinely saved me hours, especially when setting up new SSDs or reorganizing backup drives.
No ads, no fuss, and everything works as expected — can’t ask for much more in 2025.
Check it out, and if you have any questions, feel free to drop them below. Hope this helps someone avoid a partition disaster!