How to Create, Resize, Merge, Format, Delete
and Split Partition with Dr.Partition
Managing disk partitions is a critical part of maintaining a healthy and efficient Windows system. Whether you're looking to resize, merge, split, or format partitions, having a reliable and easy-to-use tool is essential. Dr.Partition is a powerful disk management software designed to simplify partition operations on Windows 11, 10, 8, and 7, as well as Windows Server. With its intuitive interface and advanced features, Dr.Partition makes it possible for both beginners and experienced users to safely manage their hard drives without risking data loss. This tutorial will guide you through the most common tasks you can perform with Dr.Partition, step by step.
Part 1. How to Create a New Partition from Disk
Creating a new partition allows you to organize your files, set up a dual-boot system, or separate personal data from system files. With Dr.Partition, the process is simple and risk-free. Follow these steps to create a new partition on your Windows PC.
Step 1Download and Launch Dr.Partition
Download, install, and open Dr.Partition. The software will automatically scan and display all connected disks and existing partitions.
Free Trial
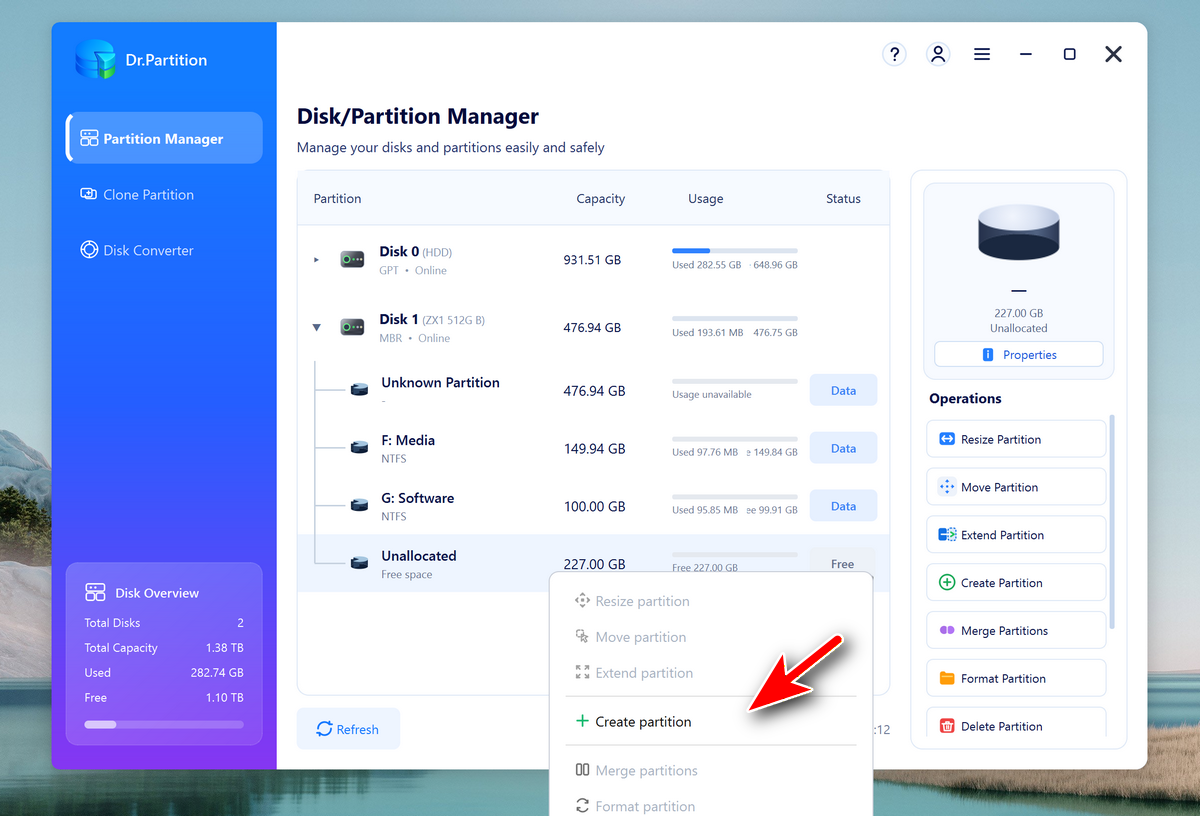
Step 2Select Unallocated Space
Find a disk with unallocated space. If there is no unallocated space, you can first shrink an existing partition by right-clicking it and choosing "Create partition ".
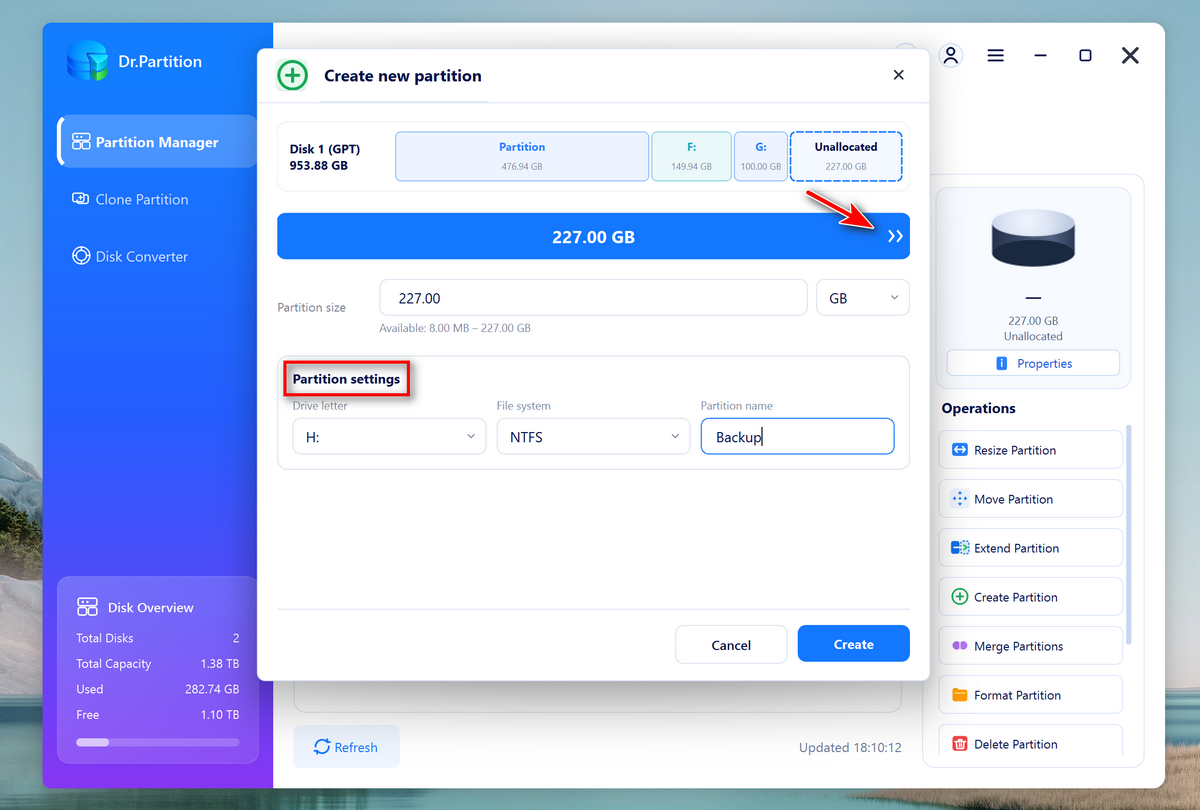
Step 3Configure Partition Settings
In the pop-up window, set the partition size by dragging the "<<" symbol and choose the file system and the volume name. When it is done, click the "Create" button.
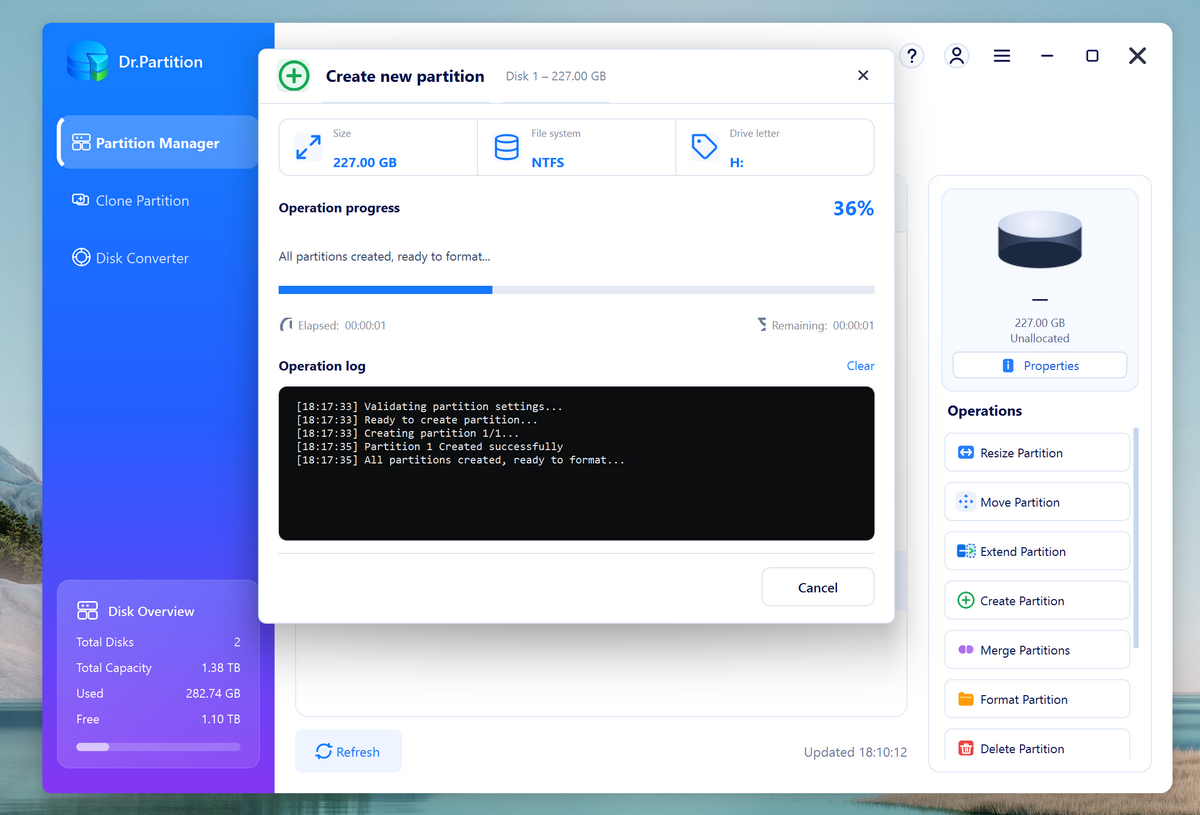
Step 4Start Creating a New Partition
Wait a few seconds and you will see the progress of creating new partition.
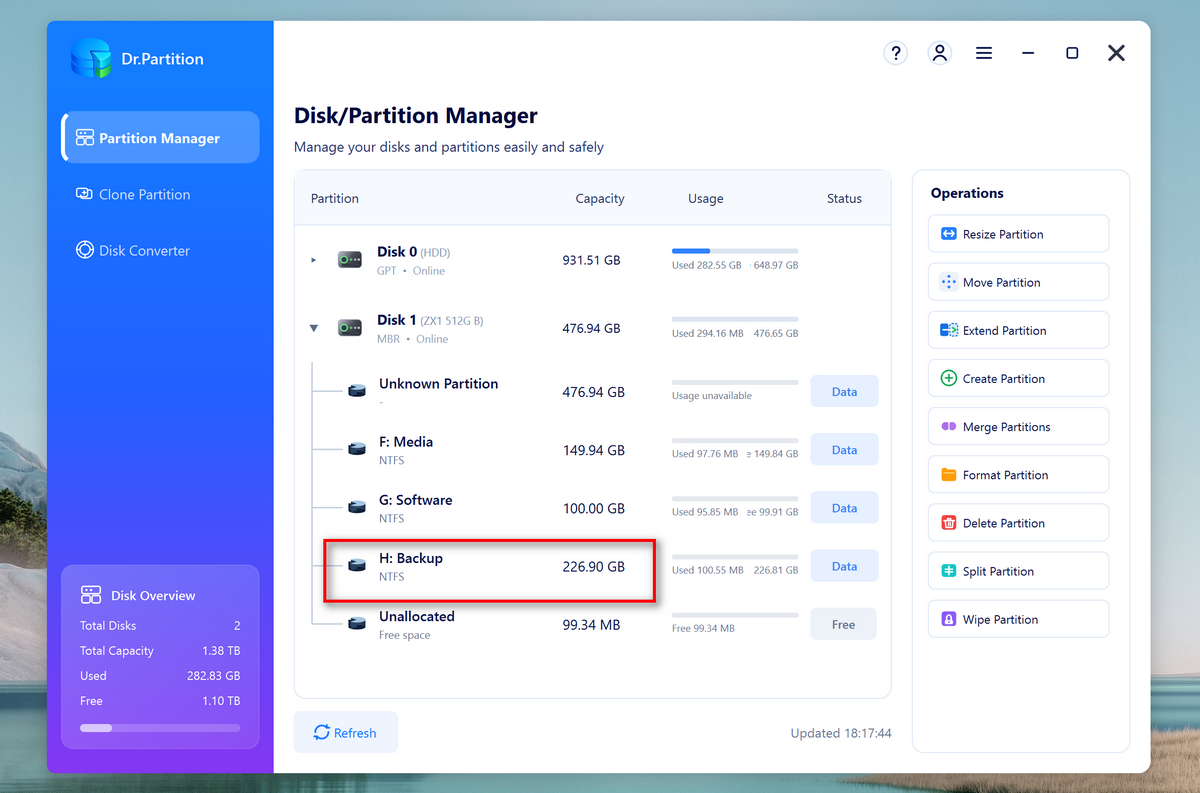
Step 5Check the Information of New Partition
When the new partition is created, the partition list will be updated automatically and you can see the information about the new partition.
 Free Trial
Part 2. How to Resize a Partition with Dr.Partition
Resizing a partition is useful when you want to free up space for another volume or extend an existing one. With Dr.Partition, you can safely resize any partition without formatting or losing data. Here's how:
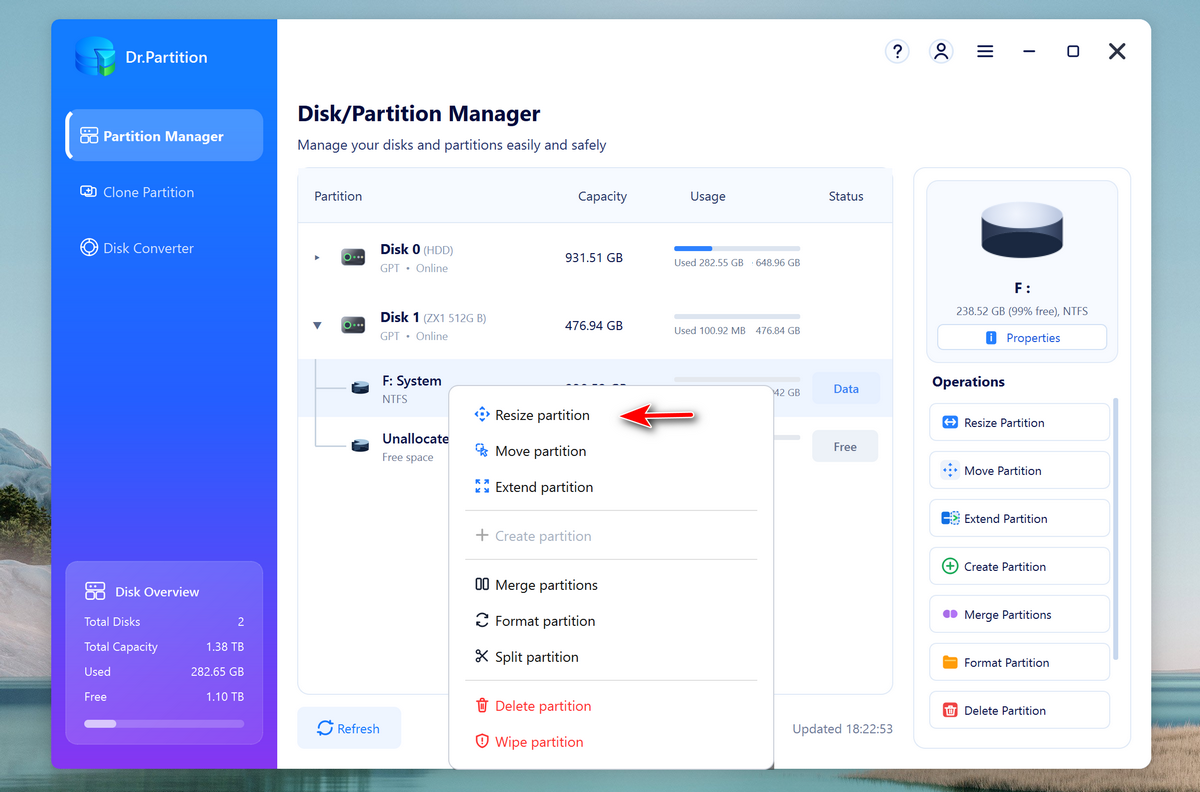
Step 1Choose the Resize Option
In the main interface, locate and select the target drive. With the F drive selected in our example, right click on it and choose the "Resize partition" option from the pop-up menu.
Step 2Start Resizing the Partition
A window will pop up. Now, you can drag and drop the circle symbol to adjust the size for target partition. You can also enter a number in the field. In our example, I am going to decrease the size of the F partition to 400 GB.
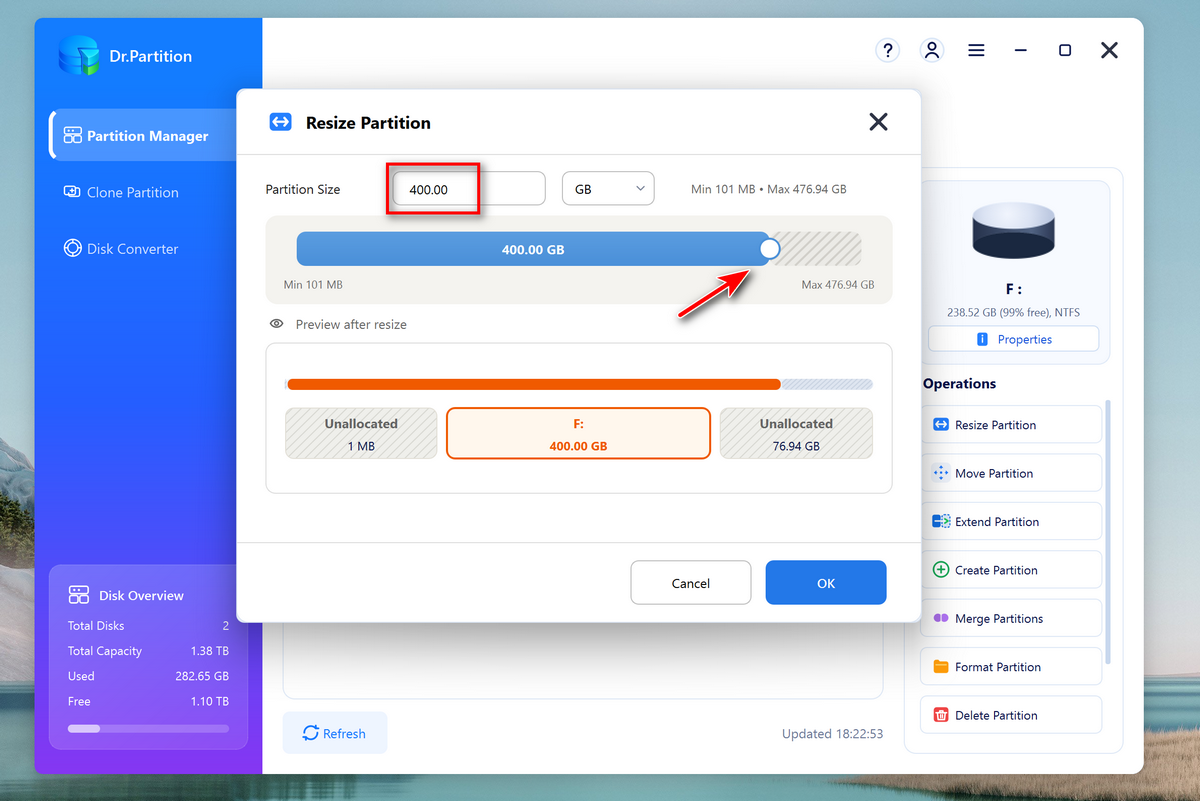
Step 3Start Resizing the Partition
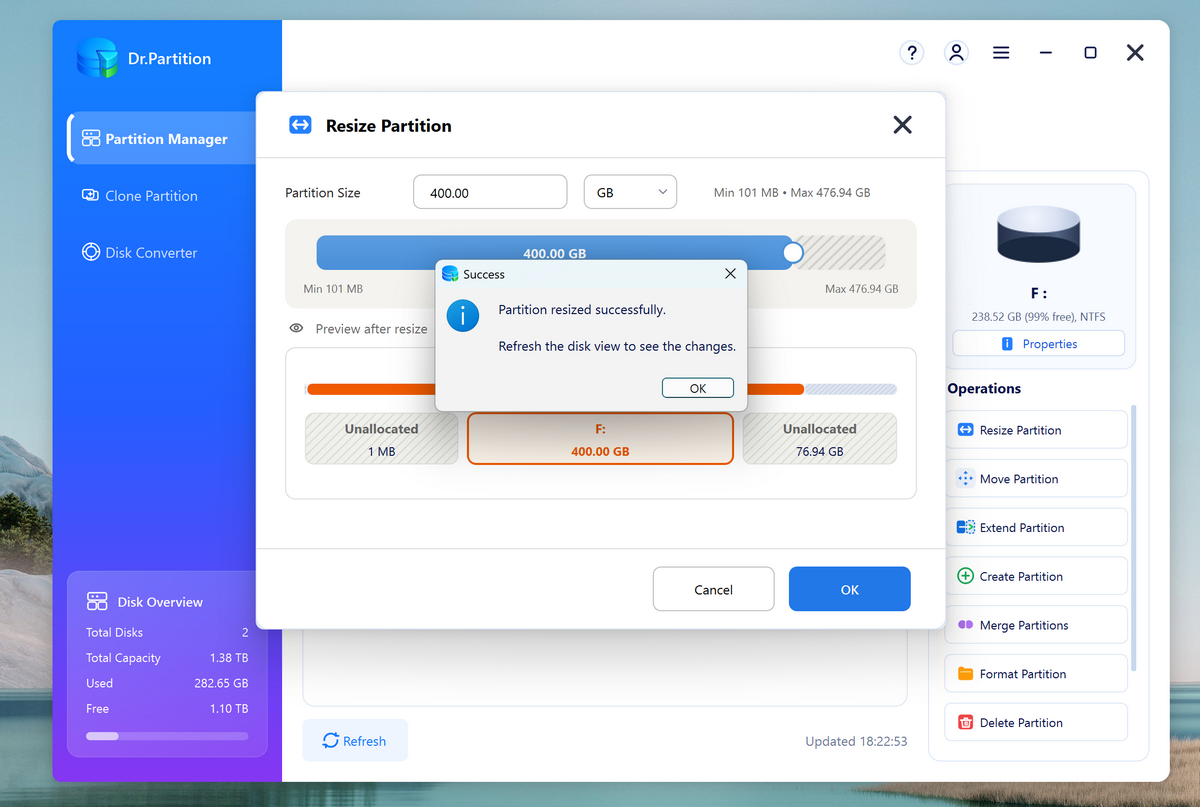
When the settings is done, click the "OK" button to proceed. Wait a few seconds and the resizing task will be done.
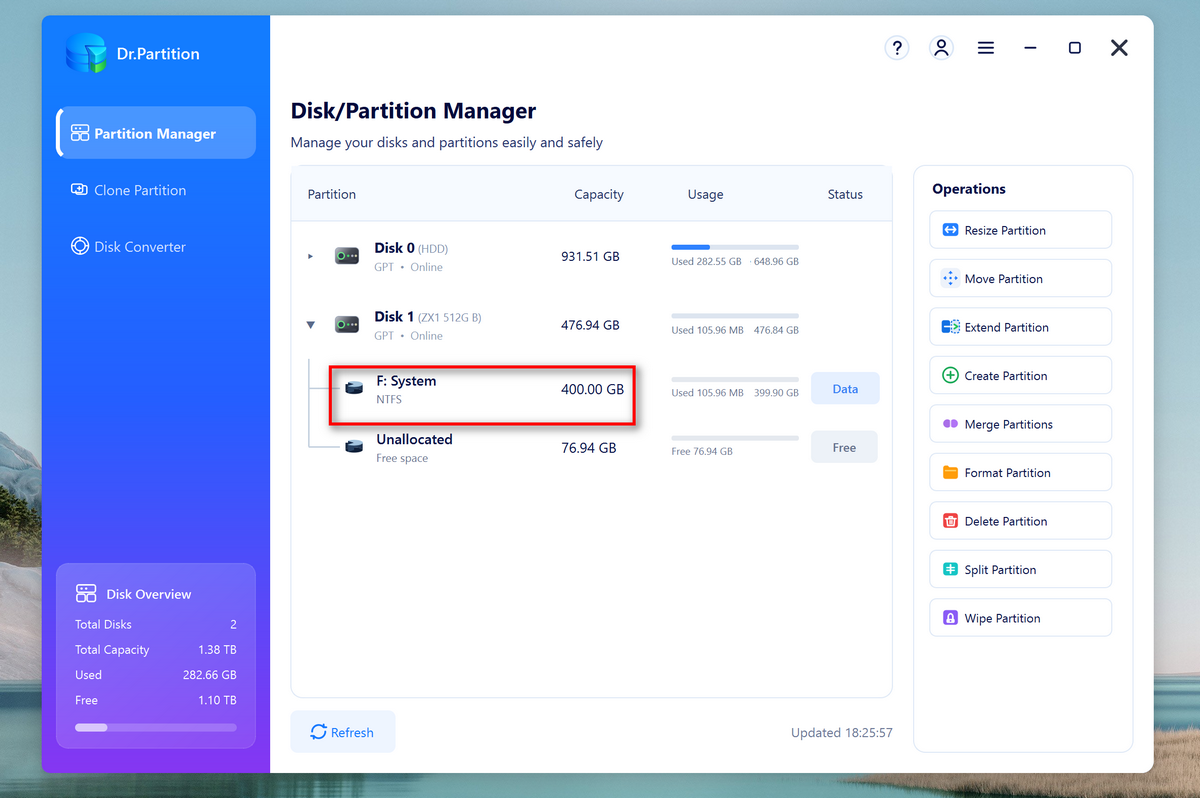
Step 5Check the Information of New Partition
When the new partition is resized, the partition list will be updated automatically and you can see the F partition was increased to 400 GB.
Part 3. How to Merge Two Partitions with Dr.Partition
Merging two partitions can help consolidate storage, especially if you're running out of space on one volume and have extra space on another. With Dr.Partition, you can merge partitions easily without losing your files. Follow these steps:
Step 1Backup the Drive (The latter One)
You need to back up the drive to get merged. For example, if you want to merge F partition with G, then you have to back up the G partition (the latter D) as it will be formatted during merge.
Step 2Start Merging Two Partitions
Right click on the targe drive and choose the "Merge partition" menu.
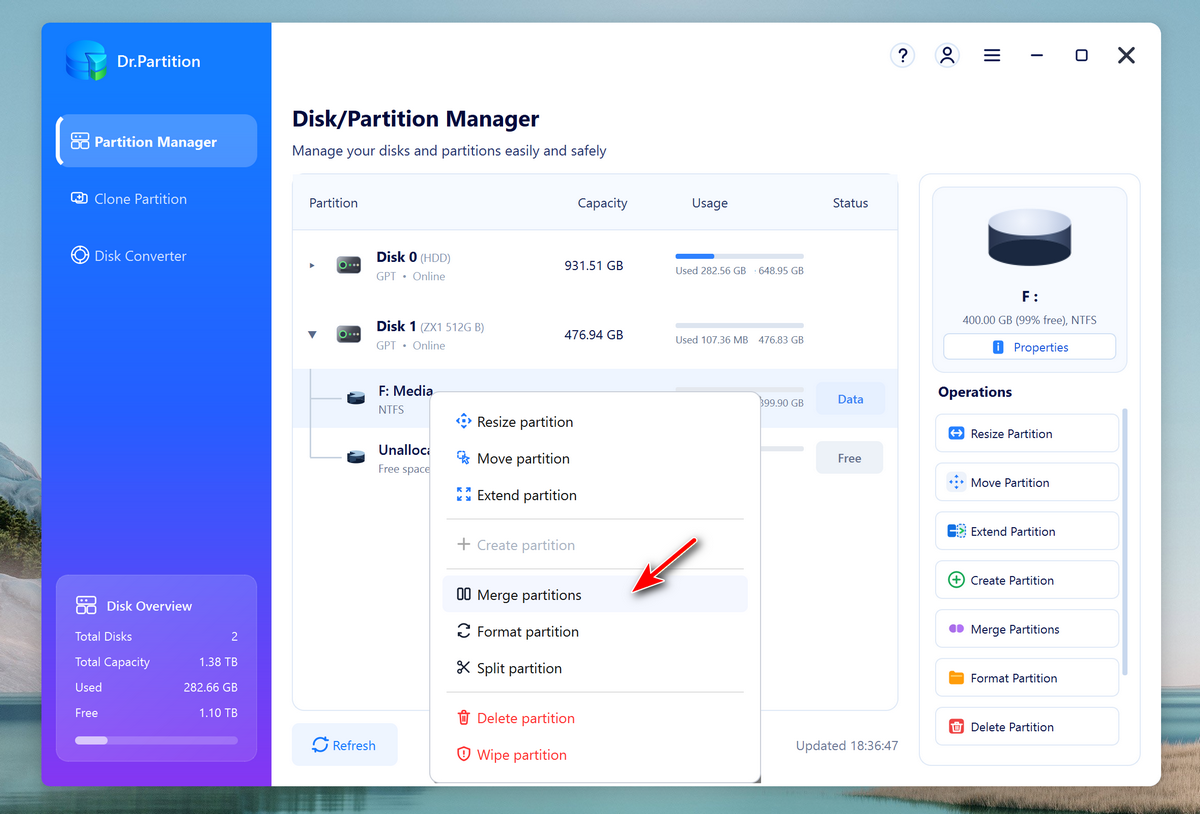
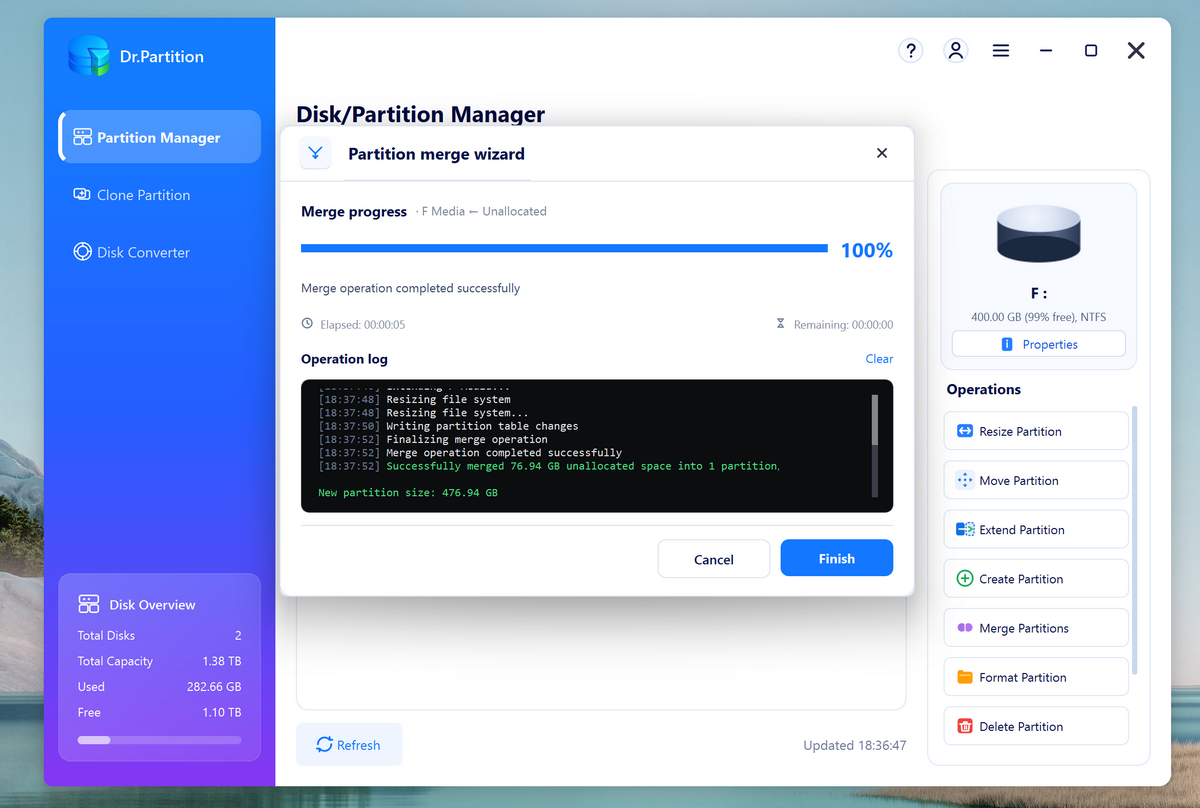
A new window will pop up and list the details for the merging operation. Please read the prompt carefully.

Once you know the details and you are fine to go, then click the "Merge" button at the bottom to start merging the two partitions.
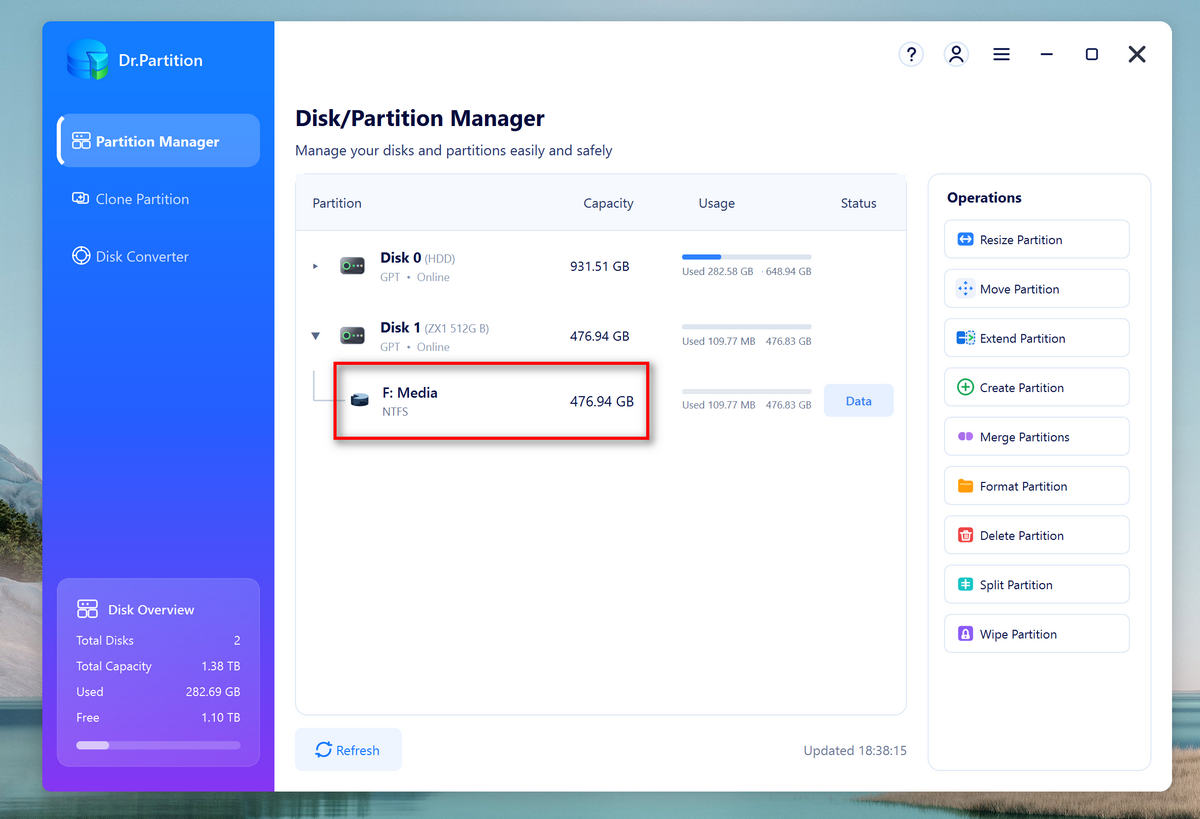
Step 3Check the Information of New Partition
The partition list will be refreshed automatically after merging operation is completed. Now, you can see the merged new partition has been increased to 476 GB.
Conclusion
With Dr.Partition, managing your disk partitions is no longer a complex or risky process. From extending your system drive to organizing data across multiple partitions, this tool provides a safe and user-friendly solution for all your disk management needs. Whether you're optimizing storage or preparing a drive for a new OS installation, following this tutorial ensures that every operation is done efficiently and without data loss. Take full control of your drives with confidence—thanks to the power and simplicity of Dr.Partition.

Mateo Ryan
Mateo is a senior editor at Aiseefox and lifelong tech enthusiast with over a decade of experience writing thousands of articles about Windows and macOS. Beyond writing, Mateo enjoys creating short explainer videos, gaming and exploring animated shows.
💬 Reviews