
AiseeFox iFixMate helps you troubleshoot common iPhone and iPad system issues, upgrade to a supported newer iOS version, or downgrade to an earlier version when compatible firmware is available. This guide covers all three functions, including a six-step illustrated repair walkthrough.
What Can You Do with iFixMate?
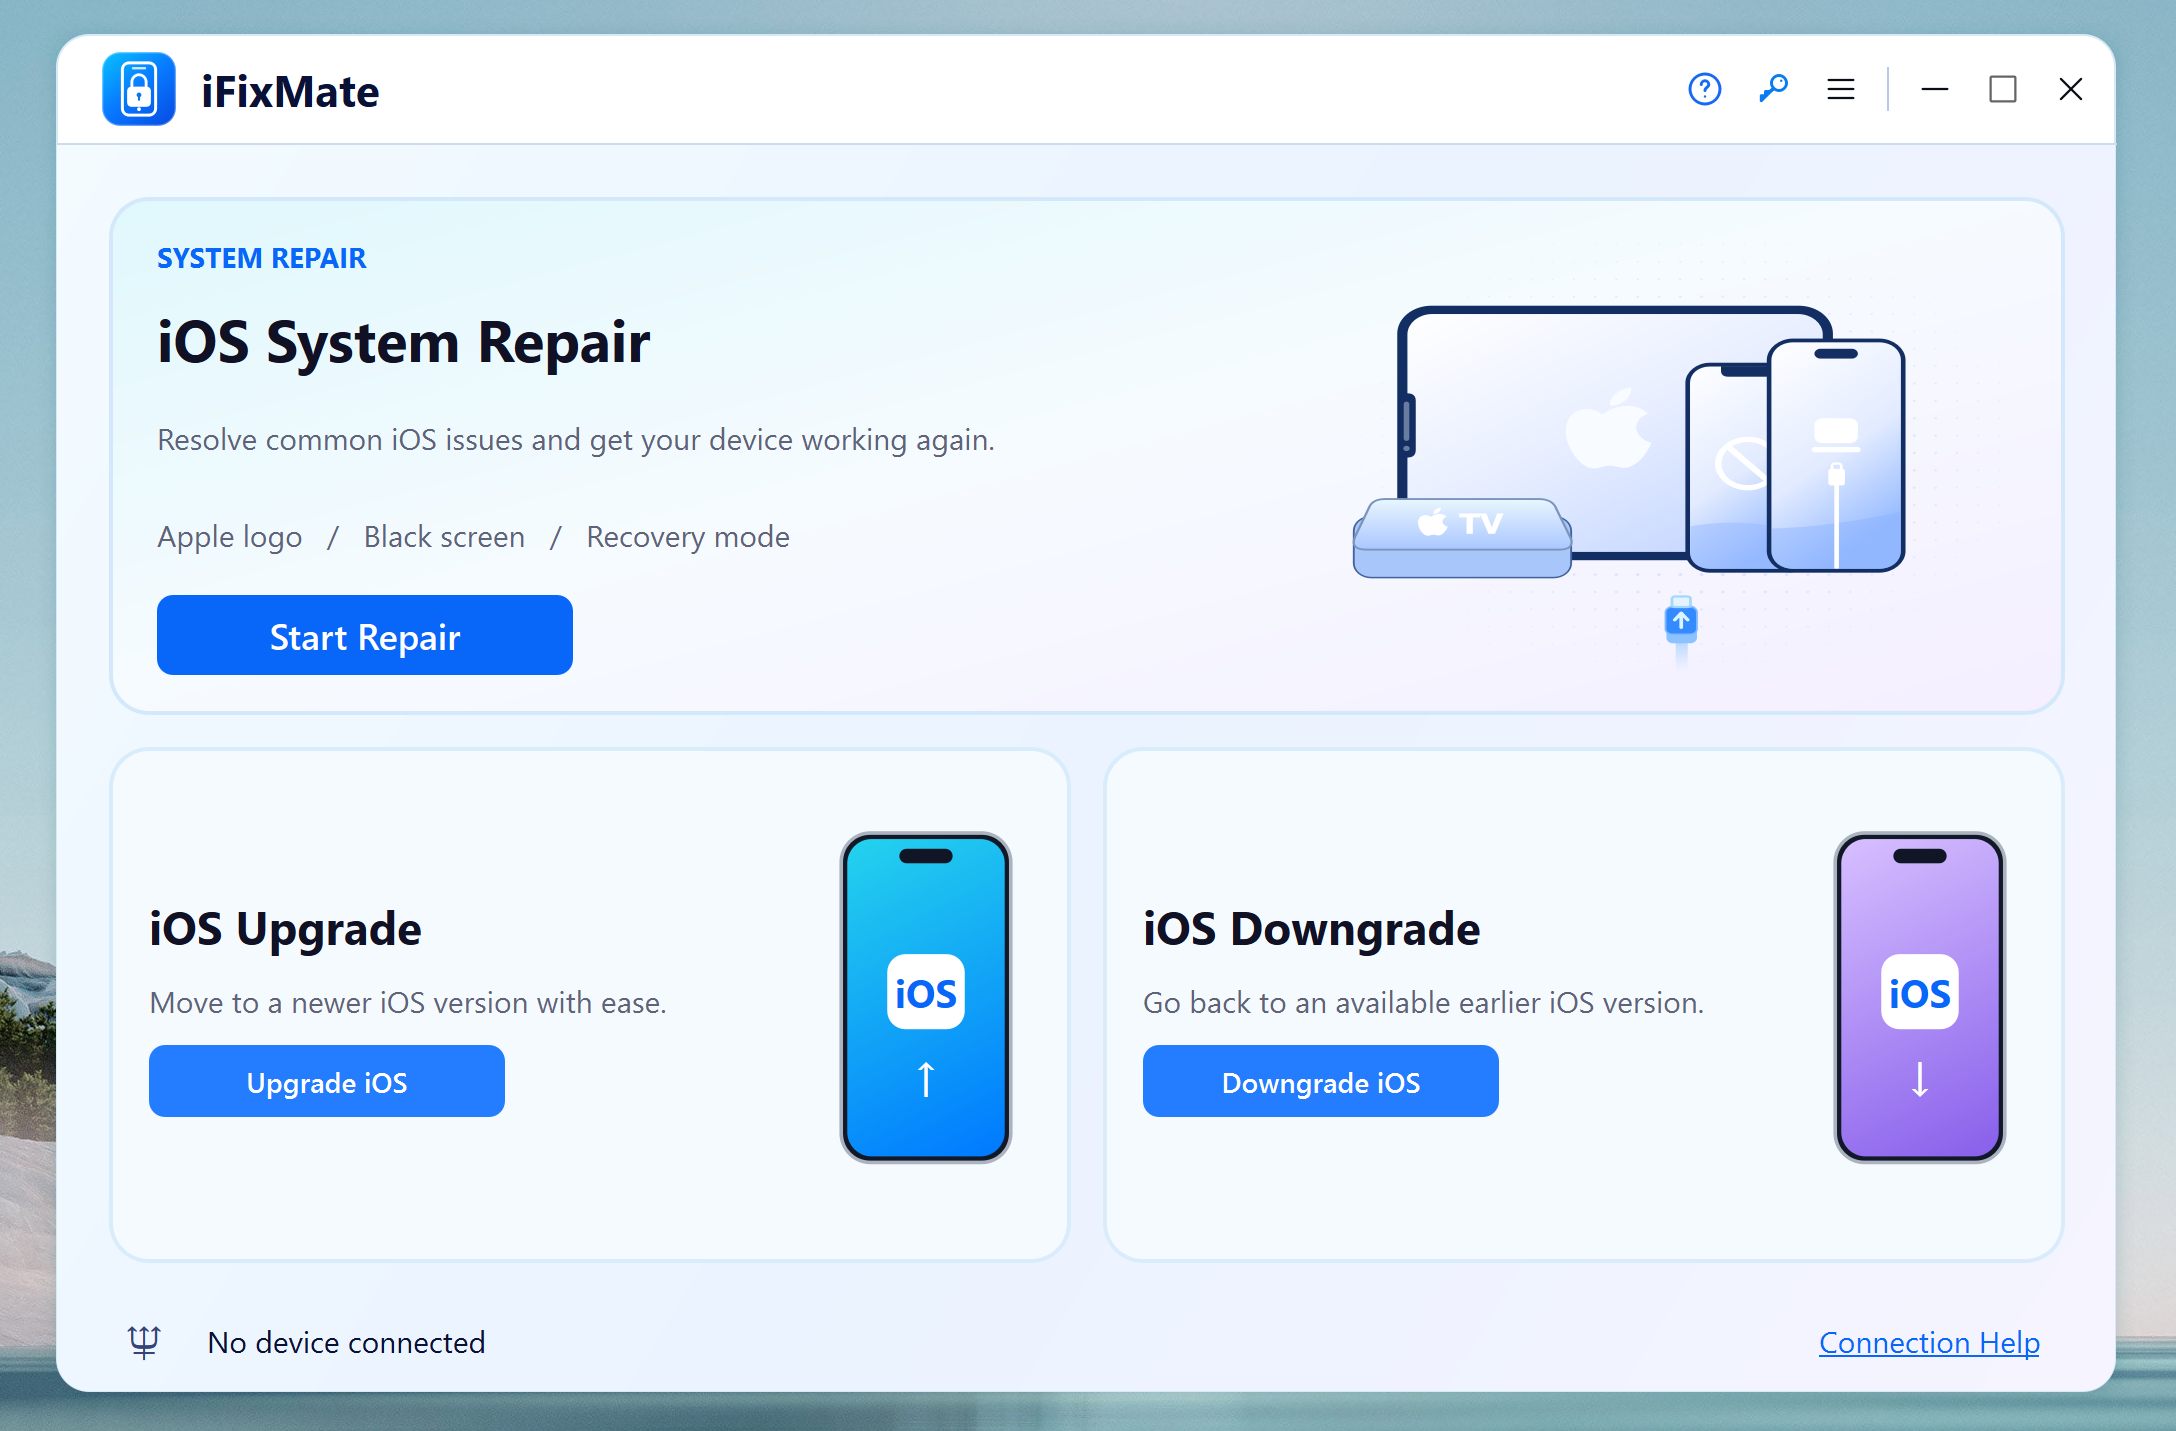
iOS System Repair: Troubleshoot an iPhone or iPad stuck on the Apple logo, frozen on a black screen, trapped in a restart loop, or stuck in Recovery Mode. Choose Standard Repair first to attempt a repair without erasing data.
iOS Upgrade: Select iOS Upgrade on the home screen to move to a newer compatible iOS version. iFixMate guides you through selecting and installing the available firmware.
iOS Downgrade: Select iOS Downgrade to check whether an earlier compatible, Apple-signed iOS version can be installed. Downgrades are not available for every device or version and may erase data.
Before You Start
Prepare your iPhone or iPad, a compatible USB cable, a Windows PC or Mac, and a stable internet connection. Back up your data before any repair, upgrade, or downgrade. Keep the device connected while firmware is installed.
Important: Standard Repair is intended to preserve device data, but this is not guaranteed. Advanced Repair erases data. Upgrades and downgrades can also involve data loss; restore options and firmware signing depend on the device and version. An older iOS version cannot be installed just because its firmware file is available.
Part 1: How to Repair iOS System Issues in 6 Steps
Use these steps for supported issues such as an Apple logo freeze, black screen, boot loop, or Recovery Mode problem. The six screenshots illustrate the repair workflow; the upgrade and downgrade workflows are explained separately below.
Step 1Install Software and Connect iPhone
Download and install iFixMate on your Windows PC or Mac. Connect the iPhone or iPad using a USB cable, open iFixMate, and choose iOS System Repair.
Free Trial Free Trial
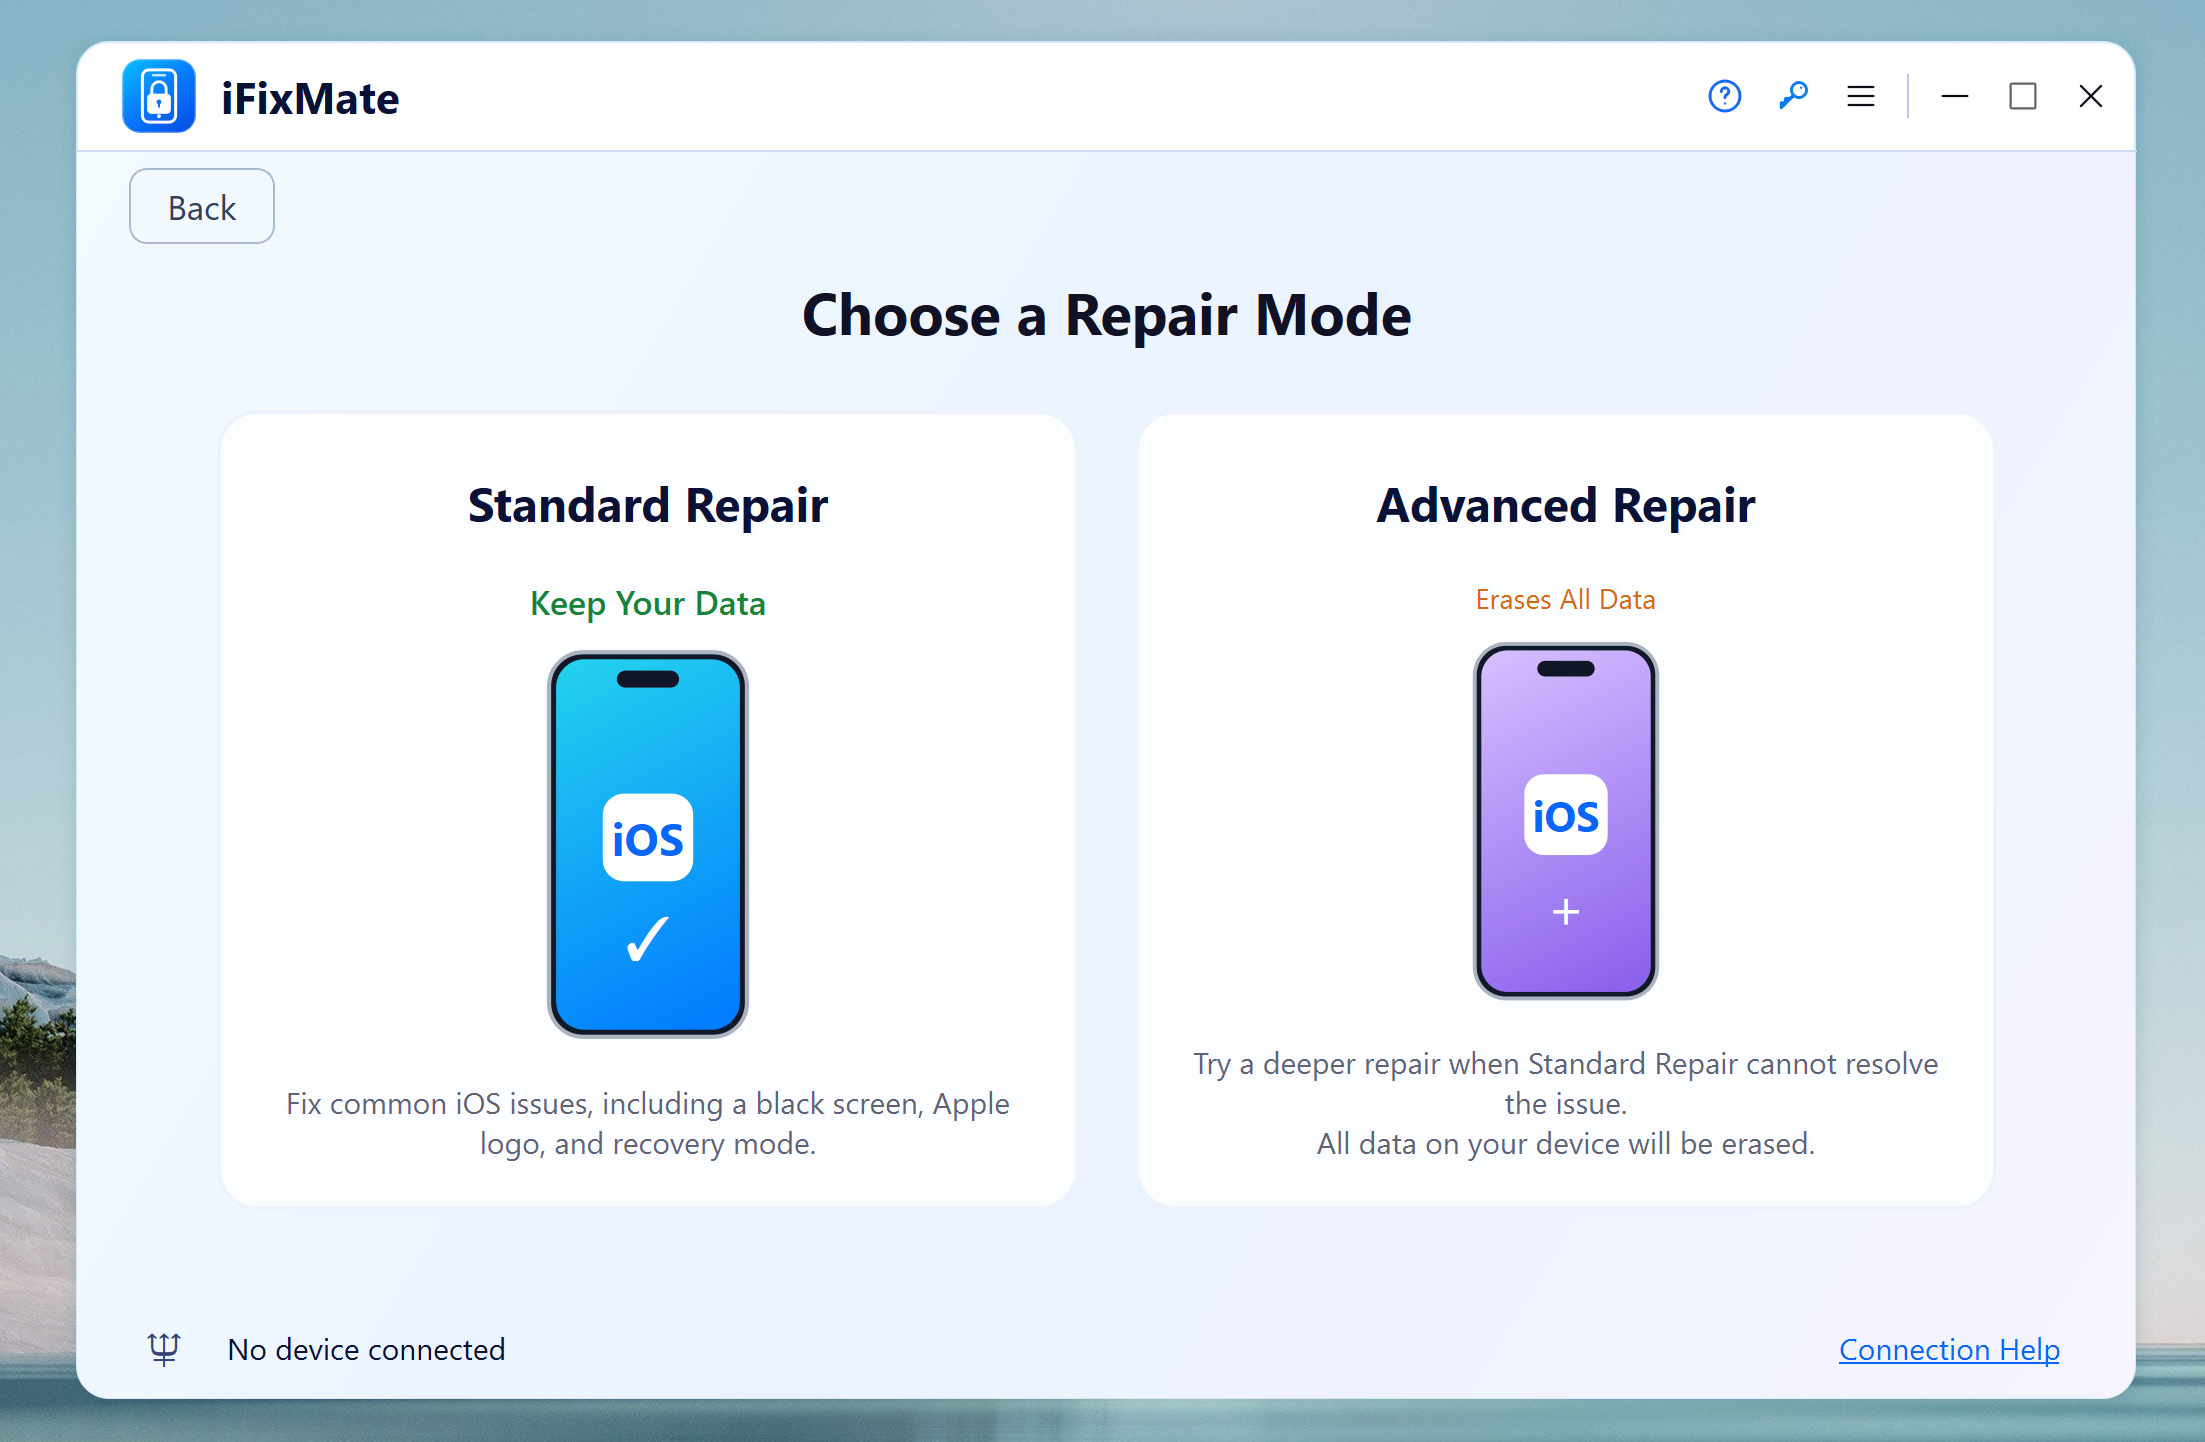
Step 2Choose a Repair Mode
Choose Standard Repair to attempt to fix common system problems while preserving data. If that does not work, Advanced Repair offers a deeper reset but erases the device.
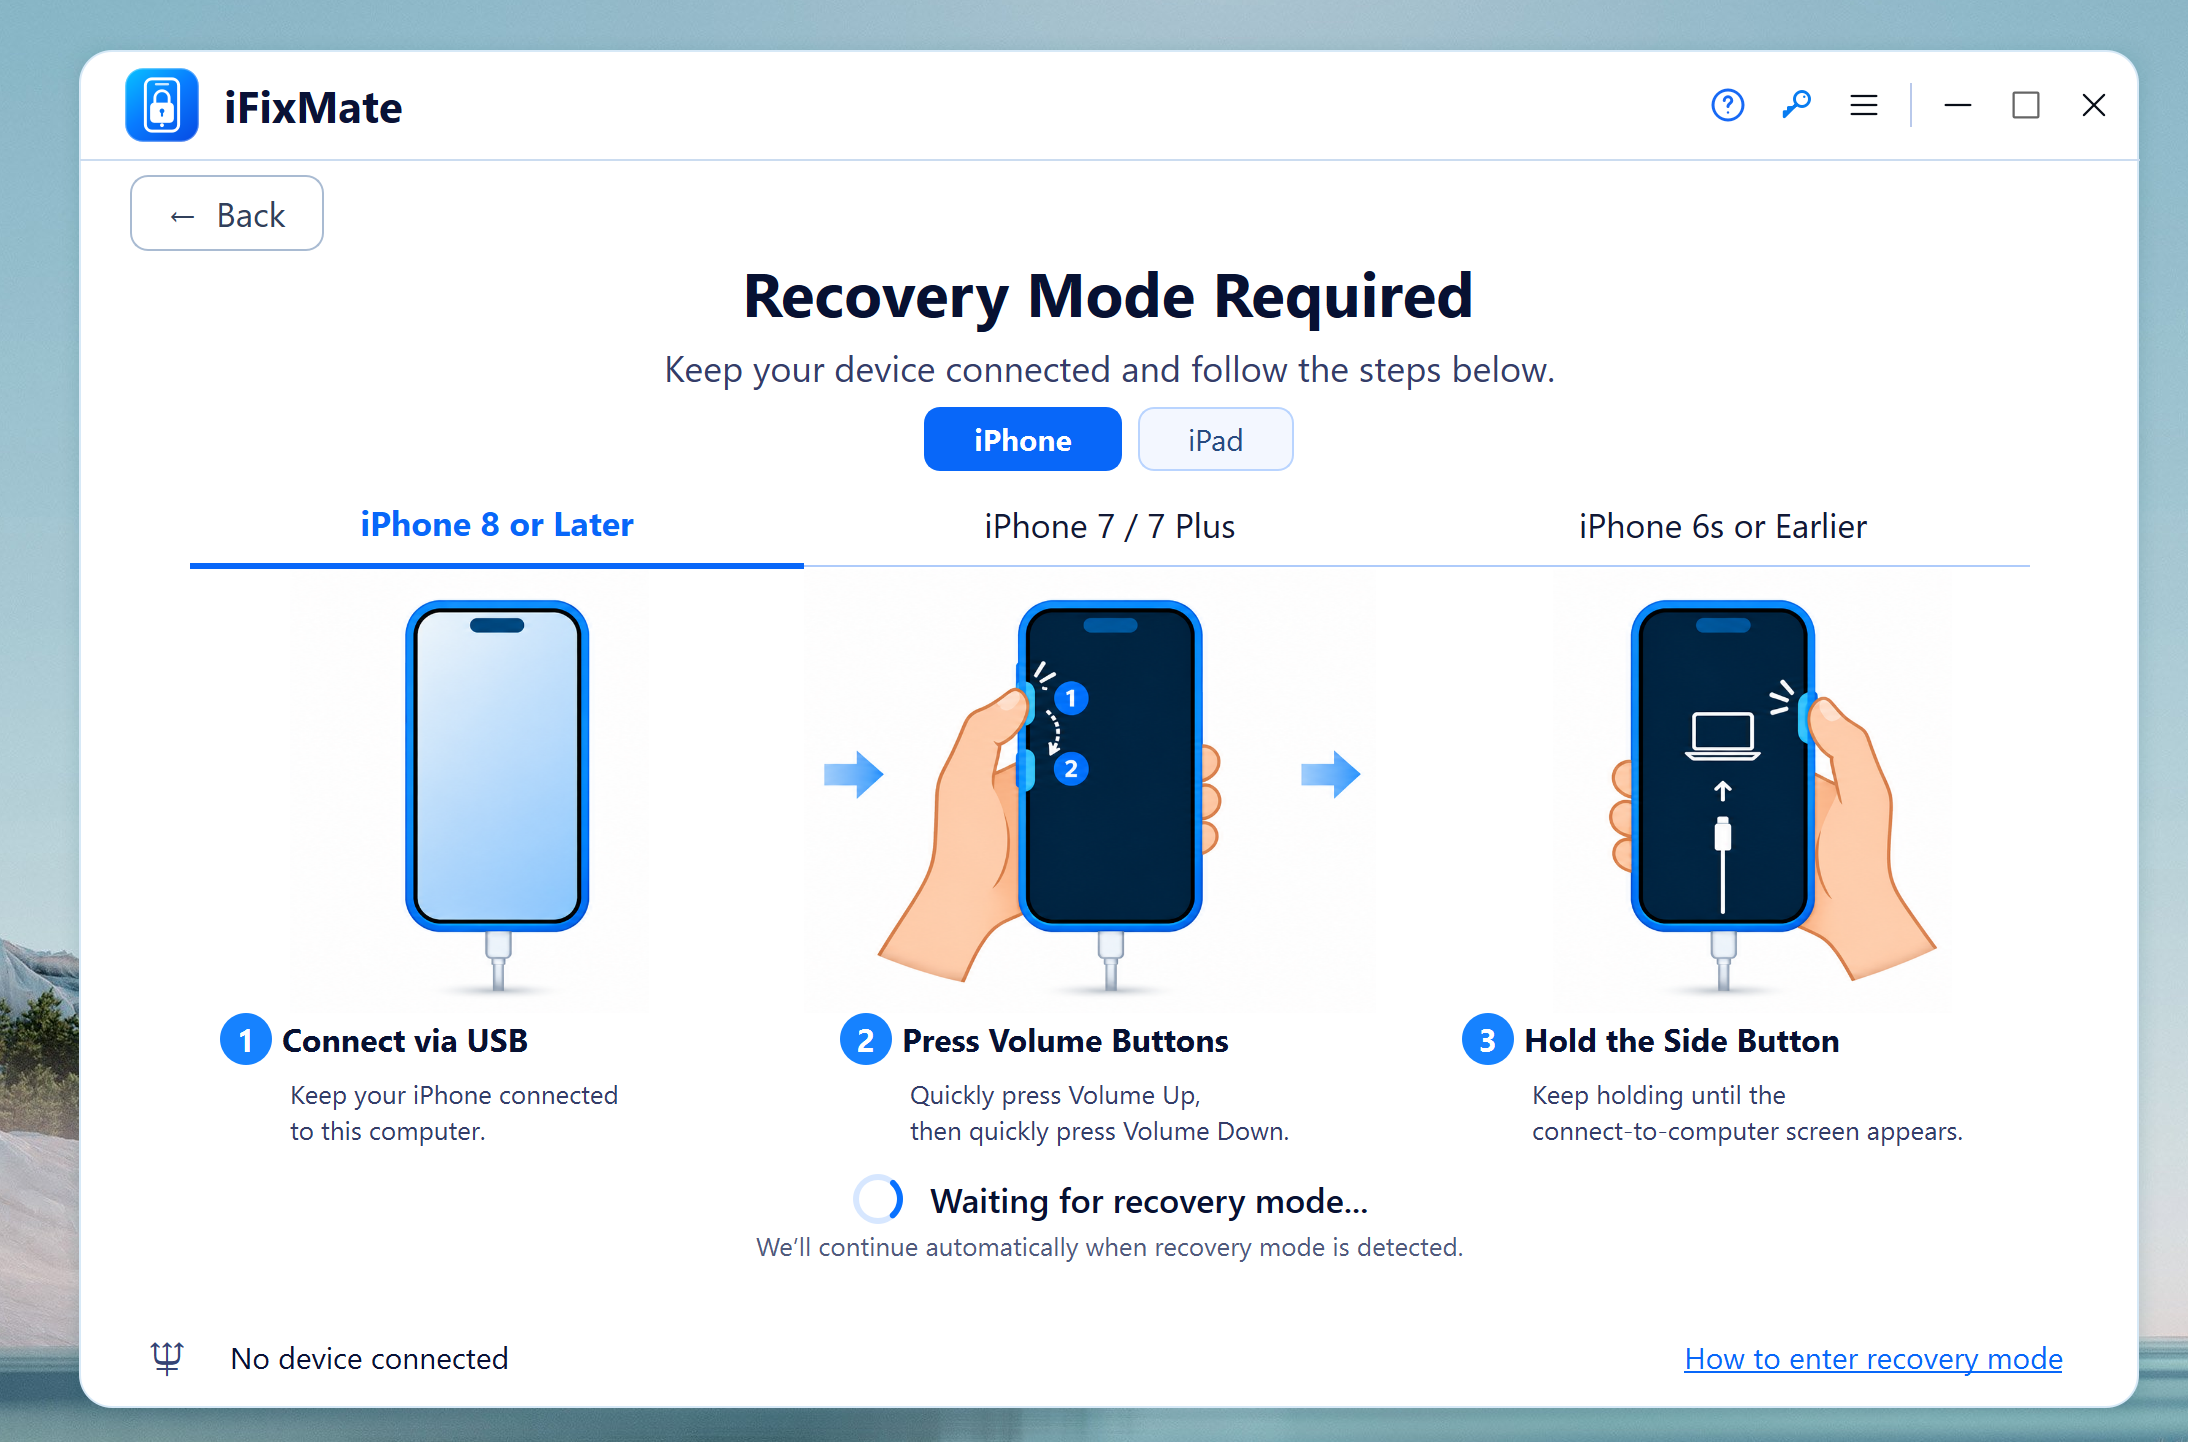
Step 3Put iPhone into Recovery Mode
If prompted, follow the on-screen button instructions for your iPhone or iPad model. Keep the USB cable connected until the recovery-mode screen appears and iFixMate detects it.
Need model-specific instructions? See How to Put an iPhone Into Recovery Mode.
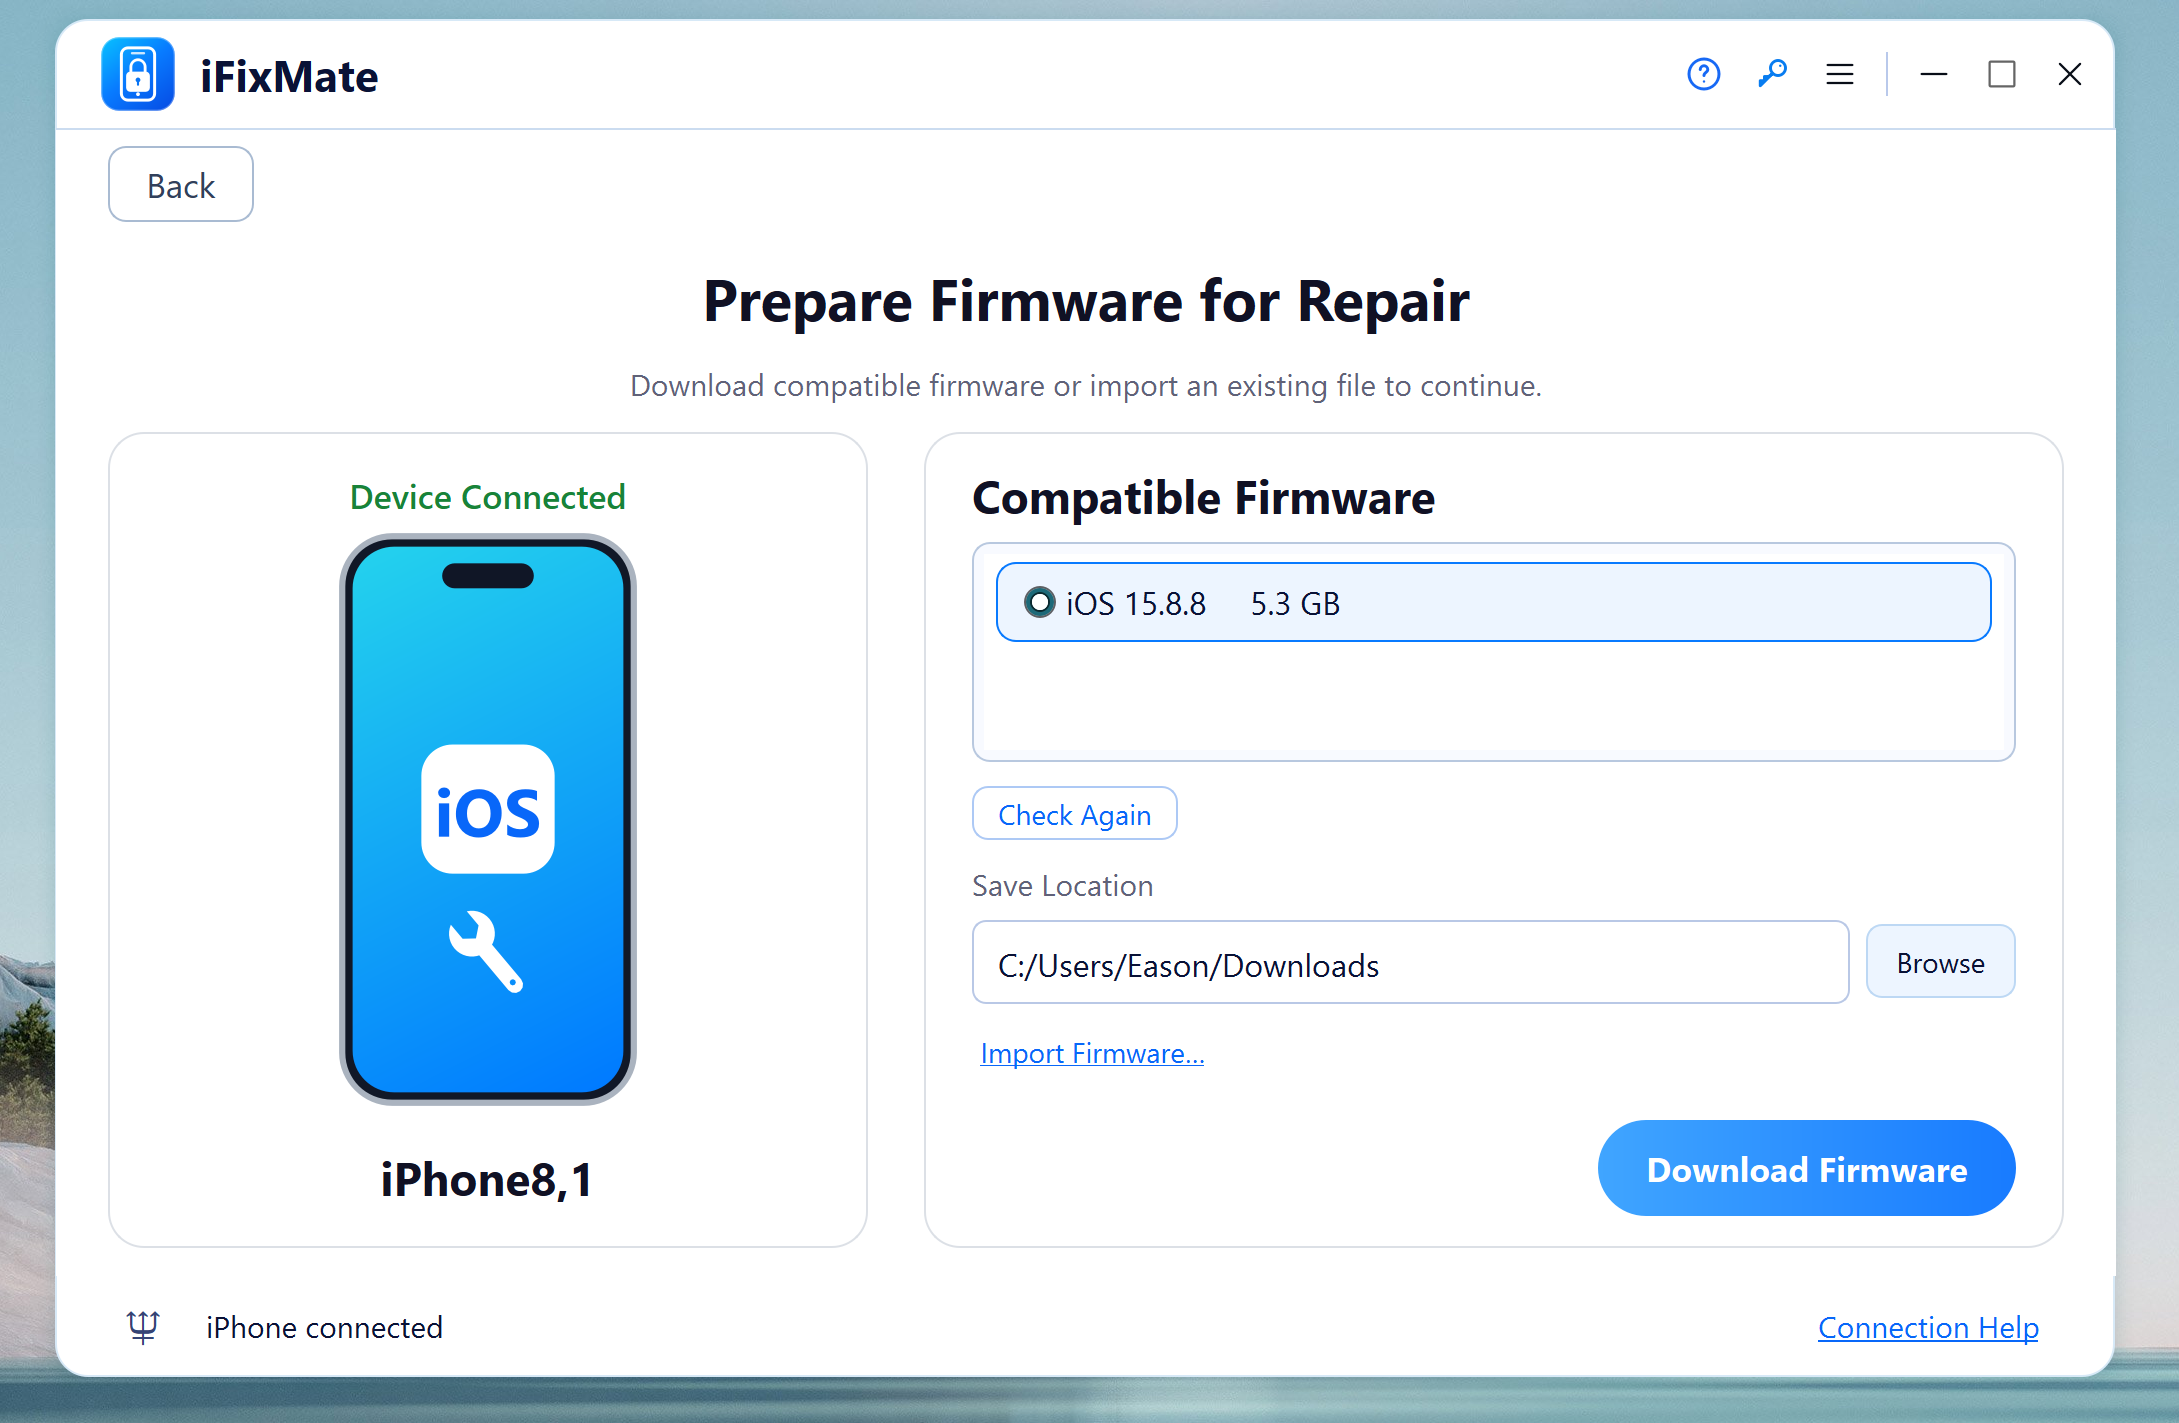
Step 4Download Firmware
Confirm the detected device and compatible iOS firmware. Choose a save location, then click Download Firmware, or import a compatible firmware file if available.
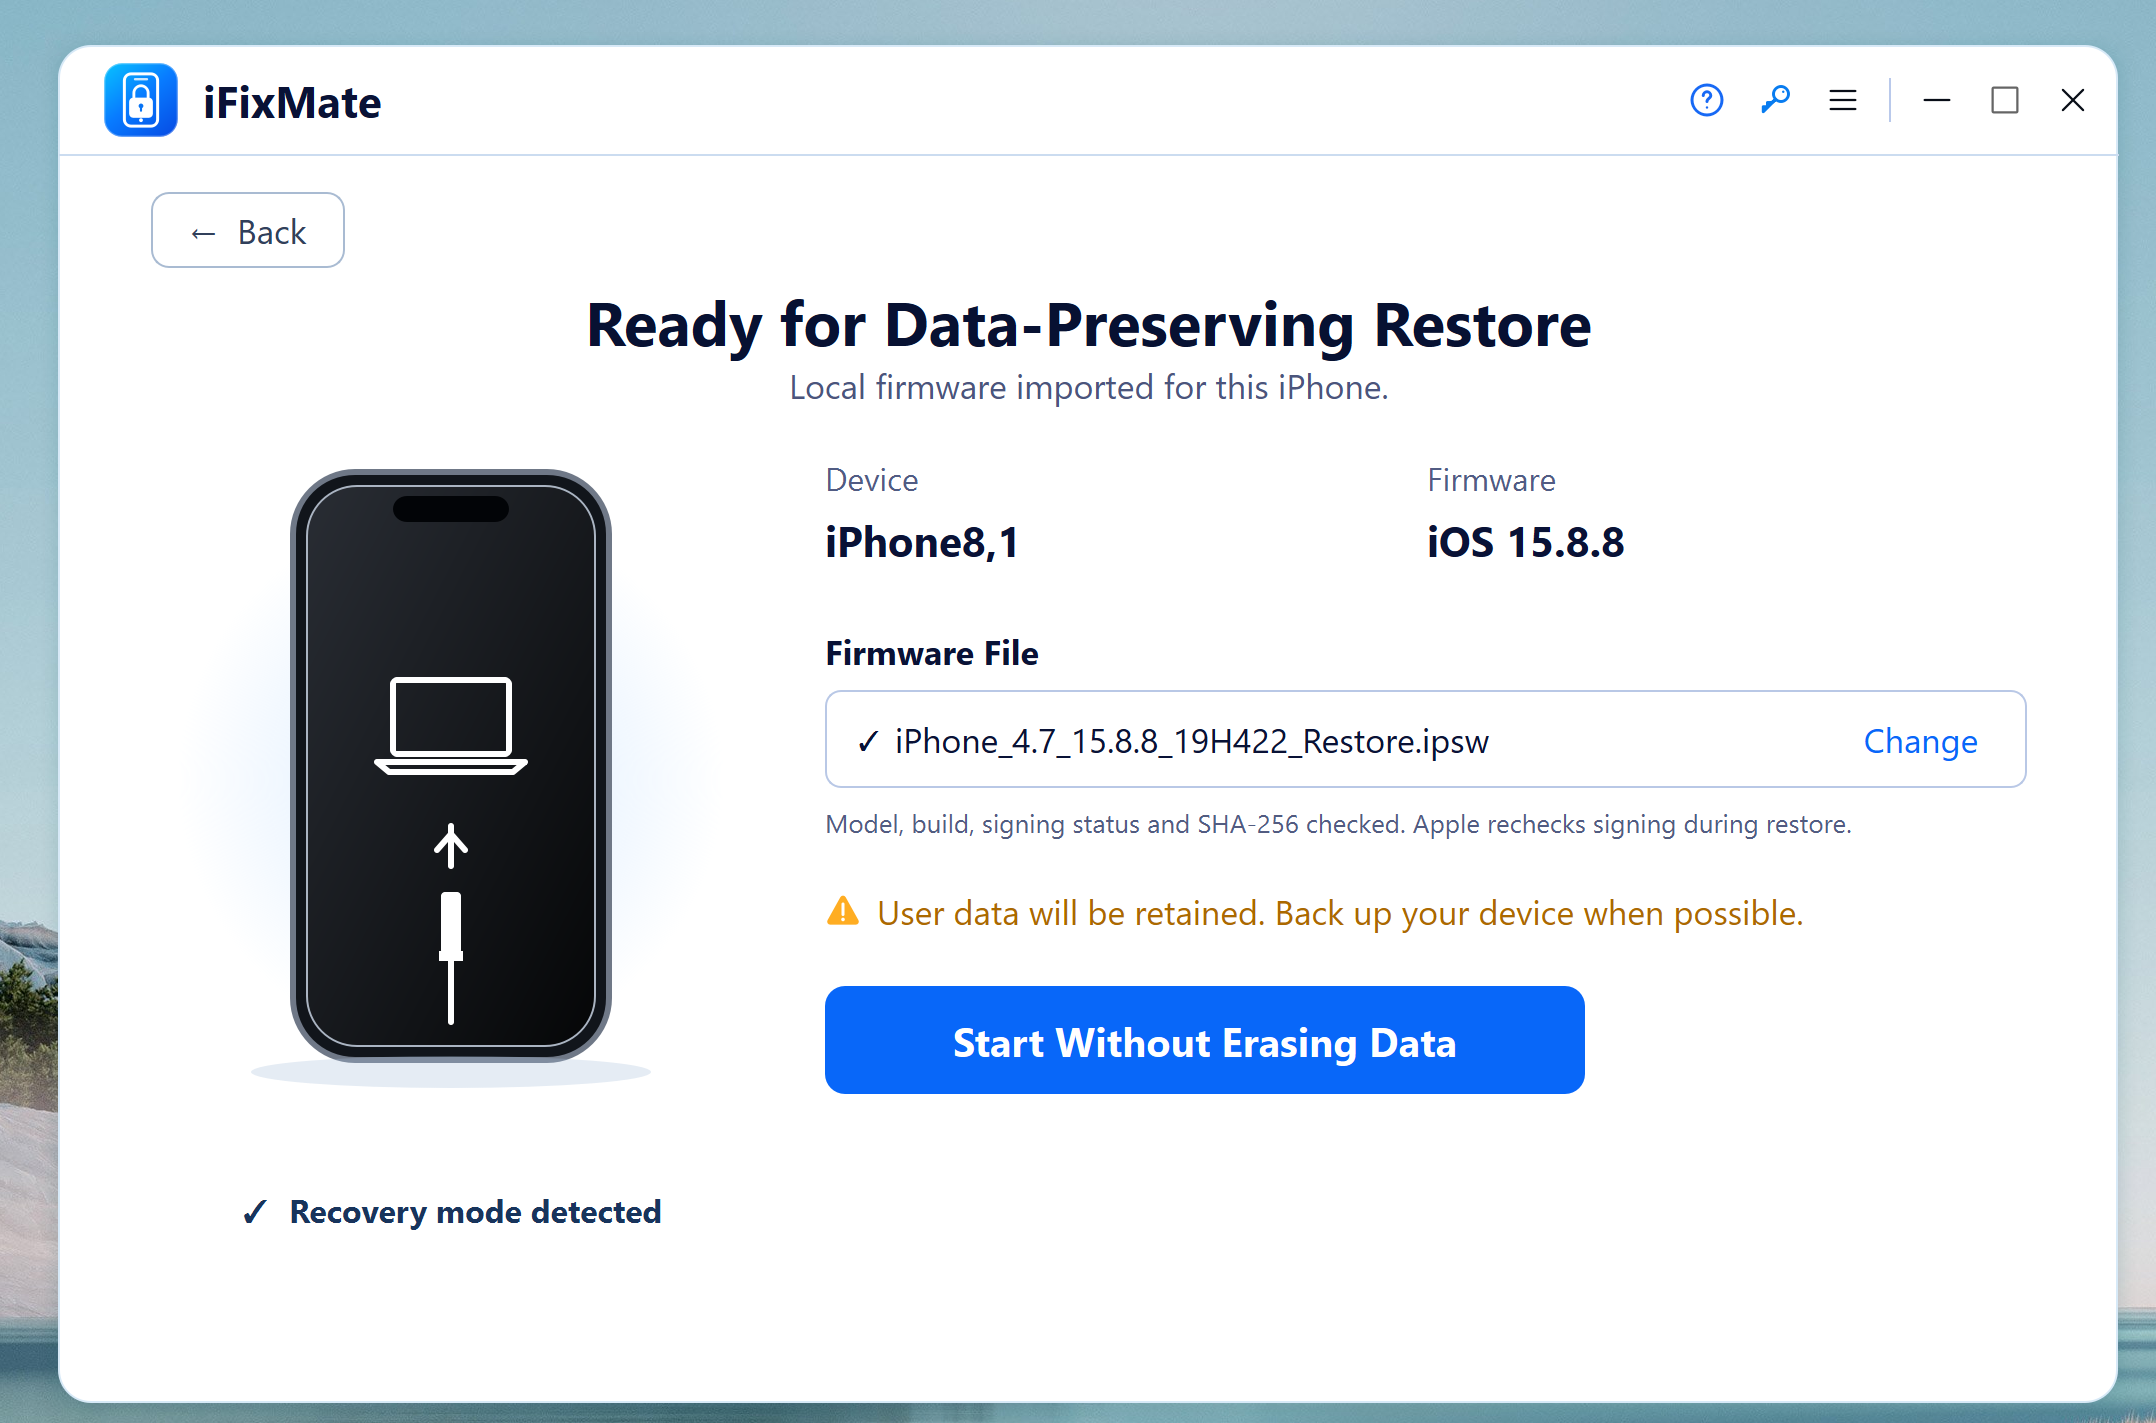
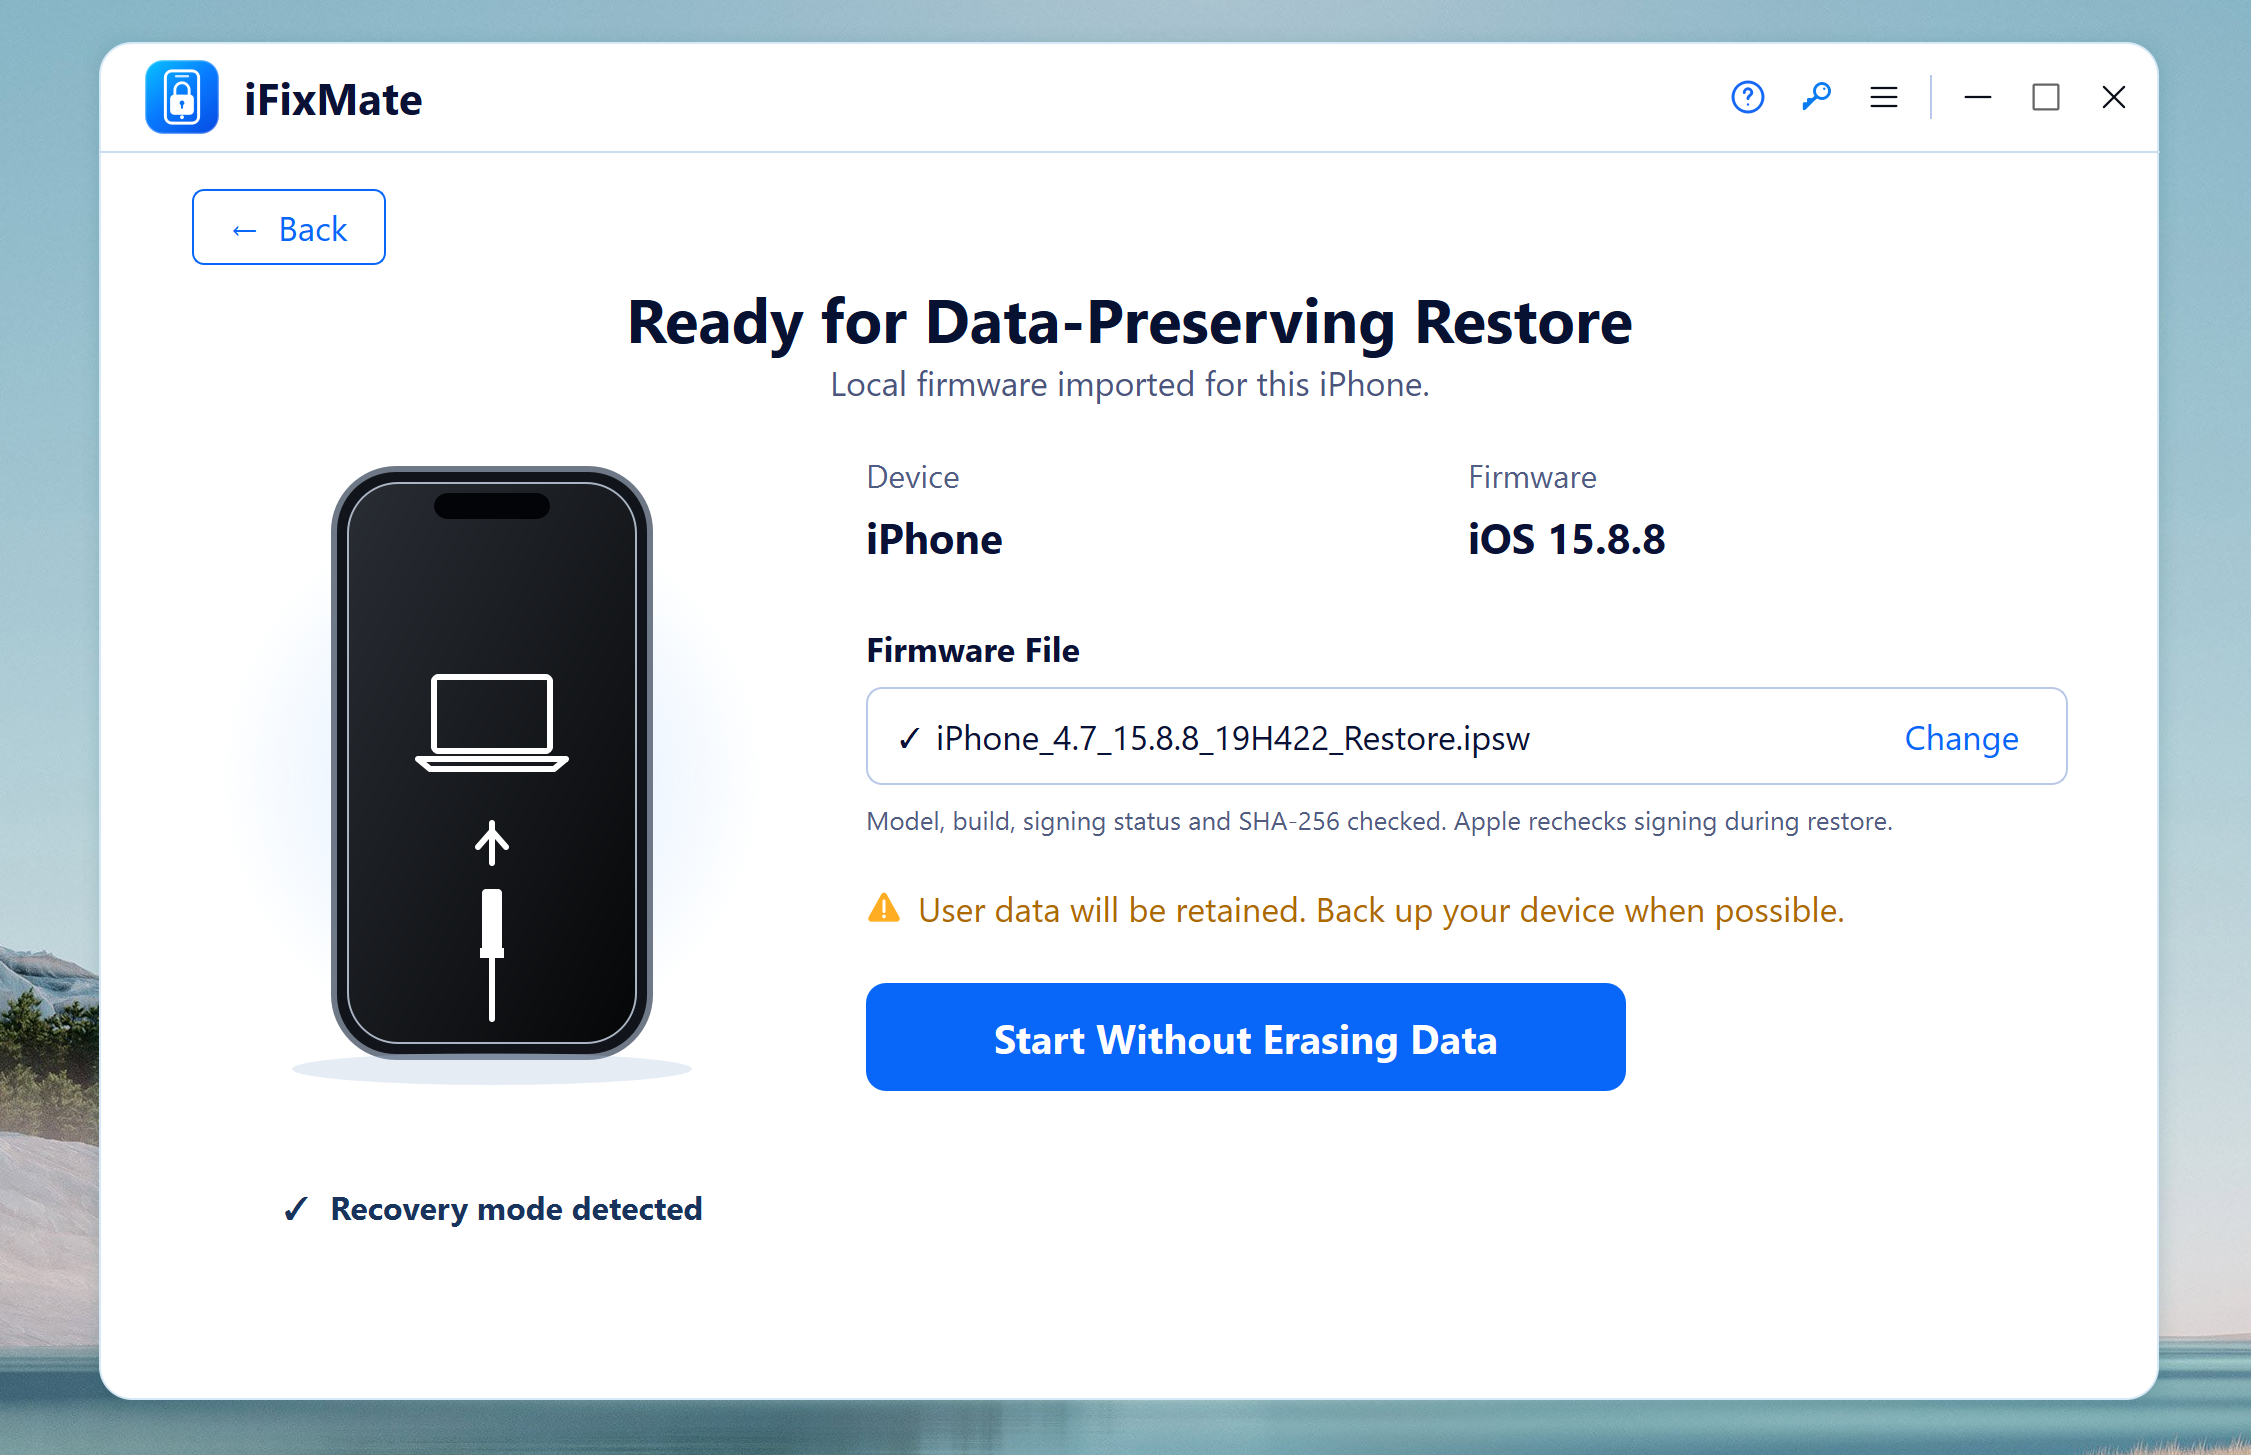
Step 5Start Standard Repair
Review the detected device and firmware file, then click Start Without Erasing Data to begin Standard Repair. Do not disconnect the device or interrupt the computer while the repair runs.
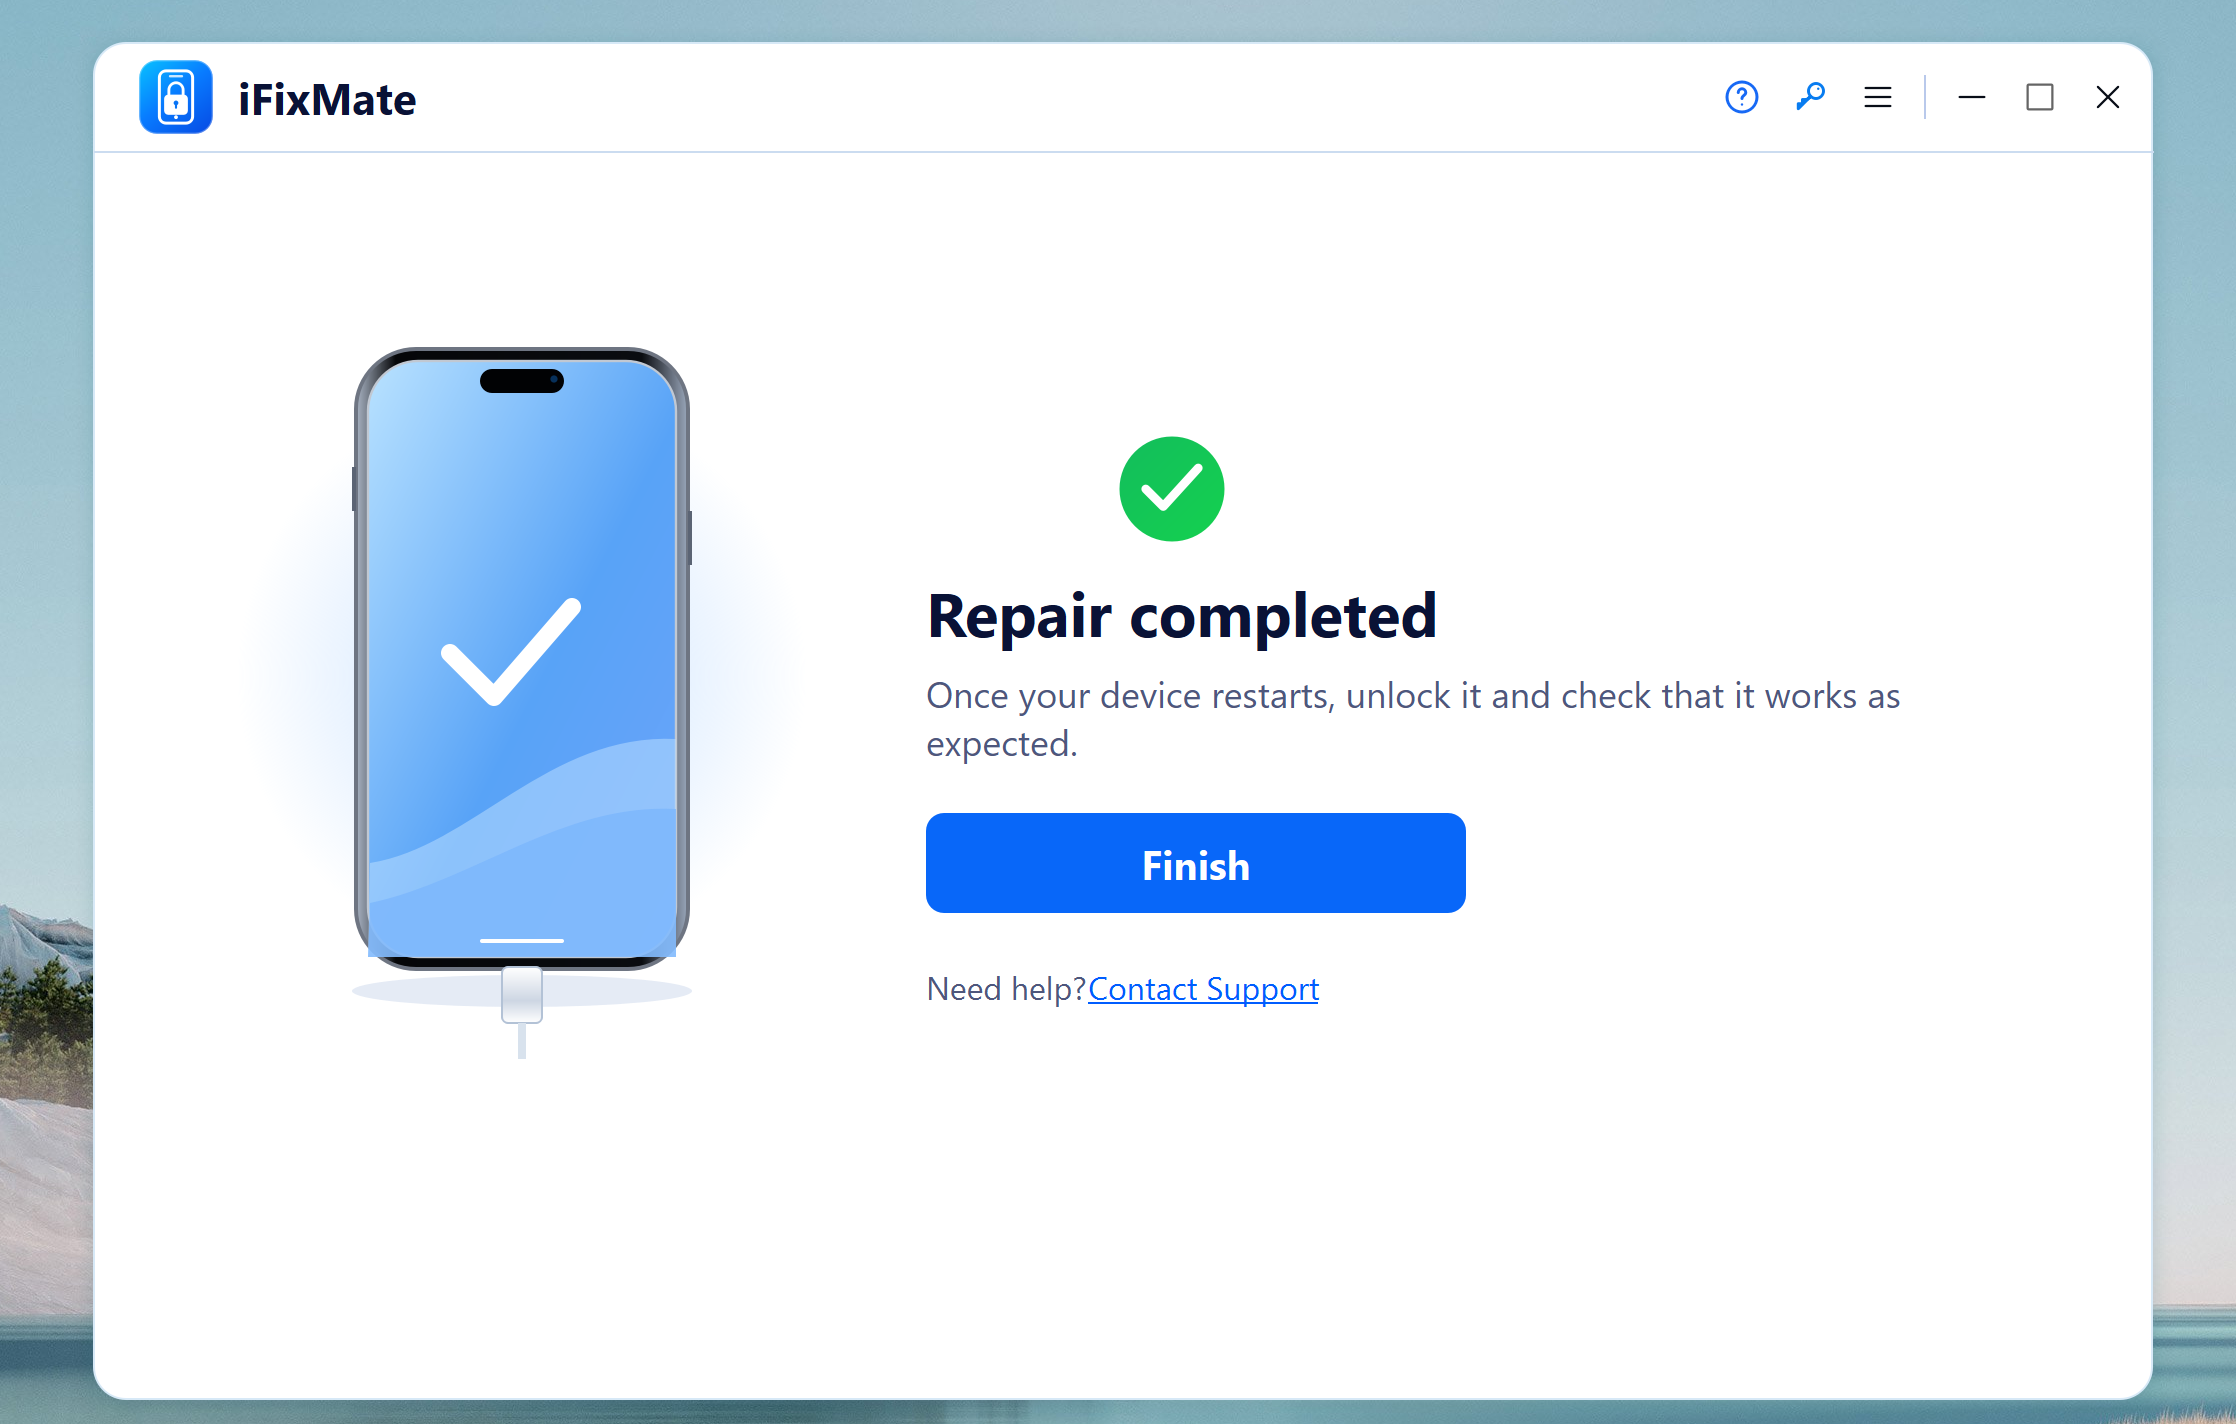
Step 6Repair Completed
When iFixMate reports Repair completed, wait for your device to restart. Check that the original problem is resolved and that the device operates normally.
Part 2: How to Upgrade iOS with iFixMate
Use iOS Upgrade when you want to install a newer compatible iOS version on your iPhone or iPad.
Step 1Choose iOS Upgrade
Launch iFixMate, connect your device with a USB cable, and select iOS Upgrade on the main screen shown in Step 1 above.
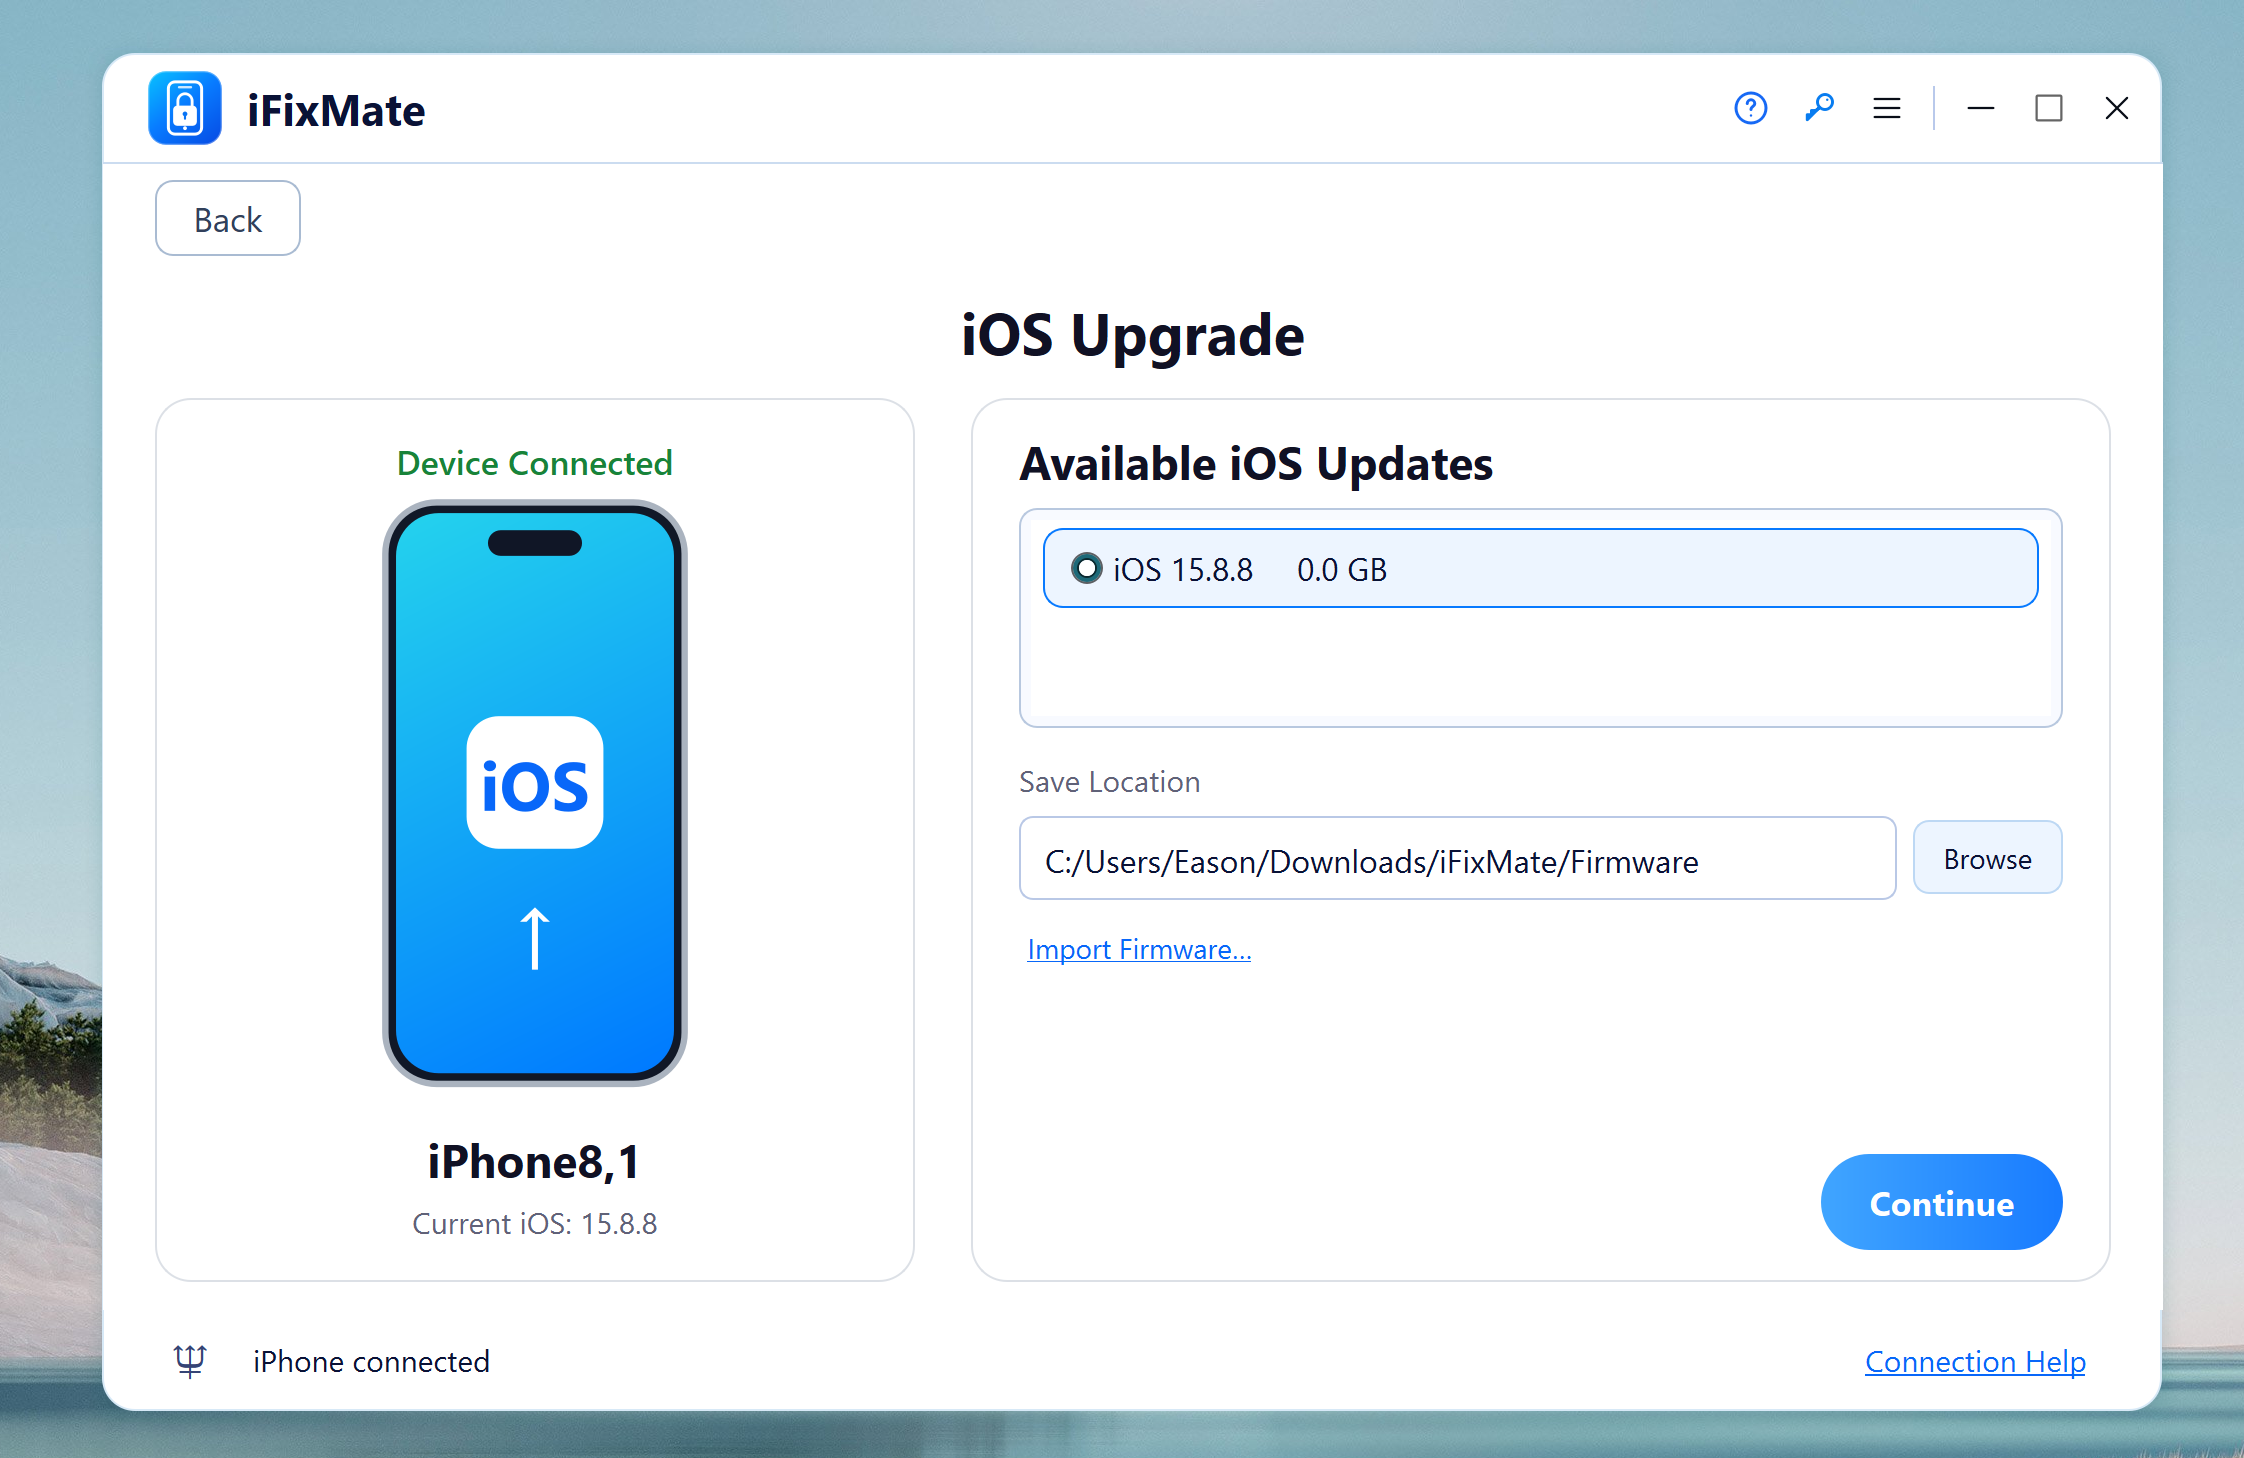
Step 2Check and Download Firmware
Review the detected device and available upgrade version. Download the compatible firmware or import a suitable file if the option is offered.
Step 3Install the iOS Update
Follow the prompts to begin installation. Keep the device connected, allow it to restart, and verify the installed iOS version in Settings. Back up your device beforehand.
Part 3: How to Downgrade iOS with iFixMate
Use iOS Downgrade to check if an earlier compatible version is available. Apple generally permits installation only of iOS versions it is still signing. A downgrade might not be offered for your device and can erase its contents.
Step 1Choose iOS Downgrade
Connect your iPhone or iPad and select iOS Downgrade from the iFixMate home screen.
Step 2Check Available iOS Versions
Review the earlier versions shown for your device. Select an eligible version, if one is available, and download the firmware.
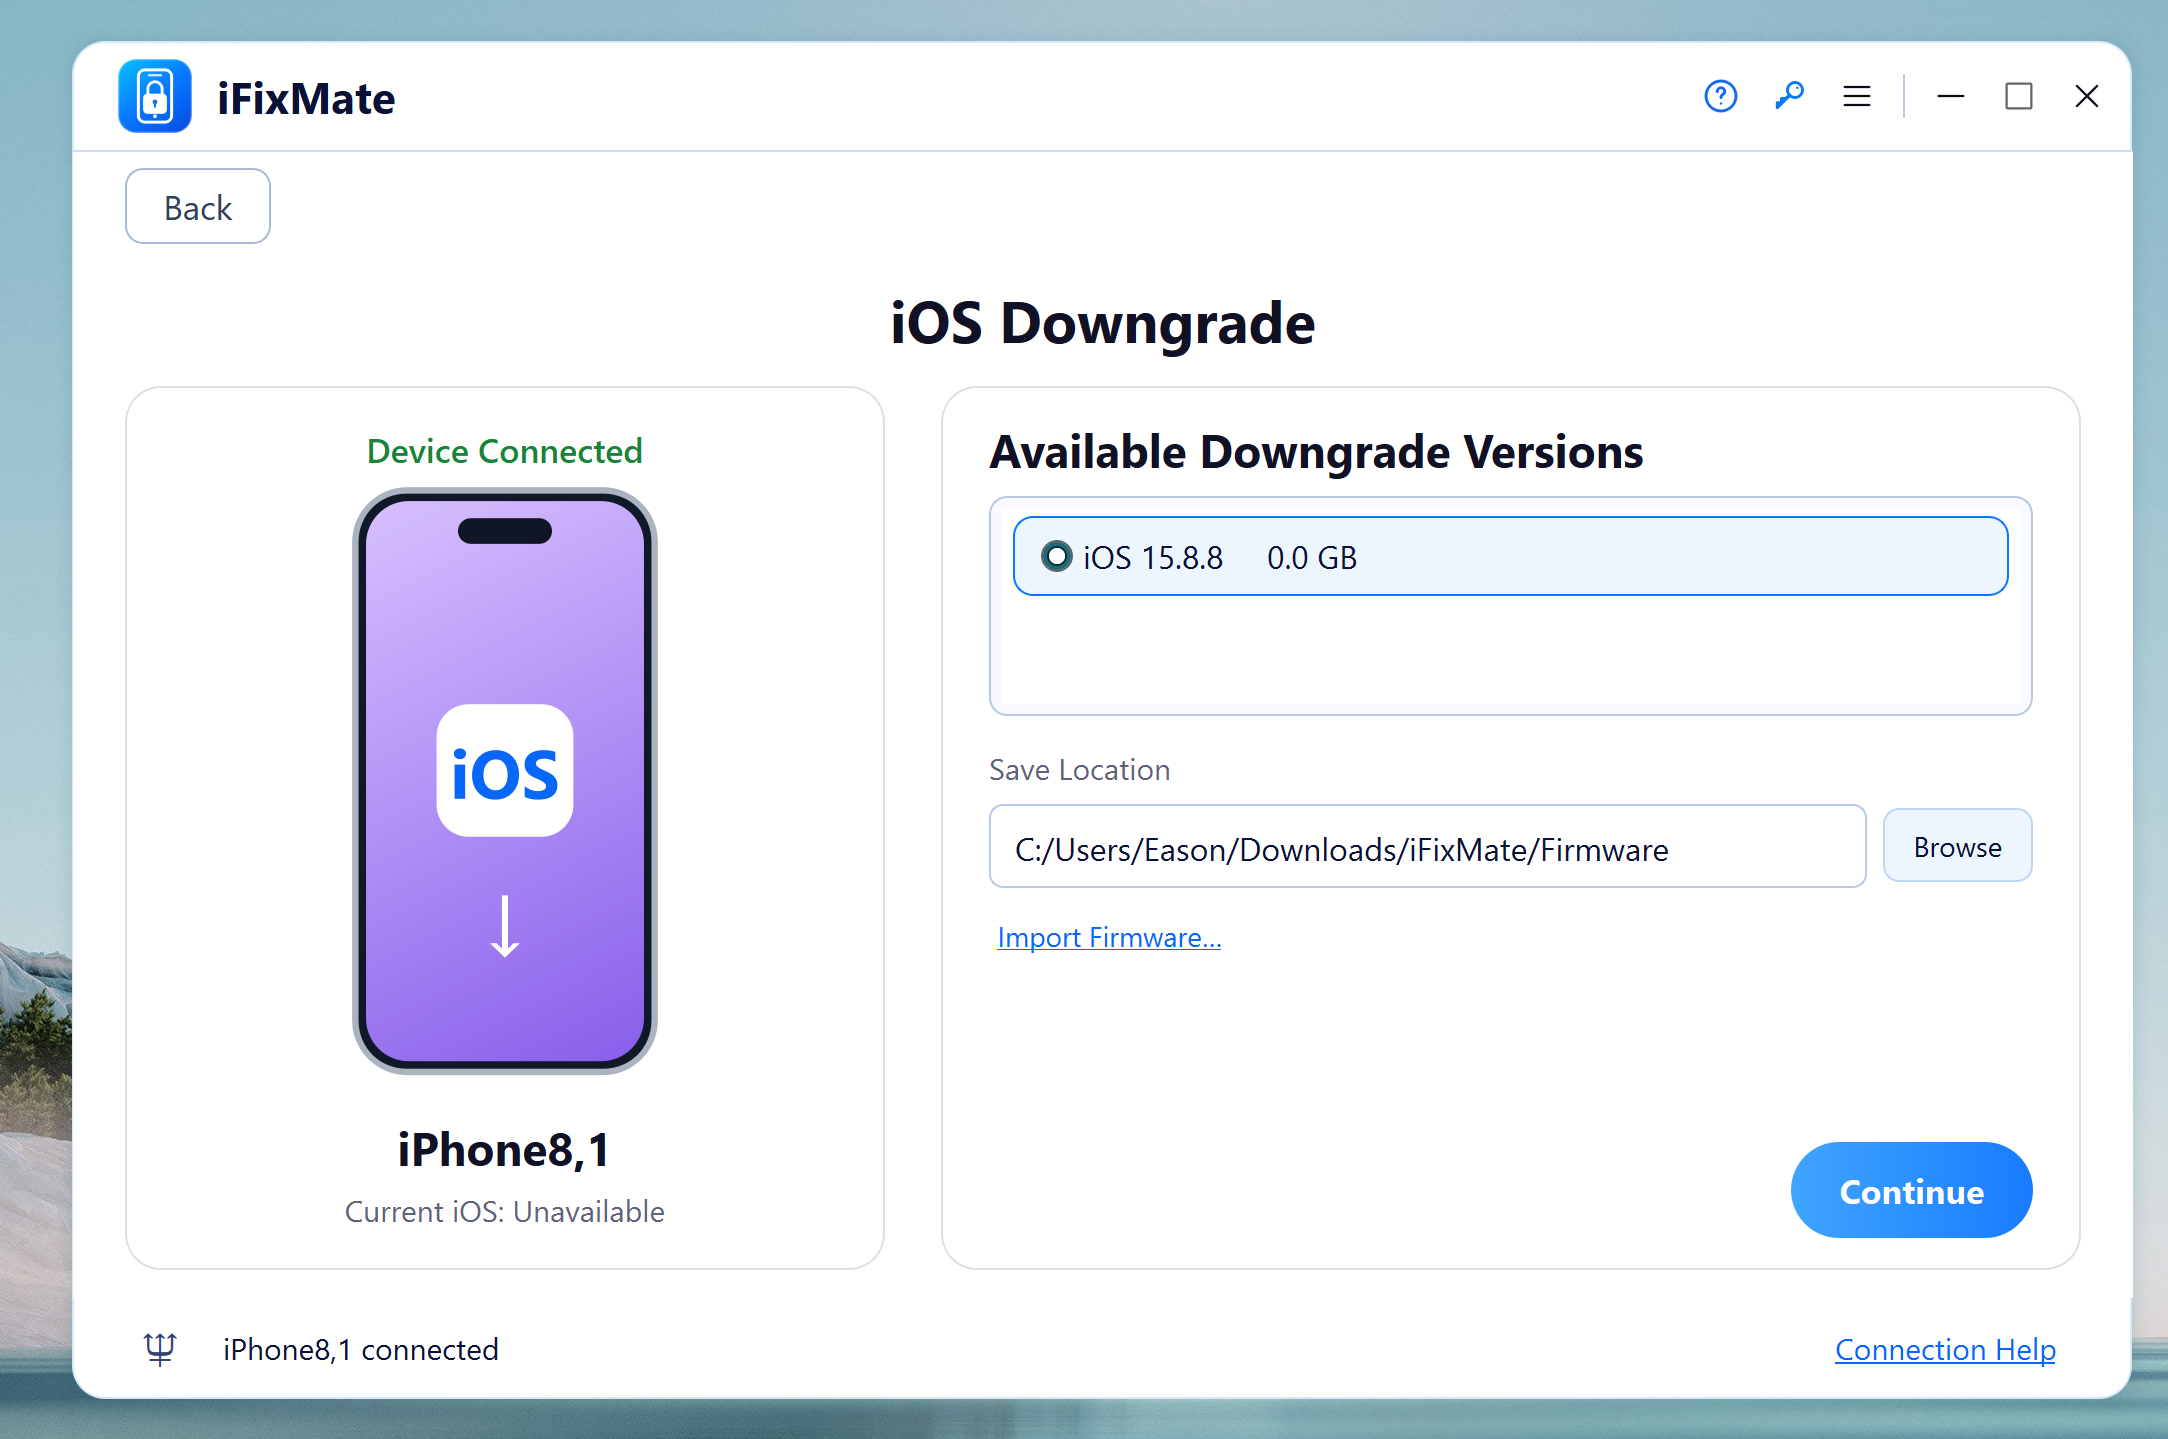
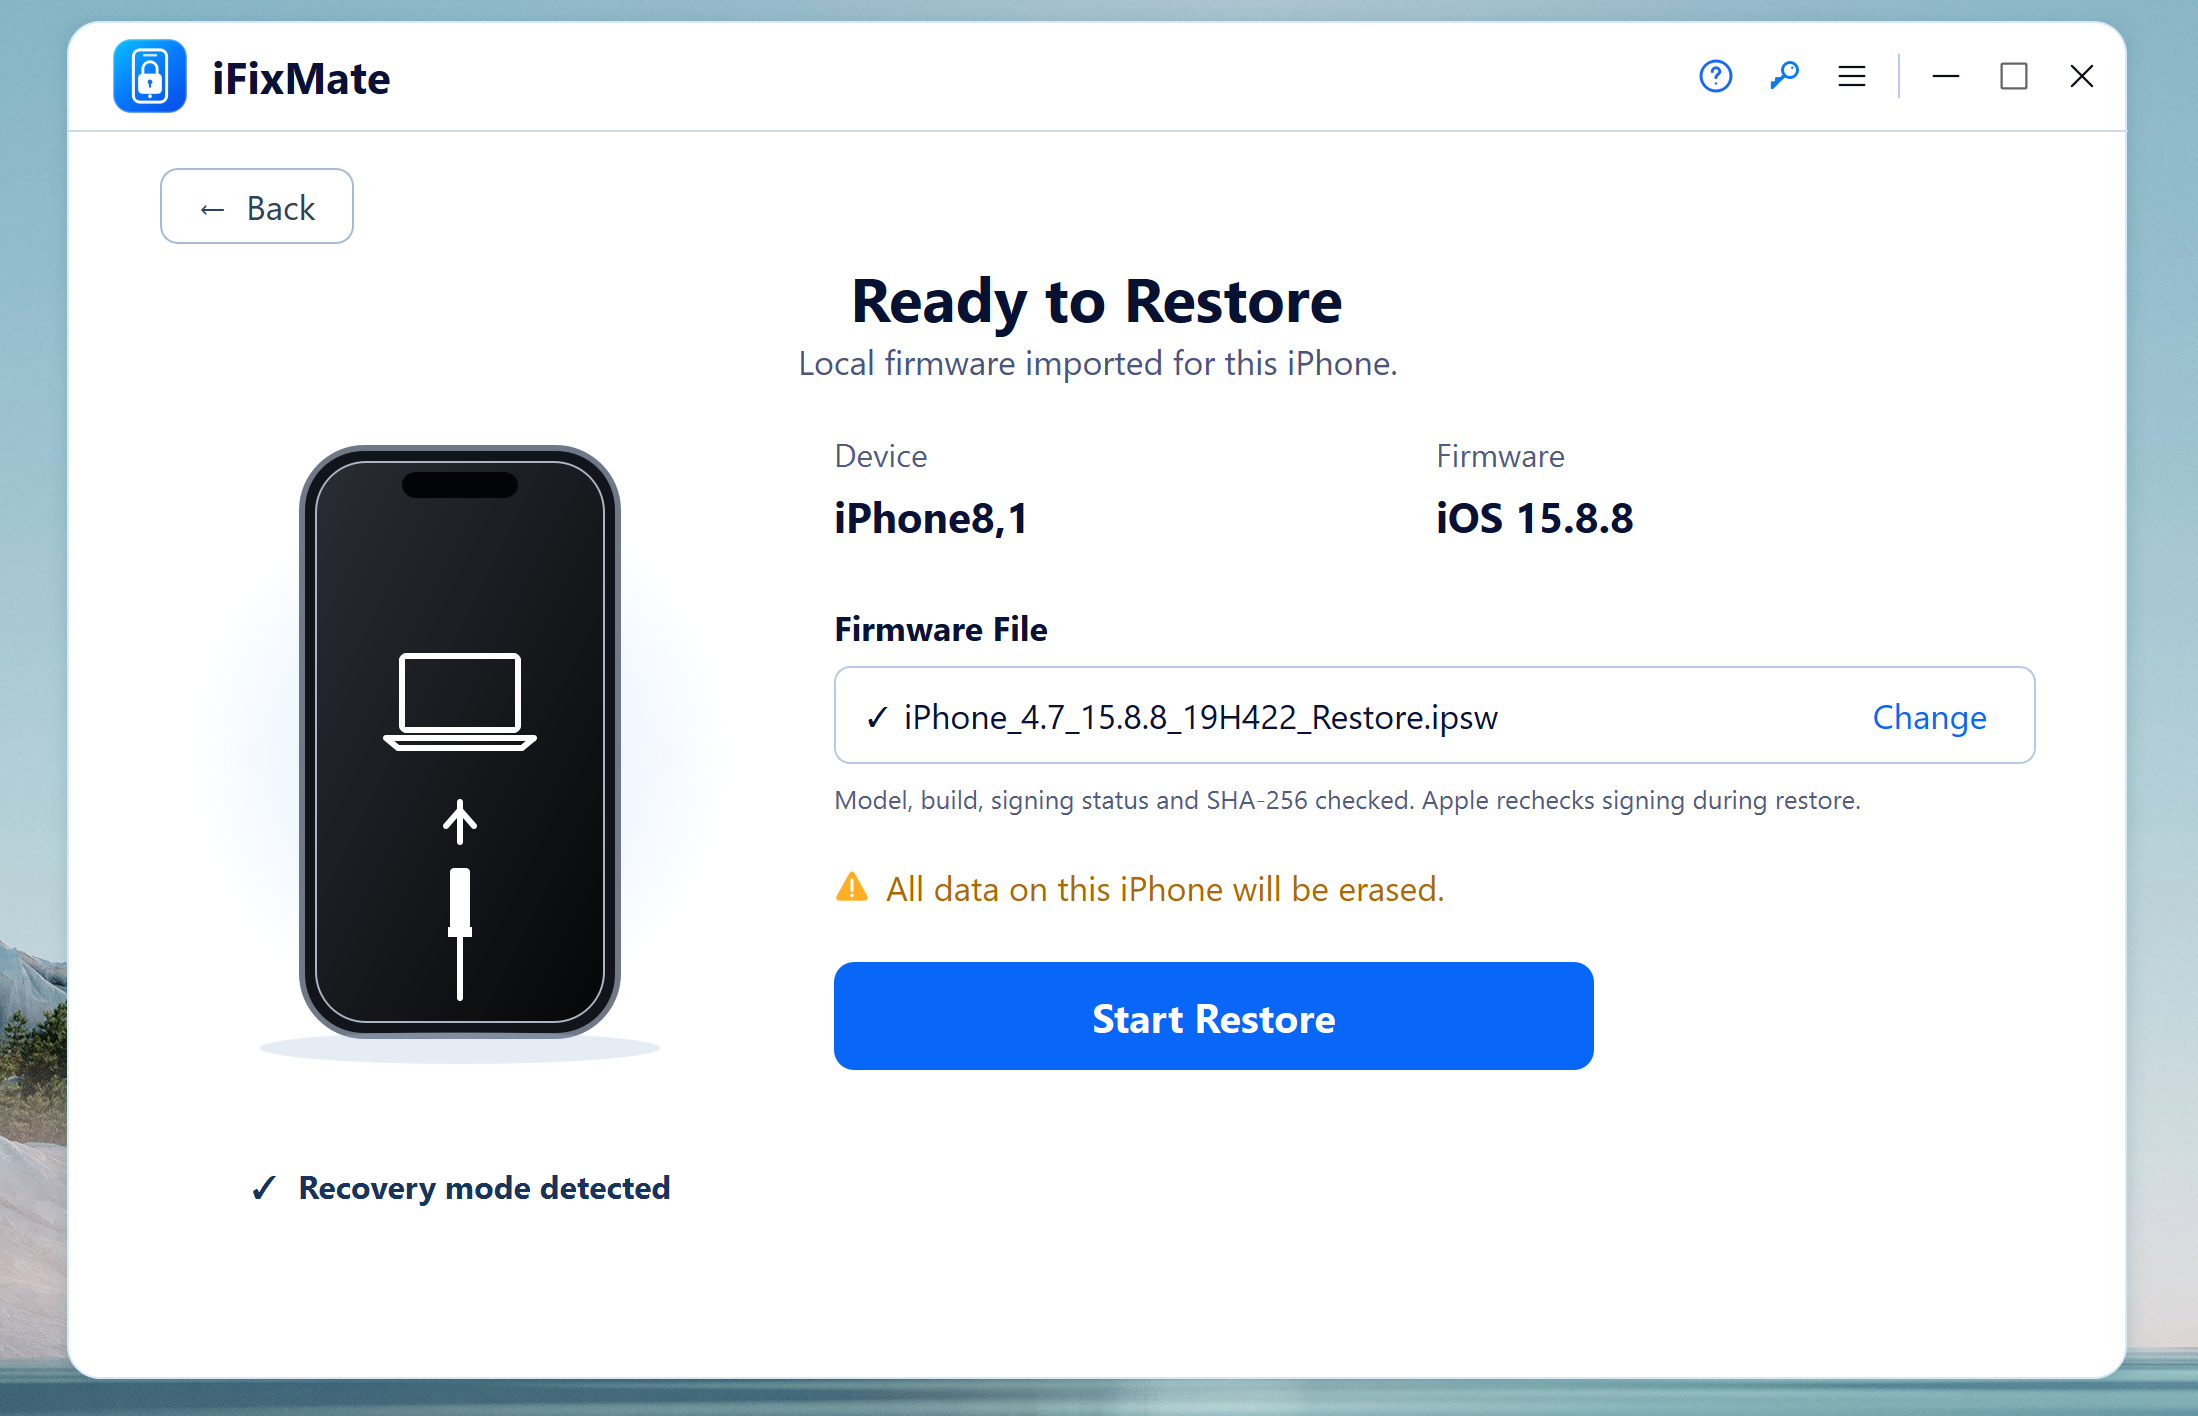
Step 3Confirm and Start Downgrade
Read the data-loss warning, back up important files, and follow the installation prompts. Do not unplug the device until the process has finished. A backup created on newer iOS may not restore to an older version.
Conclusion
iFixMate combines three iOS maintenance workflows in one desktop utility: System Repair for common device issues, iOS Upgrade for moving to a compatible newer release, and iOS Downgrade when an eligible earlier version is available. Choose the function that fits your goal, review the firmware and data warnings, and keep your iPhone or iPad connected until the operation completes.
Free Trial Free Trial

Mateo Ryan
Mateo is a senior editor at AiseeFox and a tech enthusiast with over a decade of experience writing about Windows and macOS. He enjoys producing clear software tutorials and practical troubleshooting guides.